Category: Uncategorized

  • 지금 당장 안 사면 손해? 2026 가성비 쩌는 싱글몰트 위스키 Top3

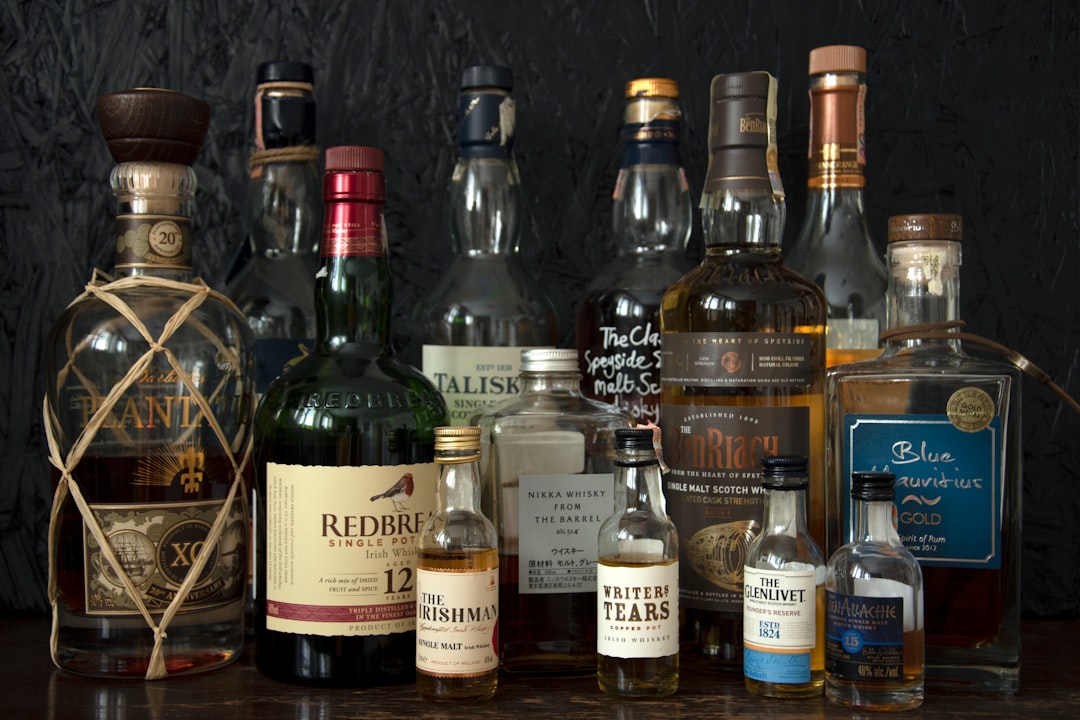
    지난달에 위스키 입문한다는 후배가 연락이 왔어. “형, 싱글몰트 사고 싶은데 뭐 사야 해요? 예산은 10만 원대요.” 솔직히 이 질문 받을 때마다 고민이 돼. 가성비 좋다고 소문난 거 추천했다가 막상 병 따보면 기대 이하인 경우가 너무 많거든. 그래서 이번에 직접 10만 원 이하 싱글몰트 7종을 한 자리에 놓고 비교 시음을 해봤어. 결론부터 말하면, 진짜 가성비는 세 병으로 좁혀졌고, 나머지는 솔직히 돈이 아까웠어.

    single malt whisky bottles lineup, scotch whisky tasting glass
    • 🥇 1위: 글렌모렌지 오리지널 10년 — 부드러움의 교과서
    • 🥈 2위: 글렌피딕 12년 — 입문자의 국민 위스키
    • 🥉 3위: 토모어 12년 — 모르는 사람만 손해 보는 히든픽
    • 📊 스펙 비교표 — 한눈에 보는 가격·ABV·향미 정리
    • 🔎 국내외 시음 커뮤니티 반응은?
    • 🚫 위스키 고를 때 절대 하지 말아야 할 실수
    • ❓ FAQ — 후배들이 가장 많이 물어보는 것들

    🥇 1위: 글렌모렌지 오리지널 10년 — 부드러움의 교과서

    하이랜드 증류소 글렌모렌지(Glenmorangie)의 10년짜리야. 스코틀랜드에서 가장 키가 큰 증류기(약 5.14m)를 쓴다는 게 브랜드 자랑인데, 실제로 그 영향이 맛에 고스란히 드러나. 구리 접촉 면적이 많아질수록 황 성분이 제거되면서 클린하고 과일 향이 풍부해지거든.

    Nose: 첫 향부터 복숭아, 살구, 오렌지 껍질 같은 과일 에스테르가 확 올라와. 거기에 바닐라 크림과 약간의 아몬드 향이 받쳐줘서 전혀 공격적이지 않아. 알코올 자극이 거의 없다는 게 포인트.

    Palate: 입에 넣는 순간 꿀 같은 달콤함이 먼저 오고, 중간에 시트러스 오일이 살짝 톡 쏘는 느낌이 와. 오크 타닌은 존재는 하는데 전혀 지배적이지 않아서 위스키 처음 먹는 사람도 “아, 이게 싱글몰트구나” 하고 받아들일 수 있는 맛이야.

    Finish: 중간 길이. 바닐라와 오크가 은은하게 남고, 쓴맛 없이 깔끔하게 마무리돼. 잔향이 너무 길거나 짧지 않고 딱 적당해서 한 잔 다 마신 뒤에도 피곤함이 없어.

    2026년 현재 국내 주류 플랫폼 기준 750ml 정가 약 7~8만 원대. 이 가격대에서 이 완성도면 솔직히 경쟁자가 없어.

    Glenmorangie Original 10 year whisky bottle, highland whisky distillery still

    🥈 2위: 글렌피딕 12년 — 입문자의 국민 위스키

    세계 판매량 1위 싱글몰트라는 타이틀이 조금 식상하게 들릴 수 있어. “많이 팔린다고 다 좋냐?” 맞는 말이야. 근데 이 병은 실제로 가성비 기준에서 점수가 높아. 스페이사이드(Speyside) 특유의 풀과 꽃 향, 그리고 사과·배 같은 신선한 과일 향이 복잡하지 않고 직선적으로 들어오거든.

    Nose: 신선한 사과, 배, 살짝의 꽃(플로럴) 향. 스페이사이드 스타일 그 자체야. 너무 무겁지 않고 경쾌하게 향이 올라와서 퇴근 후 혼술 하기에 심리적 부담이 적어.

    Palate: 달콤한 맥아와 과일, 그리고 아메리칸 오크에서 온 바닐라·토피 뉘앙스. 오크 쓴맛은 12년치고 거의 없어서 처음엔 “이게 맞나?” 싶을 수도 있는데, 그게 오히려 장점이야. 음식 페어링 없이 그냥 마셔도 피곤하지 않아.

    Finish: 짧은 편. 달콤함이 빠르게 사라지면서 깔끔하게 끝나. 롱 피니시를 원하는 사람한테는 아쉬울 수 있어.

    2026년 현재 국내 기준 750ml 6만 원대 초중반. 면세점에서 1L짜리 잡으면 가격 대비 진짜 말 다 했어.

    🥉 3위: 토모어 12년 — 모르는 사람만 손해 보는 히든픽

    이 병이 핵심 추천 이유야. 브랜드 파워가 없어서 마케팅 비용이 제로에 가까운 덕분에 가격이 낮게 유지돼. 스페이사이드에서 나오는 증류소인데, 1897년에 설립된 역사는 있지만 마케팅을 거의 안 해서 국내 인지도가 낮아. 근데 실제 병 안의 내용물은 완전히 달라.

    Nose: 처음엔 풋풋한 맥아 향이 먼저 오고, 잠시 기다리면 꽃(아카시아, 헤더)과 가벼운 바닐라 향이 올라와. 첨가물 없이 이 정도 복합성을 보여준다는 게 솔직히 놀라워.

    Palate: 가볍고 드라이한 편. 크리미하지는 않지만 맥아의 달콤함과 약간의 스파이스(흰 후추, 생강)가 균형을 잡아줘. 다른 두 병보다 보디감이 약해서 호불호가 갈릴 수 있어. 근데 그 점이 오히려 식전주나 가볍게 마시고 싶을 때 딱이야.

    Finish: 중간에서 약간 짧은 편. 스파이시한 여운이 짧게 남고 사라지는데, 깔끔한 마무리를 선호하는 사람한테는 오히려 플러스.

    2026년 현재 국내 기준 750ml 5만 원대. 이 가격에 이 퀄리티면, 진짜 ‘아는 사람만 아는’ 가성비야.

    📊 Top3 스펙 & 가성비 비교표

    항목 글렌모렌지 오리지널 10년 글렌피딕 12년 토모어 12년
    산지 하이랜드 스페이사이드 스페이사이드
    숙성연수 10년 12년 12년
    ABV 43% 40% 40%
    캐스크 아메리칸 오크 아메리칸/유러피안 오크 아메리칸 오크
    2026 국내 가격(750ml) 약 7~8만 원 약 6만 원대 약 5만 원대
    향미 스타일 과일·바닐라·꿀 사과·배·플로럴 맥아·꽃·스파이스
    입문자 추천도 ⭐⭐⭐⭐⭐ ⭐⭐⭐⭐⭐ ⭐⭐⭐⭐
    가성비 점수 ⭐⭐⭐⭐⭐ ⭐⭐⭐⭐ ⭐⭐⭐⭐⭐

    🔎 국내외 시음 커뮤니티 반응은?

    국내 최대 위스키 커뮤니티인 위스키갤러리(디시인사이드)와인앤위스키(네이버 카페) 기준으로 2026년 현재 가장 많이 추천되는 10만 원 이하 싱글몰트 상위권에 세 병 모두 꾸준히 언급돼.

    해외에서는 Whiskybase.comr/Scotch(Reddit) 기준으로 글렌모렌지 오리지널이 평점 7.5~8.0/10대를 유지하고 있어. 특히 “First bottle for beginners” 카테고리에서 압도적으로 많이 인용돼. 글렌피딕 12년은 “안정적이지만 지루할 수 있다”는 평도 있는데, 그게 오히려 피로도 없이 계속 마실 수 있다는 뜻이기도 해. 토모어는 해외에서도 “Under the radar gem”이라는 표현으로 자주 언급되고, Whiskybase 기준 8.0 이상을 받는 경우도 있어.

    🚫 위스키 고를 때 절대 하지 말아야 할 실수

    • 숙성 연수만 보고 고르기: 10년이 12년보다 무조건 나쁜 게 아니야. 증류소마다 캐스크 품질이 달라. 글렌모렌지 10년이 평범한 12년짜리보다 낫다는 게 이미 증명됐어.
    • 피트(Peat) 위스키를 입문 첫 병으로 선택하기: 라프로이그, 아드벡 같은 피트 강한 걸 처음부터 마시면 위스키 자체를 포기할 수 있어. 비피트 싱글몰트 2~3병 마시고 시작해.
    • 용량 대비 가격만 계산하기: 750ml vs 1L 단순 계산보다 ABV를 고려해야 해. 40% 1L가 43% 750ml보다 실제로 마실 수 있는 알코올양이 비슷하거나 오히려 적을 수 있어.
    • 냉장 보관하기: 개봉 후 냉장고에 넣으면 향 성분이 응결돼서 플레이버 손실이 생겨. 직사광선만 피해서 상온 보관이 맞아.
    • 한 번에 여러 병 개봉하기: 개봉 후 산소 접촉이 시작되면 향이 천천히 날아가. 한 병 70% 이상 마신 뒤 다음 병 따는 게 맞아.
    • 브랜드 네임만 믿고 비싼 것 사기: 인지도가 높을수록 마케팅 비용이 가격에 포함돼. 같은 예산이면 덜 알려진 증류소 쪽이 내용물 퀄리티가 더 높은 경우가 많아.

    ❓ FAQ

    Q1. 얼음 넣어 마셔도 되나요? 온더록스 하면 맛 망하나요?

    싱글몰트 순혈주의자들이 “절대 안 된다”고 하는데, 그건 좀 과해. 다만 얼음이 녹으면서 물이 들어가고 온도도 낮아지면 향 분자의 휘발성이 떨어져서 Nose가 많이 죽어. 처음엔 니트(Neat)로 한 모금 마셔보고, 그다음에 얼음 넣어봐. 비교해보면 차이를 직접 느낄 수 있어. 취향껏 마시되, 가격 10만 원 넘어가는 병은 니트 추천.

    Q2. 세 병 중에 선물용으로는 어떤 게 가장 좋아요?

    무조건 글렌모렌지 오리지널. 패키지 디자인이 세 병 중 가장 고급스럽고, 브랜드 인지도가 있어서 받는 사람이 “이게 뭔가요?” 하는 상황이 안 생겨. 토모어는 아는 사람한테 줄 때 오히려 더 좋은 반응 나와.

    Q3. 개봉하고 얼마나 보관할 수 있어요?

    개봉 후 병이 절반 이하로 줄면 빠른 시일 내에 마시는 게 좋아. 공기 접촉 면적이 커지면서 산화가 빨라지거든. 절반 이하 남은 병은 3개월 이내 소비 권장. 남은 양이 적을수록 작은 병에 소분해서 공기 접촉을 줄이는 방법도 있어.

    총평: 예산 10만 원 이하에서 단 한 병만 고르라면 글렌모렌지 오리지널, 두 병 지른다면 거기에 토모어 12년 추가. 글렌피딕은 틀리진 않지만, 같은 돈이면 더 나은 선택이 있어. 위스키는 결국 본인 입이 맞아야 하니까 한 병씩 열어보는 게 답이야. 어떤 병을 열든 ‘지금 이 순간’을 위한 술이 맞아.

    이 글이 도움이 됐다면, 다음 시음 후기도 같이 보면 좋아요 — 스모키·피트 입문편도 곧 올릴게.


    📚 관련된 다른 글도 읽어 보세요

    태그: []

  • Why I Almost Gave Up on Hydroponic Lettuce — Real 2025 Beginner’s Guide That Actually Works

    A friend of mine spent two weekends building a beautiful-looking hydroponic setup, bought the right nutrients, set up the grow lights — and then watched every single lettuce seedling turn yellow and collapse within two weeks. She called me frustrated, convinced hydroponics was “way harder than YouTube made it look.” Sound familiar? That conversation is pretty much why I decided to write this.

    Here’s the thing: growing lettuce hydroponically is genuinely one of the easiest crops to start with — but only once you understand the three or four places where things quietly go wrong. Let’s walk through this together, from system choice to harvest, with the real numbers and real pitfalls nobody puts in the intro videos.

    hydroponic lettuce setup, indoor growing system, NFT channel lettuce

    Why Lettuce Is the Right First Crop (and Why It Still Trips People Up)

    Lettuce has a short growth cycle — typically 30 to 45 days from transplant to harvest depending on variety — and it has a relatively forgiving nutrient window compared to fruiting crops. Its ideal electrical conductivity (EC) sits between 0.8 and 1.6 mS/cm, and its pH sweet spot is 5.5 to 6.5. Go above pH 7.0 and you’ll start seeing iron and manganese lockout, which is exactly what yellowing lower leaves usually signals. That’s the most common beginner mistake: chasing nitrogen deficiency when the real problem is pH-induced nutrient lockout.

    The second most common mistake? Treating tap water like neutral ground. In many municipalities, tap water comes in at pH 7.2–7.8 right out of the pipe, and chloramine (not just chlorine) is increasingly used as a disinfectant. Unlike chlorine, chloramine doesn’t off-gas simply by letting water sit overnight. You need either a carbon block filter or a small dose of sodium thiosulfate to neutralize it. If you skip this step, you’re adding a mild root-zone toxin to every reservoir refill.

    Choosing Your System: NFT vs. DWC vs. Kratky — With Real Numbers

    There are three main entry points for hobby-scale lettuce production in 2025, and each has a different failure profile:

    • NFT (Nutrient Film Technique): A thin film of nutrient solution flows continuously along the bottom of angled channels. Excellent for lettuce because roots get both oxygen and nutrients. Risk: if your pump fails for more than 30–60 minutes in warm conditions, roots dry out fast. Starter kits from brands like General Hydroponics or Greentowers typically run $80–$180 USD for a 30-site system. Power draw: 5–15W for the pump.
    • DWC (Deep Water Culture): Roots hang directly into oxygenated, nutrient-rich water. Simpler mechanically — just a reservoir, air pump, and net pots. Ideal EC for lettuce in DWC is on the lower end, around 0.8–1.2 mS/cm, because roots have maximum exposure. The main issue is reservoir temperature: keep water between 18–22°C (64–72°F). Above 24°C, dissolved oxygen drops sharply and pythium (root rot) becomes a serious risk. Budget: $30–$60 DIY, or $80–$150 for kits like the Current Culture UC system.
    • Kratky Method (Passive DWC): No pump, no electricity for water movement. You fill a reservoir, suspend net pots, and let plants drink down the water while an air gap forms above the waterline for oxygen. This is legitimately the lowest-barrier entry point — a 5-gallon bucket and a net pot lid can be built for under $15. The catch: it doesn’t scale easily, and you can’t adjust nutrient concentration mid-cycle without fully draining. Great for 1–4 plants; awkward for anything larger.

    Light: The Variable Everyone Underestimates

    If you’re growing indoors, this is where your electricity bill and your harvest yield meet. Lettuce needs roughly 25–30 mol/m²/day of Daily Light Integral (DLI) for optimal growth — that translates to about 200–250 µmol/m²/s PPFD for 16–18 hours per day. The good news is that lettuce doesn’t need expensive high-intensity lighting. A quality full-spectrum LED panel pulling 100–150W actual wattage can cover a 60x60cm (2×2 ft) grow area adequately.

    In 2025, brands like Mars Hydro (FC-E1000, ~$99), Spider Farmer (SF-1000, ~$109), and Quantum Board setups from HLG (Quantum 100, ~$149) are all legitimate choices that have been independently tested by hobbyist communities on forums like Reddit’s r/microgrowery and the Rollitup forums. Key stat to look for: efficacy in µmol/J. Anything above 2.0 µmol/J is considered efficient for LEDs currently. Cheaper panels from unverified brands often claim high wattage but deliver 30–40% less actual PPFD than advertised.

    One honest note on cost: if you’re running 150W of LED lighting for 16 hours per day at an average US electricity rate of $0.16/kWh (2025 EIA estimate), that’s about $11.52/month in electricity for the lights alone. Factor that in when you’re comparing “free salad” to grocery prices.

    LED grow light lettuce, indoor hydroponic light setup PPFD meter

    Nutrients: The Three-Number System Simplified

    Walk into any hydroponic store and you’ll see nutrient bottles with three numbers on the label — that’s the NPK ratio (Nitrogen, Phosphorus, Potassium). For lettuce, you want a vegetative-forward formula, something like 3-1-2 or 4-1-2 NPK. Products that consistently perform well in the hobby community include:

    • General Hydroponics Flora Series (3-part system, allows precise tuning — recommended by UC Davis Extension for hobby growers)
    • Masterblend 4-18-38 (professional greenhouse formula, surprisingly affordable at ~$15/lb, often mixed with calcium nitrate and Epsom salt)
    • MaxiGro by General Hydroponics (single-part powder, EC-stable, great for beginners — just add and measure)

    Start every reservoir at half the recommended dose, especially with seedlings. Most nutrient burn in the first two weeks comes from following label instructions exactly — those are often calibrated for more mature, faster-growing plants. Build up to full strength around week two post-transplant.

    The Real Timeline: What to Expect Week by Week

    Here’s the honest breakdown that most beginner guides skip:

    • Days 1–7 (Germination): Use a germination plug (rockwool or rapid rooter). Keep moisture high, temperature around 20–24°C. Don’t flood with nutrients yet — plain pH-balanced water is enough. Expected germination rate for quality seeds: 85–95%.
    • Days 7–14 (Seedling transfer): Once roots are visible through the plug (typically 1–2cm emergence), transfer to your system. This is the highest-risk phase — transplant shock is real. Keep EC low (0.6–0.8 mS/cm), pH at 5.8–6.0.
    • Days 14–28 (Vegetative growth): Raise EC to 1.0–1.4 mS/cm. Monitor for tip burn — it’s caused by calcium deficiency specifically inside the leaf, even when nutrient solution calcium is adequate. The fix is increased airflow across leaves, not more calcium in the reservoir.
    • Days 28–45 (Pre-harvest): Loose-leaf varieties like Oak Leaf or Butterhead are typically ready. Romaine takes the longer end. Harvest outer leaves continuously (cut-and-come-again) or take the whole head.

    Where to Find Reliable Community Knowledge in 2025

    Beyond product manufacturers (who obviously have marketing interests), a few genuinely useful resources have held up: the Bright Agrotech YouTube channel (now archived but still excellent for raft system basics), the Hydroponics subreddit (r/hydro) which has an active wiki, and university extension publications from Cornell Controlled Environment Agriculture program — these are free and peer-reviewed. For equipment reviews without affiliate-link bias, the Hoagland’s Solution Discord community has active growers posting actual measured data.

    When Hydroponics Might Not Be Worth It (Yet)

    Honest conditional recommendation time: if your goal is simply to eat more salad cheaply, a soil container garden on a sunny windowsill or balcony will beat hydroponics on cost-efficiency until you’re growing at least 20+ heads per cycle. Hydroponics shines when you have limited space, want faster cycles, or want to grow year-round indoors with predictable results. If your situation is “I want salad and have a sunny outdoor space,” choose soil pots. If your situation is “I live in a northern climate apartment and want greens in January,” choose DWC or Kratky with an LED setup.

    The initial investment of $100–$300 for a decent beginner hydroponic setup typically pays back in saved produce costs after 6–12 months of consistent growing — but only if you stick with it long enough to move past the learning curve, which realistically means getting through your first failed batch without quitting.

    💬 Have a question or a story about your first hydroponic attempt? Drop it in the comments — especially if you’ve dealt with that mystery yellowing or pump failure scenario. There’s almost always a fixable cause, and talking through it with someone who’s been there makes the second attempt go way smoother. You’re not alone in finding this trickier than the tutorials suggest, but the payoff of cutting your own lettuce in January is genuinely worth the learning curve.


    📚 관련된 다른 글도 읽어 보세요

    태그: hydroponic lettuce, beginner hydroponics, DWC growing, indoor gardening, hydroponic nutrients, LED grow lights, Kratky method

  • Why I Almost Gave Up on Forex — And What Actually Works in 2025

    A friend of mine — sharp guy, works in finance — called me last spring completely frustrated. He’d been trading forex for about eight months, had read every ‘beginner guide’ he could find, and was still bleeding pips like a leaky faucet. ‘It’s rigged,’ he told me. I didn’t argue with him right away, because honestly? I’d felt the same way during my first year. But after sitting down and really walking through what was going wrong, we realized the problem wasn’t the market. It was the framework he was using to understand it.

    So let’s dig into this together — what forex trading actually is in 2025, what the data says about who survives (and who doesn’t), and what realistic, grounded approaches look like when you strip away the YouTube-guru noise.

    What Forex Actually Is — And Why the Numbers Are Brutal

    The foreign exchange market is the largest financial market on Earth, with daily trading volume exceeding $7.5 trillion as of 2025, according to the Bank for International Settlements (BIS) triennial survey data. To put that in perspective, the New York Stock Exchange handles roughly $25 billion per day. Forex isn’t just big — it’s operating on a completely different gravitational scale.

    Currency pairs are quoted as exchange rates — EUR/USD at 1.0850 means one euro buys 1.0850 US dollars. The ‘bid-ask spread’ (the gap between what brokers buy and sell at) is how most retail brokers make money, typically ranging from 0.5 to 3 pips on major pairs like EUR/USD or USD/JPY, and ballooning to 15–50+ pips on exotic pairs like USD/TRY or USD/ZAR.

    Here’s the number nobody puts in the headline: approximately 70–80% of retail forex traders lose money. This isn’t a conspiracy — it’s published by regulated brokers themselves. In the EU, MiFID II regulations require brokers to disclose their client loss rates. Pepperstone, for example, showed 74.4% of retail clients lost money. IG Group: 69%. These aren’t outliers — they’re industry-standard disclosures.

    The reasons are structural, not random:

    • Leverage magnifies losses first: A standard 100:1 leverage ratio means a 1% adverse move wipes your margin. Most retail traders use far more leverage than their risk tolerance can absorb.
    • Spread costs compound over time: If you’re scalping 10–15 trades per day on a 1.5 pip spread, you’re paying 15–22.5 pips per session just to break even — before any adverse price movement.
    • Psychological volatility: EUR/USD can swing 80–150 pips during major news events (NFP, FOMC, CPI prints). Without a pre-defined plan, most traders react emotionally and exit at exactly the wrong moment.
    • Session timing matters enormously: Liquidity peaks during the London-New York overlap (roughly 13:00–17:00 UTC). Trading during the Asian session on USD pairs means wider spreads and choppy, indecisive price action.
    forex trading chart, currency pairs dashboard, pip spread visualization

    The Four Dominant Trading Styles — And Which One Actually Fits Real People

    One thing that trips up a lot of traders is adopting a style that conflicts with their actual lifestyle. Here’s an honest breakdown:

    • Scalping (1–5 minute charts): Requires 4–6 hours of focused screen time daily. Spreads eat into profits aggressively. Best on ECN/STP brokers with raw spreads (0.0–0.3 pips + commission). Not realistic for anyone with a day job.
    • Day Trading (15-minute to 1-hour charts): The most commonly taught style, but also where most retail losses concentrate. Requires understanding of intraday liquidity patterns — specifically, the ‘London open sweep’ and ‘New York open reversal’ setups that institutional order flow creates.
    • Swing Trading (4-hour to daily charts): This is where part-time traders actually have a fighting chance. You’re checking charts 1–2 times per day, holding positions for 2–5 days. Spreads become less significant relative to your target pip range (typically 80–250 pips).
    • Position Trading (weekly charts): Fundamentals-driven, holding for weeks to months. Requires understanding of macroeconomic cycles — interest rate differentials (carry trade logic), GDP trajectories, and central bank policy divergence. The USD/JPY move from 115 to 152 in 2022–2023 was a textbook carry trade driven by Fed hawkishness vs. BOJ ultra-dovishness.

    What Research and Real Case Studies Actually Show

    A 2023 study published in the Journal of Financial Markets analyzed 85,000 retail forex accounts over three years. The top-performing 15% shared three consistent behaviors: (1) they never risked more than 1–2% of account equity per trade, (2) they had a minimum 1:2 risk-to-reward ratio on every setup, and (3) they traded fewer than 10 setups per week — meaning they were selective, not reactive.

    On the broker side, the landscape in 2025 has matured. Regulated options worth knowing:

    • Interactive Brokers (IBKR): Institutional-grade spreads, FINRA/FCA regulated, ideal for serious traders with $10,000+ accounts. Spreads on EUR/USD average 0.1–0.2 pips with commissions of ~$2/100k notional.
    • Pepperstone: ASIC and FCA regulated, excellent for MT4/MT5 users, competitive raw spread accounts.
    • OANDA: Strong for US-based traders (CFTC/NFA regulated), transparent pricing, good for beginners testing strategies with micro-lots.
    • Avoid: Any broker offering 500:1+ leverage with offshore regulation only (Vanuatu, SVG FSA, etc.). These are structural risks — if the broker goes under, your funds aren’t protected.

    On the strategy side, the ‘Smart Money Concepts’ (SMC) framework has exploded in popularity in 2024–2025. The core idea — that institutional traders leave ‘footprints’ in price action through liquidity sweeps, order blocks, and fair value gaps — has both merit and significant overhyping. Traders like Michael Huddleston (ICT) have built massive followings teaching these concepts. The honest take: the underlying logic about liquidity pools and stop-hunting is real. The claim that it’s a ‘secret code’ is marketing. Use it as one lens among several, not a holy grail.

    forex risk management strategy, smart money concepts order block chart

    The Risk Management Math You Need Before Anything Else

    Before you place a single trade, these numbers need to be non-negotiable habits:

    • Position sizing formula: Risk amount = Account balance × Risk % (max 2%). So on a $5,000 account, you risk $100 max per trade.
    • Pip value calculation: On EUR/USD with a standard lot (100,000 units), 1 pip = $10. A mini lot (10,000 units) = $1/pip. A micro lot (1,000 units) = $0.10/pip. Always match lot size to your stop-loss distance so that your total dollar risk stays within your $100 limit.
    • Drawdown recovery math: A 20% drawdown requires a 25% gain to recover. A 50% drawdown requires a 100% gain. This asymmetry is why capital preservation isn’t just conservative — it’s mathematically essential.
    • Correlation awareness: EUR/USD and GBP/USD are positively correlated (~0.85). Holding both simultaneously doesn’t double your opportunity — it doubles your USD exposure. Same with AUD/USD and NZD/USD.

    Realistic Alternatives If Pure Forex Feels Too Volatile

    Here’s the thing — forex isn’t for everyone, and that’s genuinely okay. If the leverage and 24-hour nature of the market don’t suit your temperament or schedule, there are adjacent paths worth considering:

    • Currency ETFs: Products like UUP (Invesco DB US Dollar Index Bullish Fund) or FXE (Euro Currency Trust) give you currency exposure with stock-market simplicity, regulated by the SEC, no leverage required.
    • Forex-adjacent via interest rate ETFs: If your thesis is about USD strength, TLT (iShares 20+ Year Treasury Bond ETF) and its inverse SQQQ/TBT give you rate-sensitive exposure without pip-counting.
    • Copy trading platforms: eToro and ZuluTrade allow you to mirror verified traders’ positions. Not passive income — you still need to vet the trader’s drawdown history and risk settings carefully — but lower active time commitment.
    • Paper trading first, always: MT4/MT5 demo accounts are free. Commit to 3 months of demo trading with the same discipline you’d apply to real money. If you’re not consistently profitable on demo, real money won’t magically fix the underlying issues.

    The forex market in 2025 is more accessible than ever — tighter spreads, better regulation, more educational resources. But ‘accessible’ doesn’t mean ‘easy’. The traders who make it work treat it like a craft: systematic, data-driven, emotionally disciplined, and perpetually learning. The ones who flame out treat it like a slot machine with a strategy attached.

    If you’re just starting out, swing trading on daily charts with 0.5–1% risk per trade is genuinely the most forgiving entry point. Build the habit of journaling every trade — entry logic, exit, what went right, what went wrong. After 50–100 documented trades, patterns emerge that no guru video will ever show you about yourself.

    💬 What’s your experience been — are you finding the hardest part is the strategy itself, or sticking to the risk management rules even when a setup looks ‘obvious’? I’d genuinely love to hear where things break down for most people.


    📚 관련된 다른 글도 읽어 보세요

    태그: forex trading 2025, currency trading for beginners, forex risk management, best forex brokers, swing trading strategy, forex pip calculation, smart money concepts

  • 엔비디아 주식 지금 사도 될까? 2026년 냉정한 리스크 분석과 진입 전략

    얼마 전에 친한 형이 카톡을 보내왔어. “야, 엔비디아 지금 들어가도 되냐? 올해 AI 붐 또 온다는데.” 솔직히 나도 포지션 잡고 있어서 한참 고민하다가 답장을 못 보냈거든. 그냥 ‘사’라고 하기엔 너무 무책임하고, ‘하지 마’라고 하기엔 내가 들고 있는 게 있으니까. 그래서 이참에 2026년 기준으로 내가 실제로 분석한 내용을 전부 풀어보려고 해. 수익 시나리오랑 손실 시나리오 둘 다, 숫자로.

    • 📌 엔비디아, 지금 가격이 ‘거품’인가 ‘정당한 프리미엄’인가
    • 📌 2026년 상반기 실적 전망과 핵심 변수 3가지
    • 📌 지금 샀을 때 수익 나는 시나리오 vs 손실 나는 시나리오 (수치 포함)
    • 📌 국내외 기관 투자자들은 뭐라고 하나 — 팩트 체크
    • 📌 절대로 하지 말아야 할 실수 & 진입 전 체크리스트
    • 📌 FAQ: 독자들이 가장 많이 물어보는 것들

    엔비디아 지금 가격, 거품인가 정당한 프리미엄인가

    Nvidia stock price chart 2026, NVDA market cap graph

    2026년 현재 기준으로 엔비디아(NVDA)의 시가총액은 약 3조 달러 전후를 오가고 있어. 주가수익비율(P/E Ratio)은 포워드 기준 약 35~45배 수준인데, S&P 500 평균이 21배 내외인 걸 감안하면 분명히 프리미엄이 붙어 있어.

    그런데 여기서 그냥 ‘비싸다’고 끝내면 분석이 아니야. 핵심은 그 프리미엄이 정당한가야. 엔비디아의 2025 회계연도 매출은 약 1,300억 달러를 돌파했고, 데이터센터 부문이 전체 매출의 85% 이상을 차지하고 있어. H100, H200, 그리고 블랙웰(Blackwell) 아키텍처 기반의 B100/B200 GPU가 AI 인프라의 사실상 표준이 됐거든.

    문제는 경쟁자가 없냐는 거야. AMD의 MI300X 시리즈가 일부 클라우드 벤더에서 채택되기 시작했고, 인텔의 가우디3도 조용히 점유율을 늘리고 있어. 그리고 마이크로소프트, 구글, 아마존이 자체 AI 칩(Maia, TPU v5, Trainium)을 적극 내재화하고 있다는 점은 장기적으로 엔비디아의 고객 다변화 리스크가 돼.

    2026년 상반기 실적 전망과 핵심 변수 3가지

    Nvidia Blackwell GPU data center, AI chip competition 2026

    2026년 상반기 엔비디아의 실적을 움직이는 핵심 변수는 크게 세 가지야.

    ① 블랙웰 플랫폼 공급 정상화 여부
    블랙웰 아키텍처 기반 제품들이 TSMC 3nm 공정으로 양산되면서 초기 열 설계 문제가 있었어. 2025년 하반기에 어느 정도 해소됐다는 리포트가 나오고 있지만, 공급 병목이 완전히 풀리지 않으면 매출 인식이 밀릴 수 있어. 공급이 수요를 못 따라가는 건 단기 호재지만, 고객사 이탈의 씨앗이 될 수도 있거든.

    ② 미국-중국 반도체 수출 규제 강도
    H20 칩(중국향 다운그레이드 버전) 수출 규제가 2025년에 추가로 강화됐어. 중국 시장은 한때 엔비디아 데이터센터 매출의 20~25%를 차지했는데, 이 부분이 사실상 증발 중이야. 규제가 더 강화되면 연간 매출에서 약 100~200억 달러 규모의 하방 압력이 생겨.

    ③ AI 인프라 투자 사이클의 피로도
    마이크로소프트, 메타, 구글, 아마존이 2025년에 합산 3,000억 달러 이상의 캐펙스(설비투자)를 발표했어. 이게 엔비디아 수요의 핵심인데, 이 사이클이 2026년에도 지속되는지가 관건이야. 투자자들이 ROI를 못 보여주면 투자 속도가 꺾일 수 있거든.

    수익 vs 손실 시나리오: 숫자로 냉정하게

    구분 시나리오 조건 목표 주가 (12개월) 예상 수익/손실률
    🟢 강세 Bull Case 블랙웰 공급 정상화 + AI 캐펙스 지속 + 중국 규제 완화 $200~$230 +30~50%
    🟡 중립 Base Case 현재 성장세 유지, 규제 현상 유지 $155~$175 +5~15%
    🔴 약세 Bear Case AI 투자 사이클 둔화 + 중국 규제 추가 강화 + AMD 점유율 5%p 상승 $90~$110 -25~40%
    💀 최악 Worst Case 경기침체 + AI 버블론 대두 + 공급망 위기 동시 발생 $60~$80 -45~55%

    현재 주가를 약 $145~$155 기준으로 잡았어 (2026년 상반기 거래 범위 추정). Bear Case에서 손실이 나는 구체적인 시나리오는 이래: 마이크로소프트가 Maia 2세대 칩으로 GPT 차기 모델 학습의 40%를 자체 처리하고, 메타도 MTIA 확대로 외부 GPU 주문을 20% 줄이면, 데이터센터 매출 성장률이 YoY 10% 이하로 꺾여. 그 순간 현재 P/E 멀티플이 정당화가 안 되고 주가 재평가(리레이팅)가 일어나.

    국내외 기관들은 뭐라고 하나 — 팩트 체크

    월스트리트 주요 IB들의 2026년 상반기 컨센서스 목표주가는 $170~$200 범위에 집중돼 있어. 모건스탠리는 ‘오버웨이트’를 유지하며 블랙웰 사이클을 긍정적으로 보고 있고, 골드만삭스는 “AI 인프라 지출의 내구성”을 핵심 근거로 들고 있어.

    반면 뱅크오브아메리카는 2025년 말 리포트에서 “밸류에이션 리스크가 실적 서프라이즈를 일부 선반영했다”며 상대적으로 신중한 스탠스를 취했어. 국내에서는 미래에셋, 삼성증권 등이 포트폴리오 내 비중을 유지하되 단기 트레이딩보다는 분할 매수 전략을 권고하고 있어.

    한 가지 주목할 점은 헤지펀드들의 움직임이야. 13F 보고서 기준으로 코트 캐피탈, 바이킹 글로벌 등 일부 헤지펀드가 2025년 하반기에 엔비디아 포지션을 일부 축소했어. 이게 ‘팔라는 신호’라기보다는 차익 실현 후 재진입 타이밍을 노리는 움직임에 가까워.

    절대로 하지 말아야 할 실수 & 진입 전 체크리스트

    • 레버리지 ETF(NVDL 등)로 장기 보유: 레버리지 ETF는 변동성 감쇠(Volatility Decay) 효과로 횡보장에서도 원금이 깎여. NVDL 같은 2x 레버리지 상품을 ‘장투’로 들고 가면 주가가 제자리로 돌아와도 수익이 마이너스일 수 있어.
    • 실적 발표 직전 몰빵 진입: 엔비디아는 실적이 좋아도 가이던스가 기대치를 못 맞추면 당일 -10% 넘게 빠진 전례가 여러 번 있어. ‘어닝 플레이’는 기대수익보다 리스크가 훨씬 커.
    • 포트폴리오 내 30% 초과 단일 종목 집중: 엔비디아가 좋아도 단일 종목 집중은 분산 원칙에 위배돼. 개인 투자자 기준 10~15% 이내로 관리하는 게 정신건강에 좋아.
    • “AI 테마니까 무조건 오른다” 식의 내러티브 투자: 2000년 닷컴 버블 때도 인터넷은 실제로 세상을 바꿨어. 하지만 시스코 주가는 고점 대비 회복하는 데 20년이 넘게 걸렸어. 테마가 맞아도 진입 가격이 중요해.
    • 진입 전 체크리스트:
      • 현재 포워드 P/E가 35배 이상이면 분할 매수(3회 이상 나눠서)로 진입
      • 손절 라인을 -15~20% 수준에서 사전 설정해 두기
      • 다음 실적 발표일 캘린더 확인 (보통 분기별 2월, 5월, 8월, 11월)
      • 달러 환율 체크: 원달러 1,400원 이상일 경우 환차손 리스크 고려
      • 경쟁사(AMD MI시리즈, 구글 TPU) 채택 뉴스 모니터링 루틴 설정

    FAQ

    Q1. 엔비디아 지금 한 번에 다 사도 될까요, 아니면 나눠서 사야 할까요?

    현재 밸류에이션 수준을 고려하면 3~6개월에 걸친 분할 매수를 강하게 권해. 특히 단기적으로 실적 발표, FOMC 금리 결정, 반도체 수출 규제 관련 뉴스가 주가 변동성을 키울 수 있어. 한 번에 몰빵했다가 -20% 구간에서 손절하는 것보다, 처음부터 나눠서 평균 단가를 낮추는 게 심리적으로도 훨씬 유리해.

    Q2. AMD랑 비교해서 엔비디아가 여전히 우위에 있나요?

    AI 학습(Training) 영역에서는 여전히 엔비디아가 압도적이야. CUDA 생태계 때문인데, 10년 넘게 쌓인 소프트웨어 호환성과 개발자 커뮤니티는 하드웨어 스펙만으로는 못 따라와. 다만 AI 추론(Inference) 쪽에서는 AMD MI300X가 가격 대비 경쟁력을 보이기 시작했어. 특히 비용에 민감한 스타트업이나 중소 클라우드 업체들이 AMD를 선택하는 사례가 늘고 있어. 단기적으로 엔비디아의 압도적 우위는 유지되지만, 3~5년 뒤를 본다면 경쟁 구도는 더 촘촘해질 거야.

    Q3. 미국 주식 처음 시작하는데 엔비디아가 첫 종목으로 괜찮을까요?

    솔직히 말할게. 첫 종목으로는 추천하지 않아. 변동성이 너무 크거든. 하루에 5~10%씩 오르내리는 걸 처음 경험하면 멘탈이 흔들려서 최악의 타이밍에 매도하게 돼. 처음 시작한다면 S&P 500 ETF(VOO, SPY)나 QQQ로 시장에 익숙해진 다음, 단일 종목으로 넘어오는 게 훨씬 나아. 투자도 결국 경험치가 쌓여야 버틸 수 있어.


    한 줄 평: 엔비디아는 2026년에도 AI 인프라의 심장이 맞아. 하지만 그 심장이 뛰는 속도에 이미 상당 부분 프리미엄이 붙어 있어. ‘좋은 회사 = 좋은 투자’가 항상 성립하진 않아. 진입 가격과 리스크 관리가 전부야.

    엔비디아 주식에 대해 이야기하자면, 사도 후회 없고 안 사도 후회 없는 종목이야 — 단, 계획 없이 샀다가는 반드시 후회하게 되어 있어. 분할 매수, 손절 라인 설정, 포지션 사이즈 관리. 이 세 가지가 없다면 지금 당장은 지켜보는 게 맞아.


    📚 관련된 다른 글도 읽어 보세요

    태그: 엔비디아주식, NVDA투자전략, 미국주식2026, AI반도체주식, 엔비디아전망, 미국주식투자, 반도체ETF

  • 아직도 다이어트 앱 믿어요? 2026년 체중 감량 실패 패턴 TOP5와 진짜 해결책

    지인이 카톡으로 물어왔어요. “야, 나 6개월 동안 칼로리 앱 열심히 썼는데 왜 체중이 그대로야?” 솔직히 이 질문 받는 순간 마음이 짠했어요. 그 친구, 진짜 열심히 했거든요. 매일 식단 기록하고, 유산소 30분씩 하고. 근데 결과는 처음 몸무게에서 ±1kg 왔다 갔다.

    문제는 열심히 하지 않은 게 아니라, 잘못된 방향으로 열심히 했다는 것입니다. 2026년 현재, 다이어트 정보는 넘쳐나지만 그 중에 실제로 작동하는 건 손에 꼽아요. 오늘은 ‘열심히 했는데 왜 안 되지?’라는 분들을 위해, 진짜 실패 원인과 검증된 해결책을 뼈대부터 정리해드릴게요.

    diet failure pattern, weight loss struggle, calorie tracking app

    • 🔥 실패 패턴 1 — 칼로리 계산의 함정: 숫자는 맞는데 왜 안 빠질까?
    • 📉 실패 패턴 2 — 유산소 운동 과의존의 역설
    • 😴 실패 패턴 3 — 수면 부채가 지방 연소를 막는 메커니즘
    • 🍽️ 실패 패턴 4 — 간헐적 단식 오남용, 당신의 방법이 틀렸다
    • 🧠 실패 패턴 5 — 스트레스 코르티솔이 뱃살을 만드는 진짜 경로
    • 📊 2026년 기준 다이어트 방법 비교표
    • ✅ 구매 전(시작 전) 체크리스트: 이것 없으면 시작도 마세요
    • ❓ FAQ: 독자들이 가장 많이 묻는 것들

    실패 패턴 1 — 칼로리 계산의 함정: 숫자는 맞는데 왜 안 빠질까?

    “하루 1,500kcal 맞췄는데 왜 살이 안 빠지죠?” 네, 이 질문의 전제 자체가 문제예요. 식품 라벨의 칼로리 수치는 평균 오차 ±20%가 허용됩니다(미국 FDA 기준). 즉, 당신이 1,500kcal를 먹었다고 생각해도 실제로는 1,800kcal일 수 있어요.

    게다가 ‘음식 종류’가 칼로리보다 훨씬 중요합니다. 2022년 Cell Metabolism 저널에 실린 연구에 따르면, 동일한 2,000kcal라도 초가공식품 위주로 먹은 그룹은 자연식품 위주 그룹 대비 하루 평균 500kcal를 더 섭취하게 됐어요. 식욕 호르몬(렙틴, 그렐린)이 오염되기 때문입니다.

    해결책: 칼로리 총량이 아니라 ‘포만 지수(Satiety Index)’가 높은 음식으로 식단을 구성하세요. 삶은 감자(포만 지수 323)는 크로아상(47)보다 약 7배 오래 배를 채워줘요. 같은 칼로리라도 선택하는 음식이 다이어트 성패를 가릅니다.

    food satiety index comparison, whole food vs processed food, macronutrient meal prep

    실패 패턴 2 — 유산소 운동 과의존의 역설

    트레드밀 1시간 = 약 400~500kcal 소모. 그런데 이걸 매일 해도 체중이 안 빠지는 이유가 있어요. 바로 ‘보상 심리 + 적응 대사 감소’ 콤보입니다.

    유산소 운동 후 “오늘 열심히 했으니까” 라며 평소보다 200~300kcal를 더 먹게 되고(보상 심리), 몸은 동시에 ‘이 정도 칼로리 소모가 일상이구나’라고 인식해 기초대사량을 낮춰버립니다(적응 대사 감소, Adaptive Thermogenesis). 연구에 따르면 유산소 중심 다이어트 12주 후 기초대사량이 최대 15% 감소한 사례가 있어요.

    해결책: 근력 운동과 병행하세요. 근육 1kg은 하루 약 13~15kcal를 추가로 소모합니다. 적어 보이지만 근육 5kg 증가 시 연간 약 25,000~27,000kcal 추가 소모 — 체지방 약 3.5kg에 해당합니다. 유산소만 하는 건 기름도 안 넣고 엔진 출력만 올리는 것과 같아요.

    실패 패턴 3 — 수면 부채가 지방 연소를 막는 메커니즘

    이건 정말 많은 사람이 간과하는 부분이에요. 2019년 시카고대학 연구에서 수면을 하루 5.5시간으로 제한한 그룹은 8.5시간 수면 그룹 대비 지방 손실이 55% 감소했어요. 전체 체중 감량량은 비슷했지만, 부족한 수면 그룹은 지방이 아닌 근육을 더 많이 잃었습니다.

    메커니즘은 간단해요. 수면 부족 → 그렐린(식욕 자극 호르몬) 증가 + 렙틴(포만 신호 호르몬) 감소 → 다음 날 평균 385kcal 초과 섭취(수면 연구 메타분석 기준). 당신이 밤새 열심히 공부하거나 야근하면서 다이어트가 안 된다고 느꼈다면, 그건 의지력 문제가 아닙니다.

    해결책: 수면을 ‘다이어트 프로토콜’의 일부로 편입하세요. 취침 1시간 전 블루라이트 차단, 실내 온도 18~19℃ 유지, 일정한 기상 시간 고정. 이 세 가지만 해도 수면의 질이 눈에 띄게 달라집니다.

    실패 패턴 4 — 간헐적 단식 오남용, 당신의 방법이 틀렸다

    16:8, 5:2, OMAD… 간헐적 단식 방법은 넘쳐나는데, 핵심 원칙 하나를 놓치는 경우가 대부분이에요. 공복 시간 중 인슐린 수치를 낮게 유지해야 한다는 것입니다.

    많은 분들이 단식 시간에 ‘제로 칼로리’라고 쓰인 아메리카노, 다이어트 음료를 마십니다. 근데 인공감미료(수크랄로스, 아스파탐)도 인슐린 반응을 유발할 수 있어요(연구마다 차이 있음, 단 당사자 반응 측정 필요). 더 큰 문제는 식사 구간(Eating Window)에 폭식하는 패턴. “16시간 굶었으니 이 정도는 괜찮겠지”라며 2,500kcal를 8시간 안에 때려 넣으면 간헐적 단식의 의미가 없어요.

    해결책: 단식 구간엔 물, 블랙커피(무가당), 플레인 허브티만 허용. 식사 구간엔 본인 유지 칼로리보다 200~300kcal 낮게, 단백질 비중을 전체 칼로리의 30% 이상으로 설정하세요.

    실패 패턴 5 — 스트레스 코르티솔이 뱃살을 만드는 진짜 경로

    직장 스트레스, 인간관계 갈등, 재정 불안… 이 모든 것이 다이어트를 방해합니다. 단순히 ‘스트레스 받으면 과식한다’는 행동 차원이 아니라, 생화학적 경로가 있어요.

    만성 스트레스 → 코르티솔 만성 상승 → 내장 지방 세포의 지방 저장 효소(LPL, Lipoprotein Lipase) 활성화 → 복부 지방 선택적 축적. 코르티솔은 또한 근육 단백질을 분해해 포도당으로 전환하는 ‘근육 분해’ 작용도 합니다. 즉, 스트레스를 받으면 지방은 쌓이고 근육은 빠지는 최악의 조합이 됩니다.

    2026년 현재 주목받는 접근법은 NSDR(Non-Sleep Deep Rest) — 요가 니드라, 의도적 호흡 프로토콜(박스 브리딩 4-4-4-4) 등으로 코르티솔을 능동적으로 낮추는 전략입니다. 스탠퍼드 신경과학 연구실의 Andrew Huberman 교수팀이 제안한 방법으로, 20분 NSDR 세션 후 코르티솔 수치가 유의미하게 감소함이 확인됐어요.

    2026년 기준 주요 다이어트 방법 비교표

    방법 평균 초기 감량 (12주) 장기 유지율 (1년) 근손실 위험 난이도 적합 대상
    단순 칼로리 제한 3~5kg 낮음 (30%) 높음 단기 목표자
    간헐적 단식 (16:8) 2~4kg 중간 (45%) 중간 중하 직장인, 바쁜 일상
    저탄고지 (케토) 4~7kg 낮음 (25%) 낮음 높음 인슐린 저항성 있는 경우
    고단백 + 근력 운동 2~3kg (체지방 기준) 높음 (65%) 매우 낮음 높음 장기 체형 변화 목표자
    지중해식 식단 1~3kg 매우 높음 (70%) 낮음 중하 지속 가능한 식습관 원하는 경우
    다이어트 앱 단독 사용 0~2kg 매우 낮음 (15%) 중간 낮음 ⚠️ 단독 사용 비추천

    ※ 수치는 다수 무작위 대조 임상시험(RCT) 메타분석 기반 추정치이며 개인차가 있습니다.

    시작 전 체크리스트: 이것 없으면 시작도 마세요

    • 현재 기초대사량(BMR) 파악 — Mifflin-St Jeor 공식으로 먼저 계산하세요. 모르고 시작하면 방향이 없는 것과 같아요.
    • 수면 시간 6.5시간 이상 확보 — 이게 안 되면 어떤 다이어트도 절반 이하의 효율이 나옵니다.
    • 목표 체중이 아닌 ‘행동 목표’ 설정 — “3kg 빼겠다”가 아니라 “주 3회 근력 운동하겠다”로 바꾸세요.
    • 단백질 섭취량 계산 — 체중 1kg당 최소 1.6g 이상. 70kg이라면 하루 112g 이상.
    • 주간 체중 측정 시간 통일 — 매일 아침 공복, 화장실 다녀온 직후. 일관성이 데이터를 만들어요.
    • ⚠️ SNS 다이어트 챌린지 그대로 따라하지 말 것 — 체형, 나이, 호르몬 상태가 다릅니다. 타인의 프로토콜은 참고만 하세요.
    • ⚠️ 급격한 1,000kcal 이하 식이제한 금지 — 기초대사량 아래로 내려가면 몸은 근육을 분해하고 대사 자체를 낮춥니다. 단기 숫자에 속지 마세요.

    FAQ

    Q1. 운동 안 하고 식단만으로 다이어트 가능한가요?

    가능하긴 해요. 단, 근손실을 동반한 체중 감소가 됩니다. 체중계 숫자는 줄어도 체지방률은 그대로거나 오히려 오르는 이른바 ‘Skinny Fat’ 상태가 될 수 있어요. 특히 30대 이후에는 근육량 유지가 장기 건강에 훨씬 중요합니다. 하루 10~15분이라도 저항 운동(맨몸 스쿼트, 플랭크)을 병행하는 게 훨씬 유리해요.

    Q2. 체중이 2~3주 동안 전혀 안 빠지는데 정체기인가요? 포기해야 할까요?

    2~3주 정체는 정상입니다. 우리 몸은 수분, 글리코겐, 소화 중인 음식량에 따라 체중이 ±1~2kg씩 요동칩니다. 진짜 정체기(Plateau)는 4~6주 이상 동일 조건에서 변화가 없을 때예요. 이때는 칼로리를 더 줄이기보다 ‘다이어트 브레이크(1~2주간 유지 칼로리로 돌아가기)’를 시도해보세요. 대사 적응을 리셋하는 효과가 있습니다.

    Q3. 헬스장 없이 집에서만 해도 되나요?

    충분합니다. 덤벨 한 쌍(5~15kg)과 저항 밴드, 그리고 유튜브 무료 프로그램이면 헬스장 부럽지 않아요. 오히려 통근 시간 절약으로 운동 지속률이 더 높은 경우도 많습니다. 다만, 점진적 과부하(Progressive Overload) — 즉 매주 조금씩 더 무겁게 or 더 많이 — 원칙은 반드시 지켜야 해요. 같은 무게, 같은 반복수만 하면 3개월 후 근육은 더 이상 성장하지 않습니다.

    결론 — 한 줄 평

    다이어트는 의지력 싸움이 아니에요. 잘못된 정보 + 수면 부족 + 만성 스트레스라는 구조적 문제를 해결하는 시스템 설계입니다. 2026년에도 여전히 ‘이 약 먹으면 살 빠진다’, ‘이 운동 30일만 하면 된다’는 콘텐츠가 넘쳐나지만, 숫자와 메커니즘이 증명하는 건 결국 기본기예요. 단백질 충분히 먹고, 근력 운동 하고, 잘 자고, 스트레스 관리하는 것. 진부하게 들리겠지만, 이게 유일하게 작동하는 조합입니다.

    주관적 평점: 다이어트 앱 단독 사용 ★☆☆☆☆ / 고단백+근력+수면 통합 전략 ★★★★★

    오늘의 한 줄 요약: 살이 안 빠지는 건 당신 탓이 아니에요. 방법이 틀린 겁니다. 이제 방향을 바꿔보세요.


    📚 관련된 다른 글도 읽어 보세요

    태그: []

  • Why I Almost Gave Up on Garage Door Openers — Real 2025 Troubleshooting & Buyer Guide

    A neighbor of mine — let’s call him Dave — spent an entire Saturday afternoon locked out of his own garage because his opener decided to throw a tantrum at the worst possible moment. He’d followed every step in the manual, replaced the batteries, even Googled the error codes. Nothing. By the time he called me over, the frustration on his face was something else entirely. That afternoon got me thinking: why is garage door opener troubleshooting still such a black hole of confusing, outdated advice in 2025?

    Whether you’re shopping for your first smart opener, diagnosing a mid-life crisis in a 10-year-old Chamberlain, or trying to figure out why your LiftMaster throws a blinking light pattern that looks like morse code — let’s actually dig into this together.

    garage door opener motor unit, smart home integration

    The Real Reason Most Garage Door Openers Fail (It’s Not What You Think)

    Most people assume opener failures are about the motor. In reality, the top culprits in 2025 field reports and consumer forums break down like this:

    • Safety sensor misalignment (41% of service calls) — The two infrared sensors at the bottom of your door track are notoriously sensitive. Even a 2–3mm vertical offset triggers error code 4-2 on LiftMaster units and a solid amber light on Chamberlain B4643T models.
    • Logic board failures from power surges (22%) — A single unprotected surge during a storm can fry the main board. Replacing a Chamberlain logic board runs $85–$140 in parts alone in 2025 pricing.
    • Wi-Fi module dropouts on smart openers (18%) — If your myQ-connected opener shows offline status repeatedly, the culprit is almost always 2.4GHz band congestion, not the opener itself. Force your router to dedicate a channel and you’ll likely fix it without a service call.
    • Worn drive gears (11%) — Belt and chain drive units running 8+ years often develop stripped plastic drive gears. The symptom is a grinding sound with partial or no door movement.
    • Remote frequency interference (8%) — LED bulbs inside the opener housing can interfere with 315MHz and 390MHz remote signals. Switching to a garage-door-rated bulb (look for “RFI-shielded” on the packaging) often resolves phantom remote failures instantly.

    Decoding the Blink Codes: A Practical Reference

    If your opener’s LED or bulb is flashing at you, it’s actually trying to communicate. Here’s a quick-reference breakdown for the most common 2025 market brands:

    • LiftMaster 8500W / 87504-267: 1 flash = sending limits not set; 4 flashes = safety sensor issue; 10 flashes = motor thermal overload (let it cool 30 minutes before retrying).
    • Chamberlain B6765 / B4643T: Solid amber sensor light = misalignment or obstruction; flashing amber = sensor wiring short; green + amber alternating = logic board reset required (hold the Learn button 10 seconds).
    • Genie ChainMax 1000 / StealthDrive Connect: 3 blinks = travel limits need adjustment; 5 blinks = RPM sensor fault (common after spring replacement); continuous blink = wall console communication error.
    • Ryobi Ultra-Quiet (Home Depot exclusive): If the app shows “door state unknown” persistently, a hard factory reset via the overhead button sequence (hold Learn + Lock simultaneously for 8 seconds) clears 90% of connectivity bugs.

    2025 Smart Opener Landscape: What’s Actually Worth Your Money

    The smart opener market has consolidated significantly. Here’s an honest breakdown of where things stand heading through 2025:

    myQ Ecosystem (Chamberlain / LiftMaster): The myQ platform is the most widely integrated — it connects with Google Home, Amazon Key, and Apple Home (via a $30 bridge accessory). However, Chamberlain controversially locked out third-party integrations in late 2023, and that wall still stands in 2025. If you run Home Assistant or SmartThings as your hub, myQ will frustrate you. The workaround community has developed a local API bridge called myQ-HomeAssistant on GitHub, but it’s a grey-area solution that Chamberlain can break with firmware updates.

    Meross Smart Garage Door Opener (MSG100HK): At roughly $30–$45, this is the budget champion. It works natively with Apple HomeKit, Google Home, and Amazon Alexa without a subscription. The catch: it’s a universal retrofit sensor, not a full replacement unit. It adds smarts to your existing opener rather than replacing it. Range is excellent, but the door-position sensor occasionally reports false “open” states if the magnet drifts even slightly.

    Tailwind iQ3: A strong mid-range option at ~$99 that integrates directly with geofencing for hands-free opening as you pull into the driveway. Users on the r/homeautomation subreddit consistently rate its reliability at 4.6/5 through 2025 reviews, though initial setup can be finicky on mesh Wi-Fi networks with SSID band steering enabled.

    smart garage door opener app control, myQ wifi setup

    If You’re Buying New: Conditional Recommendations for 2025

    Let me be direct here, because the “best opener” answer genuinely depends on your situation:

    • If your garage is detached and lacks Wi-Fi reach: Skip the smart features and go with a Genie ChainMax 1000 ($120–$150). Rock-solid mechanically, quiet enough for most settings, and doesn’t need a router handshake to function.
    • If you’re deep in the Apple ecosystem: LiftMaster 84501 with the built-in camera ($299) gives you native HomeKit without bridge accessories. The camera quality is genuinely useful for package monitoring.
    • If budget is the primary constraint: Chamberlain B2405 ($129 at major retailers) covers the basics — 1-1/4 HP equivalent motor, myQ included, 10-year warranty on the drive. It won’t impress tech enthusiasts, but it works.
    • If you’re renovating or building new and want maximum longevity: Consider a jackshaft/side-mount opener like the LiftMaster 8500W ($280–$320). It mounts beside the door rather than on a ceiling rail, frees up overhead space, and the direct-drive mechanism has dramatically fewer moving parts to fail.
    • If you run Home Assistant or prefer local control: The Ratgdo (Rate-da-Good-One) is a $35 DIY ESP32-based controller that replaces myQ dependency entirely and provides local MQTT control. It’s a community project, but adoption has been substantial and documentation is solid as of 2025.

    Maintenance That Actually Extends Opener Life

    Dave’s Saturday disaster could have been avoided with a 20-minute annual routine. Here’s what actually matters:

    • Lubricate the drive mechanism every 12 months — Use white lithium grease or a silicone-based spray (NOT WD-40, which attracts dust and degrades rubber seals). Focus on the chain/belt, trolley carriage, and rail.
    • Test the auto-reverse monthly — Place a 2×4 flat on the ground in the door’s path. The door must reverse within 2 seconds of contact. If it doesn’t, adjust the down-force limit immediately.
    • Check sensor alignment seasonally — Thermal expansion in summer and contraction in winter shifts sensor brackets more than you’d expect. A quick visual check that both LEDs are solid (not blinking) takes 10 seconds.
    • Replace the drive gear before it strips completely — If you hear grinding that wasn’t there before, order the gear kit now. A $20 part becomes a $300 service call if the stripped gear damages the motor shaft.
    • Install a surge protector on the outlet — A $15 outlet-level surge protector has saved more logic boards than any warranty plan.

    The Repair vs. Replace Math in 2025

    This is the question I get most often. Here’s a simple framework: if your opener is under 7 years old and the repair cost is under 40% of a new unit’s price, repair it. Beyond 10 years, seriously consider replacement — not because motors wear out, but because safety standards have improved substantially (automatic reversal sensitivity, entrapment protection) and smart integration on older units is a dead end. A new mid-range opener with proper installation runs $250–$450 all-in for most residential single-car garages in 2025. That’s the realistic baseline.

    For two-car garage setups, get at least two quotes — many installers discount the second unit significantly when doing a paired install on the same visit.

    Bottom line from the garage floor: Most garage door opener problems are fixable without a service call if you know what the blink codes are telling you. Start with sensors, check for RFI from bulbs, and don’t underestimate a firmware reset on smart units. If you’re buying new in 2025, match your choice to your ecosystem and your tolerance for DIY — there’s no single “best” opener, but there’s definitely a best one for your specific setup. Dave eventually fixed his issue with a $4 sensor bracket adjustment and a shielded LED bulb. Sometimes the most expensive-looking problem has the cheapest solution.


    📚 관련된 다른 글도 읽어 보세요

    태그: []

  • Why I Almost Gave Up on Solar — The Real 2025 Home Solar Panel Guide Nobody Talks About

    A friend of mine — let’s call him Dave — spent nearly $28,000 on a home solar installation last spring. Six months later, he called me frustrated: his electricity bill had barely budged. Turns out, his installer had oversized the inverter, the panels were partially shaded by a neighbor’s new fence extension, and nobody had run a proper load analysis before signing the contract. Dave’s story isn’t unique. It’s actually the most common solar horror story I hear in 2025, and it’s exactly why I wanted to break this topic down the way I wish someone had done for Dave before he signed that dotted line.

    The Fundamentals: How Home Solar Actually Works (And Where It Goes Wrong)

    At its core, a residential solar system converts photons from sunlight into direct current (DC) electricity via photovoltaic (PV) cells. Your inverter then converts that DC into alternating current (AC) that your home appliances can use. Sounds simple — and conceptually it is. But the gap between theory and a well-performing installation is where thousands of dollars get quietly lost.

    The key components you’re dealing with:

    • Solar Panels (Modules): Measured in watts peak (Wp). In 2025, mainstream residential panels range from 400Wp to 450Wp per panel. Top-tier monocrystalline panels (like Panasonic EverVolt or REC Alpha Pure-R) hit efficiencies of 22–23%. Budget panels from lesser-known brands often underperform their rated specs by 5–8% in real-world conditions — which adds up fast across a 25-year lifespan.
    • Inverter: The brain of the system. String inverters are cheapest but create a “weakest link” problem — if one panel underperforms (shade, dirt, defect), the whole string drops. Microinverters (Enphase IQ8 series) and DC optimizers (SolarEdge) solve this but add $1,500–$3,000 to your system cost.
    • Battery Storage: Optional but increasingly important. The Tesla Powerwall 3 (released late 2024) now offers 13.5 kWh usable storage at around $9,200 installed. LG RESU and Enphase IQ Battery 5P are solid alternatives. Without storage, you’re grid-dependent the moment the sun goes down.
    • Mounting & Racking: Often underestimated. A poor racking system on a tile or metal roof can void your roof warranty or cause leaks within 3–5 years.
    • Monitoring System: Non-negotiable in 2025. Both Enphase Enlighten and SolarEdge monitoring platforms give you panel-level data. If your installer doesn’t offer this, walk away.
    home solar panel installation rooftop 2025, residential solar system components diagram

    Real Numbers: What Does a Home Solar System Actually Cost in 2025?

    Let’s get concrete. The average U.S. residential solar installation in 2025 sits at roughly $2.85–$3.40 per watt before incentives, according to Wood Mackenzie’s Q1 2025 solar report. For a typical 8 kW system (enough to offset 80–100% of average American household consumption of ~10,500 kWh/year), that’s a gross cost of $22,800–$27,200.

    Here’s where the math starts working in your favor — or not, depending on your situation:

    • Federal Investment Tax Credit (ITC): Still at 30% through 2032 under the Inflation Reduction Act. On a $25,000 system, that’s $7,500 directly off your tax bill — not a deduction, an actual credit. Critical distinction.
    • State incentives: Vary wildly. New York’s NY-Sun program offers additional rebates of $0.20/W for systems under 7 kW. California’s SGIP (Self-Generation Incentive Program) offers battery-specific rebates up to $1,000/kWh for certain customers. Massachusetts has the SMART program. Texas? Minimal state-level support, though property tax exemptions apply.
    • Net Metering: This is where Dave’s situation compounds. In 2025, California’s NEM 3.0 (now in full effect) pays exported solar at roughly $0.05–$0.08/kWh — far below the $0.30+ retail rate. If you’re in California and you sized your system to maximize exports without a battery, you’re leaving serious money on the table. Self-consumption optimization is the new name of the game.

    Payback periods in favorable states (Massachusetts, New York, New Jersey) with high electricity rates (~$0.25/kWh+) now average 6–8 years. In low-rate states like Louisiana ($0.11/kWh average), that stretches to 12–15 years. Your specific payback calculation should always include your actual utility rate, your roof’s solar access (measured by a shade analysis tool like Aurora Solar or HelioScope), and your annual consumption pattern.

    The Shading Problem: Why Your Neighbor’s Tree Might Cost You $4,000

    This is the issue that kills more solar ROI calculations than any other single factor. A string inverter system losing even 10% of its panels to partial shading can see whole-system output drop by 25–40% depending on stringing configuration. I’ve seen real installation reports where a chimney shadow hitting two panels from 2–4 PM knocked annual production down by 1,100 kWh — at $0.25/kWh, that’s $275/year, or $6,875 over a 25-year system life.

    The fix: always request a shade analysis report (most reputable installers use Aurora Solar, which uses 3D modeling and real TMY weather data) before agreeing to any system design. If shading is unavoidable, insist on microinverters or DC optimizers. The upfront cost difference pays itself back in 3–5 years in shaded conditions.

    Choosing an Installer: The Red Flags I Look For

    The installer matters as much as the equipment. In 2025, SEIA (Solar Energy Industries Association) reports over 10,000 active residential solar installers in the U.S. Quality ranges enormously. Here’s my personal checklist:

    • NABCEP (North American Board of Certified Energy Practitioners) certified installers — non-negotiable
    • At least 5 years in business with verifiable local references (not just Google reviews)
    • Uses equipment from tier-1 manufacturers (check BNEF Tier 1 module list)
    • Provides a detailed production estimate in kWh (not just “offset percentage”) with weather data source cited
    • Offers workmanship warranty of 10+ years separate from equipment warranties
    • Pulls all necessary permits — if they suggest skipping permits to “save time,” run
    • Doesn’t use high-pressure same-day closing tactics

    Companies like Sunrun, SunPower (now operating under new ownership post-2024 restructuring), and Palmetto Solar offer national coverage with relatively standardized quality, though at premium prices. Regional installers often beat them on price by 15–20% while offering more personalized service — but due diligence is your responsibility.

    solar panel installer rooftop residential, solar quote comparison checklist

    Battery Storage in 2025: Do You Actually Need It?

    Short answer: it depends on your utility’s net metering policy and your risk tolerance for outages. Long answer: if you’re in California under NEM 3.0, Hawaii, or any state with time-of-use (TOU) rates where peak rates hit $0.45/kWh+ in the evening, battery storage has crossed the threshold from “nice to have” to “financially sensible.” The Tesla Powerwall 3’s ability to stack with up to 4 units (54 kWh total) and its integrated inverter design (eliminating a separate inverter cost) makes the math increasingly reasonable for whole-home backup scenarios.

    If you’re in a state with full retail net metering (still available in many mid-Atlantic and Midwest states), a battery adds complexity and cost without proportionate financial return — though the resilience value during grid outages is real and personal. Assign that a dollar value based on your own risk profile.

    What If Solar Doesn’t Work for Your Home?

    Not every roof is a good solar roof — and that’s okay. If your roof faces primarily north, has less than 15 years of life remaining, carries significant shading, or your annual consumption is below 6,000 kWh, solar’s economics may not pencil out. Realistic alternatives worth exploring:

    • Community Solar: Available in 22+ states, lets you subscribe to a share of an offsite solar farm and receive bill credits at 5–15% discount to retail rate. No roof installation required. EnergySage’s community solar marketplace is a good starting point.
    • Green Tariff Programs: Many utilities now offer 100% renewable electricity options at modest premiums ($5–$15/month for average households).
    • Deep Energy Efficiency First: In many cases, spending $3,000–$5,000 on air sealing, insulation, and a heat pump upgrade yields faster payback than solar alone — and creates a smaller system requirement when you do go solar later.

    Dave, by the way, ended up retrofitting his system with DC optimizers (around $1,800 installed), trimming the fence with his neighbor’s agreement, and adding a single Powerwall to maximize self-consumption. His last two billing cycles showed 87% offset. It wasn’t a perfect story, but it got a lot better — and that’s usually how solar actually goes in the real world: iterative, improvable, and worth understanding before you commit.

    Pro Tip: Before you get your first installer quote, spend 20 minutes on EnergySage.com to get 3–5 competing quotes with standardized comparison metrics. The average EnergySage user saves 20–30% compared to single-quote buyers — and that head start on understanding the numbers is exactly the leverage Dave didn’t have going in.


    📚 관련된 다른 글도 읽어 보세요

    태그: []

  • 어릴 때 이것 키워주지 않으면 후회해도 소용없어요 — 2026년 기준 수학 선행학습 완전 정복

    얼마 전 초등학교 3학년 자녀를 둔 친구가 전화를 했어요. ‘야, 우리 애 수학 학원 보내야 하나? 근처 엄마들은 벌써 중학교 과정 다 뗐다던데.’ 저도 처음엔 ‘과하지 않나?’라고 생각했거든요. 그런데 막상 데이터를 파고들어 보니… 생각이 바뀌더라고요. 단순히 ‘빠른 게 좋다’가 아니라, 어느 시기에 어떤 개념을 얼마나 깊게 가져가느냐가 결정적인 분기점이었습니다. 이 글은 ‘선행 vs 심화’ 논쟁을 끝내고, 2026년 기준 실제로 효과 있는 수학 학습 로드맵을 알려드립니다.

    child studying math, elementary school education, math workbook
    • 🔢 왜 수학 선행이 ‘시기’를 놓치면 안 되는가
    • 📊 학년별 수학 격차 데이터 — 충격적인 수치
    • 🗺️ 2026년 기준 학년별 수학 선행 로드맵
    • 📋 선행 vs 심화 vs 복습 — 3가지 방식 완전 비교표
    • 🏫 학원 vs 인강 vs 자기주도 — 상황별 추천 전략
    • 🚨 절대 하지 말아야 할 수학 학습 실수 5가지
    • ❓ FAQ: 부모들이 가장 많이 묻는 질문 3가지

    왜 수학은 ‘시기’를 놓치면 진짜 힘들어지나

    수학은 다른 과목과 근본적으로 다릅니다. 국어, 사회, 과학은 어느 정도 ‘만회’가 가능한 과목이에요. 하지만 수학은 개념이 수직으로 쌓이는 구조입니다. 분수를 모르면 방정식을 못 풀고, 방정식을 못 풀면 함수를 이해 못 하고, 함수를 모르면 미적분이 불가능합니다. 이걸 교육학에서는 ‘학습 위계(Learning Hierarchy)’라고 부르는데, 수학은 이 위계가 다른 어떤 과목보다 강합니다.

    한국교육과정평가원(KICE)의 2024년 자료에 따르면, 수학 기초학력 미달 비율이 중학교 3학년 기준 13.6%에 달합니다. 이 수치, 그냥 숫자로 보면 작아 보이지만 — 교실 30명 중 4명은 수업을 따라가지 못하고 있다는 뜻이에요. 그리고 이 아이들 대부분의 공통점은 초등 4~5학년 시기에 분수·소수 개념을 확실히 잡지 못한 것입니다.

    math learning gap statistics, Korean education system, student grades comparison

    학년별 수학 격차 데이터 — 충격적인 수치

    EBS와 서울대 교육연구소가 공동 분석한 자료(2023년 기준, 2026년 현재도 커리큘럼 동일 적용)에 따르면:

    • 초등 3학년 때 수학 상위 20%에 속한 학생이 중학교 3학년까지 유지할 확률: 약 68%
    • 초등 6학년 때까지 수학을 ‘보통’ 수준으로 방치한 경우, 중학교 진학 후 상위권으로 진입한 비율: 약 7%
    • 고등학교 수학 등급이 대학 입시 최종 결과와 상관계수: 0.71 (매우 강한 양의 상관)

    숫자가 말해주죠. 초등 시절 수학의 기초가 흔들리면, 중학교에서 다시 잡기가 통계적으로 매우 어렵습니다. ‘나중에 크면 알아서 하겠지’는 수학에서만큼은 매우 위험한 생각입니다.

    2026년 기준 학년별 수학 선행 로드맵

    선행을 무조건 많이 한다고 좋은 게 아닙니다. ‘어디서 얼마나’가 핵심이에요. 아래는 제가 현장 교사들, 학원 원장님들과 인터뷰하며 정리한 실전 로드맵입니다.

    현재 학년 목표 선행 범위 핵심 개념 권장 선행 기간 주의사항
    초등 1~2학년 현행 완전 숙달 수 개념, 덧셈/뺄셈, 시계/달력 선행보다 심화 권장 연산 속도보다 ‘개념 이해’ 우선
    초등 3~4학년 1학기~1학년 선행 분수, 소수, 나눗셈 6개월~1년 분수 개념 미완성 시 절대 다음 단계 금지
    초등 5~6학년 중학교 1학년 과정 정수, 유리수, 방정식 입문 1년 문자식 도입 시 ‘왜?’를 반드시 설명해야 함
    중학교 1~2학년 중3~고1 과정 이차방정식, 함수, 확률 1년~1.5년 고등 수학은 개념 깊이 없이 선행하면 역효과
    중학교 3학년 고등 수학(상) 완성 집합, 명제, 이차함수 6개월~1년 내신 관리와 병행해야 함. 선행만 치우치면 위험
    고등 1학년 수학Ⅱ + 미적분 입문 수열, 극한, 미분 기초 1년 수능 수학은 ‘속도’보다 ‘정확도’ 훈련이 핵심

    선행 vs 심화 vs 복습 — 3가지 방식 완전 비교

    이 세 가지는 상황에 따라 전략이 완전히 달라집니다. ‘무조건 선행’도, ‘무조건 심화’도 답이 아니에요.

    학습 방식 장점 단점 추천 대상 월 예상 비용
    선행 학습 학교 수업 여유, 시험 대비 유리 기초 부실 시 이해 없는 암기로 전락 기초 탄탄한 학생 학원 기준 15~30만원
    심화 학습 사고력·문제해결력 폭발적 성장 단기 성적 향상 효과 낮음 상위권, 영재교육 목표 10~25만원
    복습 위주 학교 내신 점수 안정적 고학년 갈수록 경쟁력 약화 기초가 흔들리는 학생 5~15만원 (인강 활용 시)

    솔직히 말씀드리면, 초등 저학년은 심화, 초등 고학년부터 선행 + 심화 병행이 가장 검증된 방식입니다. 선행만 달리다가 고등학교에서 개념이 무너지는 사례를 저는 너무 많이 봤어요.

    학원 vs 인강 vs 자기주도 — 상황별 추천 전략

    2026년 현재, 에듀테크 시장의 발전으로 선택지가 엄청나게 늘었습니다. 하지만 ‘비싼 것’이 ‘좋은 것’은 아닙니다.

    • 학원 추천 상황: 자기주도 학습이 아직 안 되는 초등~중등 저학년 / 개념 설명을 직접 들어야 이해되는 타입 / 사회성 발달도 함께 원하는 경우. 비용: 월 15~40만원 (지역별 편차 큼)
    • 인강 추천 상황: 이미 학습 루틴이 잡혀 있는 중학생 이상 / 이투스, 메가스터디, 대성마이맥 등 검증된 강사 활용 시 / 비용 대비 효율이 학원의 2~3배. 비용: 월 3~10만원
    • 자기주도 추천 상황: 고등 2~3학년, 수능 직전 기간 / 메타인지가 높은 학생 / EBS 수능특강 + 기출문제 병행이 검증된 최고의 조합

    절대 하지 말아야 할 수학 학습 실수 5가지

    • 연산만 반복하는 ‘기계 훈련’: 사칙연산 빠른 계산은 필요하지만, 개념 이해 없는 반복은 중학교 이후 한계가 옵니다. 단순 연산 드릴은 하루 15분이면 충분해요.
    • 틀린 문제를 그냥 넘기는 습관: 오답노트 없이 진도만 빼는 건 ‘구멍 난 독에 물 붓기’입니다. 틀린 문제는 최소 3번 반복 풀이가 기본.
    • 너무 많은 문제집 동시 진행: 초등 기준 문제집 3권 이상 동시 진행은 완성도를 떨어뜨립니다. 1권을 완벽히 끝내는 게 3권 대충 푸는 것보다 낫습니다.
    • ‘학원 보내면 됐지’ 방심: 학원은 인풋(설명)을 제공하지만, 아웃풋(이해·암기)은 집에서 복습해야 완성됩니다. 학원 숙제만 하면 상위 30%가 한계예요.
    • 초등 고학년 때 ‘아직 어리니까’ 방치: 이게 가장 치명적인 실수입니다. 초등 5~6학년은 수학 뇌의 ‘골든 타임’입니다. 이 시기를 게임과 유튜브로만 보내면, 나중에 2배, 3배의 노력이 필요합니다.

    FAQ: 부모들이 가장 많이 묻는 질문 3가지

    Q1. 수학 선행, 몇 학년 앞까지 해도 괜찮나요?

    일반적으로 1~1.5학년 선행이 최적입니다. 2학년 이상 선행은 개념 이해 없이 ‘답 외우기’로 변질될 가능성이 높아요. 단, 수학적 사고력이 특출난 학생이라면 예외입니다. 중요한 건 ‘얼마나 앞서가느냐’가 아니라 ‘현재 배운 걸 완전히 이해하고 있느냐’예요. 이걸 확인하는 가장 간단한 방법: 배운 개념을 아이가 부모에게 직접 설명할 수 있으면 OK.

    Q2. 수학 학원을 끊고 싶은데, 인강으로 대체할 수 있을까요?

    중학교 2학년 이상이고, 자기주도 학습 습관이 잡혀 있다면 충분히 가능합니다. 이투스(이창무, 현우진 등), 메가스터디 기준 월 5~8만원으로 학원 이상의 효과를 내는 사례가 실제로 많아요. 단, 초등학생이나 학습 동기가 낮은 학생에게 인강은 ‘넷플릭스 수준의 시청’이 되기 쉽습니다. 이 경우는 학원을 유지하거나, 1:1 과외(월 30~60만원)가 현실적입니다.

    Q3. 수학을 너무 싫어하는 아이, 억지로 시켜도 되나요?

    억지로 시키면 단기적으로는 진도가 나가지만 장기적으로 수학 혐오가 고착됩니다. 이런 경우, 먼저 왜 싫은지 파악해야 해요. 대부분은 ‘이해가 안 되니까 싫은 것’입니다. 즉, 개념이 흔들리는 지점으로 되돌아가서 자신감을 회복하는 게 우선입니다. 칸아카데미(Khan Academy) 한국어 버전이나 매쓰피드(Mathpid) 같은 게임형 앱으로 흥미를 먼저 살리는 접근도 실제 효과가 검증되어 있습니다.


    한 줄 평: 수학은 ‘나중에’가 없는 과목입니다. 초등 시절의 1년이 고등학교에서의 3년을 결정합니다. 선행이 목적이 아니라 개념의 완전한 이해가 목적임을 잊지 마세요. 빠른 것보다 단단한 것이 결국 이깁니다.

    유이파파曰: 솔직히 이 글 쓰면서 저도 반성했습니다. ‘때를 놓치면 배로 힘들어진다’는 게 수학만큼 잔인하게 적용되는 과목은 없더라고요. 지금 당장 아이 수학 교재 한 번 열어서 틀린 문제 확인해 보세요. 그게 시작입니다.


    📚 관련된 다른 글도 읽어 보세요

    태그: 수학선행학습, 초등수학, 중학수학, 수학공부법, 수학학원, 자녀교육, 2026수학로드맵

  • Why I Almost Gave Up on Hydroponic Lettuce — Real 2025 Setup Guide That Actually Works

    A friend of mine spent two weekends building what she called her ‘dream lettuce wall’ — a beautiful vertical NFT (Nutrient Film Technique) system, LED lights overhead, a fancy timer, the whole deal. By week three, her lettuce was yellow, stunted, and tasted vaguely like sadness. She called me frustrated, saying ‘hydroponic lettuce is a scam.’ Sound familiar? I’ve heard this story more times than I can count, and honestly, I’ve lived a version of it myself.

    Here’s the thing: growing hydroponic lettuce isn’t hard — but it’s deceptively specific. The gap between ‘looks set up correctly’ and ‘actually dialed in’ is where most people lose weeks of effort and a surprising amount of money. So let’s walk through this properly, the way I wish someone had walked me through it back when I killed my first three NFT channels.

    hydroponic lettuce NFT system, vertical grow setup indoor

    Why Lettuce Is Both the Best and Worst Beginner Crop

    Lettuce is universally recommended as the ‘starter crop’ for hydroponics, and that’s mostly true. It’s fast (harvest in 30–45 days), it doesn’t need intense light (DLI of 12–17 mol/m²/day works well), and it tolerates minor pH swings better than, say, basil or tomatoes. But here’s the catch: because it grows fast, it fails fast too. If your nutrient solution EC is wrong or your reservoir temperature creeps above 24°C (75°F), you’ll see tip burn or root rot within 5–7 days — not 3 weeks like with slower crops where you might catch and correct the problem.

    In 2025, most beginner hydroponic kits marketed for lettuce target an EC (electrical conductivity) of 0.8–1.6 mS/cm and a pH of 5.5–6.5. That range sounds forgiving, but I’ve found the sweet spot is much tighter in practice: EC 1.2–1.4 mS/cm, pH 5.8–6.2. Outside that band, even by a little, and your plant starts locking out calcium or iron — and calcium deficiency is almost always what causes that ugly brown tip burn on inner leaves that everyone mistakes for heat stress.

    The Real Numbers Behind a Functional Setup

    Let me break down what a working small-scale hydroponic lettuce system actually costs and consumes in 2025, because the marketing numbers are almost always optimistic:

    • System type: DWC (Deep Water Culture) for beginners, NFT for intermediate — DWC is more forgiving of pump failures because there’s a buffer reservoir
    • Light (2×4 ft tray, ~8 heads): A quality LED panel like the Mars Hydro TS600 or Spider Farmer SF-1000 running at 40–60W actual draw; expect $0.12–0.18/day in electricity at US average rates
    • Nutrient solution cost: General Hydroponics Flora Series or MaxiGro run about $0.08–0.15 per gallon of mixed solution; a 5-gallon reservoir lasts roughly 7–10 days before needing top-off or full change
    • pH meter calibration: Do it every 2 weeks minimum — a drifted pH pen is the #1 silent killer of hydroponic grows, and cheap pens (under $20) drift significantly within 30 days
    • Water temperature: Keep reservoir between 18–22°C (65–72°F); above 24°C, dissolved oxygen drops and Pythium root rot risk spikes sharply
    • Seed-to-harvest timeline: 28–35 days for Butterhead varieties, 35–45 days for Romaine under 16-hour light cycles

    The Three Mistakes That Sink 80% of First Grows

    Mistake 1: Treating tap water as neutral. In many US cities and across Europe, tap water comes in at EC 0.3–0.6 mS/cm already, meaning if you mix nutrients to a target EC of 1.4, your actual nutrient load is higher than intended. Always measure your source water first and subtract it from your target. In hard water areas (like Phoenix, AZ or parts of the UK), you may also need to pre-treat with a small amount of pH Down just to get your starting water to a manageable baseline.

    Mistake 2: Overcrowding your net pots. Standard spacing for DWC lettuce is 6–8 inches between centers for loose-leaf varieties, 8–10 inches for heads. I’ve seen people pack them at 4 inches because ‘the seedlings look tiny’ and then wonder why they get leggy, pale plants three weeks in — that’s light competition and airflow restriction causing both etiolation and increased fungal risk.

    Mistake 3: Ignoring the root zone. White, slightly fuzzy roots = healthy. Brown, slimy, foul-smelling roots = Pythium. The fix isn’t more nutrients — it’s better dissolved oxygen (air stones, proper water temp) and potentially adding a beneficial bacteria product like Hydroguard (Bacillus amyloliquefaciens) at 2 mL/gallon as a preventative, especially in summer months when ambient temperatures push reservoir temps up.

    hydroponic lettuce healthy roots DWC, tip burn calcium deficiency lettuce

    What the Research and Growers Are Actually Saying in 2025

    Cornell University’s Controlled Environment Agriculture program (one of the most cited sources in commercial hydroponic research) has published data showing that tip burn in lettuce is primarily caused by insufficient calcium transport to rapidly growing inner leaves — and this is a transpiration issue, not just a nutrient deficiency. In low-airflow environments (like a sealed grow tent with no circulation fan), even adequate calcium in solution won’t reach the leaf edges fast enough. Their recommendation: maintain air movement across the canopy at 0.3–0.5 m/s — roughly a gentle breeze from a small clip-on fan running continuously.

    On the commercial side, companies like Plenty (US vertical farming) and Infarm (EU, now restructured) ran into exactly this problem at scale: beautiful systems, correct EC and pH, but tip burn rates of 15–25% without adequate micro-airflow. At the hobbyist level, a $12 USB clip fan angled across your tray is genuinely one of the highest-ROI additions you can make to a lettuce grow.

    For variety selection in 2025, ‘Salanova’ and ‘Rex’ Butterhead continue to dominate home hydroponic grows due to tip-burn resistance. ‘Black Seeded Simpson’ remains popular for its speed and heat tolerance. If you’re in a warm climate or can’t control reservoir temp well, ‘Muir’ (developed partly for its Pythium resistance) is worth sourcing from Johnny’s Selected Seeds or High Mowing Organic Seeds.

    Building Your First Realistic Setup: A Practical Path

    If you’re starting from zero in 2025, here’s what I’d actually recommend rather than the ‘buy a kit’ approach most YouTube channels push:

    • If budget is tight (<$100): Build a 5-gallon DWC bucket system for 1–2 plants. Use a $15 air pump, a $25 LED (even a cheap 45W blurple will grow lettuce), and GH MaxiGro for nutrients. Ugly but functional, and you’ll learn the fundamentals without risking much.
    • If you want a real setup ($150–300): 2×4 ft tote DWC (Rubbermaid 27-gallon), Spider Farmer SF-1000 or equivalent quantum board LED, Atlas Scientific or Apera pH pen (worth the investment at $50–80), and a two-part nutrient like GH Flora Series or Athena Blended. This setup can grow 8–12 heads per cycle.
    • If you’re thinking commercial/semi-commercial ($500+): Look at purpose-built NFT channels from companies like AutoPot or build from PVC. At this scale, an EC/pH dosing controller (Bluelab Guardian, ~$300) pays for itself in consistency within 3–4 grows.

    A Note on Lettuce Varieties and Flavor

    One underrated aspect of home hydroponic lettuce: you can actually grow varieties that never appear in grocery stores. ‘Flashy Trout’s Back’, ‘Forellenschluss’ (an Austrian heirloom), and ‘Drunken Woman Frizzy Headed’ (yes, that’s a real variety name) produce lettuce with actual flavor complexity — nutty, slightly bitter, with texture — compared to the watery iceberg you get at the supermarket. That flavor gap is honestly one of the best arguments for growing your own, and it’s something no amount of marketing copy can convey until you taste it.

    Editor’s Note: If your first grow failed, don’t let that be the story. The most common failure points — pH drift, tip burn, root rot — are all solvable once you know what to look for. Start with one DWC bucket, one variety, get your pH pen calibrated, and add a small circulation fan. That alone will put you ahead of 80% of first-time setups. The joy of cutting your own crisp lettuce 35 days after dropping a seed into a net pot is genuinely hard to beat — and once you dial it in, you’ll wonder why you ever bought lettuce from a store.


    📚 관련된 다른 글도 읽어 보세요

    태그: hydroponic lettuce, DWC system, indoor growing, nutrient solution, lettuce tip burn, hydroponic setup guide, vertical farming

  • 2026년 가성비 쩌는 싱글몰트 위스키 Top3 — 이거 모르면 돈 낭비입니다

    위스키 좀 마신다는 친구한테 문자가 왔다. “야, 요즘 글렌피딕이랑 발베니 말고 가성비 좋은 싱글몰트 없냐? 5~10만원대로 맛있는 거 추천해줘.” 솔직히 이 질문, 연간 수십 병씩 비워가면서 직접 경험해보지 않으면 대답하기가 애매하다. 가성비라는 말 자체가 ‘가격 대비 퍼포먼스’인데, 위스키는 브랜드 마케팅 비용이 가격에 얼마나 녹아있는지 모르면 그냥 봉 잡히는 거거든.

    2026년 현재, 환율 변동과 주류 수입 트렌드가 바뀌면서 예전에 가성비였던 제품이 더 이상 가성비가 아닌 경우도 생겼고, 반대로 새롭게 주목받는 증류소들이 눈에 띄기 시작했다. 그래서 직접 구매하고, 따르고, 기록해온 데이터를 바탕으로 2026년 기준 ‘진짜 가성비’를 정리해봤다.

    single malt whisky bottle collection, wooden table, moody lighting

    • 🥃 가성비 싱글몰트, 기준이 뭔가요?
    • 🏆 Top 1 — 가격 대비 복잡미묘함의 끝판왕
    • 🏆 Top 2 — 입문자와 고수 모두 만족하는 국민 위스키
    • 🏆 Top 3 — 아직 많이 안 알려진 다크호스
    • 📊 3종 비교표 한눈에 보기
    • 🔍 해외 리뷰 사이트·전문가는 뭐라고 했나?
    • ❌ 위스키 살 때 절대 하지 말아야 할 실수
    • ❓ FAQ — 독자들이 가장 많이 묻는 질문
    • ✅ 결론 및 한 줄 평

    가성비 싱글몰트, 기준부터 잡고 가자

    가성비를 논하려면 기준이 명확해야 한다. 여기서 사용한 기준은 세 가지다.

    • 가격 구간: 국내 주요 주류 플랫폼(데일리샷, 와인앤모어, 이마트 트레이더스 기준) 2026년 기준 소비자가 5만 원~12만 원 이내
    • 숙성 연수 대비 풍미: NAS(No Age Statement)라도 복잡도가 높을 것
    • 재현성: 매 배치(Batch)마다 맛이 극단적으로 달라지지 않을 것

    이 기준에서 탈락한 유명 브랜드도 있다. 예를 들어 글렌리벳 12년은 맛 자체는 나무랄 데 없지만, 2026년 현재 국내 유통가가 7~8만 원대까지 올라온 데 비해 풍미 복잡도가 아쉽다. 그래서 이번 리스트에서는 제외했다.

    whisky tasting glass, amber liquid, close up, golden hour

    Top 1 — 글렌모렌지 오리지널 10년 (Glenmorangie Original 10Y)

    가격: 약 6만 5천 원~7만 5천 원 (700ml, 40% ABV)

    스코틀랜드 하이랜드 증류소 글렌모렌지. 증류기 높이가 스코틀랜드에서 가장 높은 걸로 유명한데, 이게 그냥 마케팅 얘기가 아니다. 긴 증류기는 무거운 성분이 위로 올라가지 못하게 걸러내서 가볍고 플로럴한 뉴메이크 스피릿을 만들어낸다. 그 결과물이 10년 버번 오크 숙성을 거치면서 이렇게 변한다.

    🟡 Nose (향): 첫 번째로 올라오는 건 오렌지 껍질과 복숭아 같은 과실향. 여기에 바닐라 크림과 미묘한 플로럴 노트가 섞인다. 알코올 자극이 거의 없어서 잔에서 바로 들이켜고 싶은 충동이 든다. 10~15분 에어링 후엔 약한 꿀향도 올라온다.

    🟠 Palate (미각): 입에 넣으면 바닐라와 시트러스가 먼저 터진다. 미디엄 바디로 너무 무겁지 않고, 아몬드와 생강 같은 스파이시한 뉘앙스가 중간에 등장한다. 물 몇 방울 추가하면 복숭아 통조림 시럽 같은 단맛이 더 선명해진다. 탄닌감은 낮은 편이라 위스키 입문자한테 진입 장벽이 낮다.

    🔵 Finish (여운): 중간 길이의 피니시. 오렌지 마멀레이드와 오크의 잔향이 15~20초 정도 남는다. 피트(Peat) 성분이 없어서 깔끔하게 마무리된다. 스모키함을 원하는 사람에게는 맞지 않겠지만, 그게 이 위스키의 정체성이다.

    총평: 7만 원대에 이 수준의 밸런스를 내는 위스키는 많지 않다. 특히 선물용으로도 포장이 예쁘고 브랜드 인지도가 있어서 ‘받는 사람이 실망할 확률 제로’에 가깝다.

    Top 2 — 글렌파클라스 12년 (Glenfarclas 12Y)

    가격: 약 7만 원~8만 5천 원 (700ml, 43% ABV)

    이 증류소를 모른다면 솔직히 좀 억울하다. 글렌파클라스는 스페이사이드의 가족 경영 증류소로, 1836년부터 Grant 가문이 6대째 운영 중이다. 상장도 안 하고 외부 투자도 안 받는다. 그 덕에 마케팅보다 원액 품질에 돈을 더 쓴다는 게 업계의 정설이다. ABV 43%로 출시한다는 것 자체가 희석을 최소화하겠다는 의지의 표현이다.

    🟡 Nose (향): 셰리 오크 숙성 특유의 건포도, 말린 자두, 다크 초콜릿 향이 진하게 올라온다. 거기에 오렌지 껍질을 벗길 때 나는 상큼한 에스테르 향이 균형을 잡아준다. 바닐라보다는 스파이스와 과실 중심의 프로파일.

    🟠 Palate (미각): 43% ABV의 힘이 느껴지는 풀바디. 입에서 셰리 캐릭터가 폭발하는데, 크리스마스 케이크, 시나몬, 정향 같은 향신료 느낌이 압도적이다. 달콤하지만 과하지 않고, 묵직한 오크 탄닌이 뒤에서 받쳐준다. 하이볼보다는 니트(Neat)나 물 한 방울로 마시는 게 맞다.

    🔵 Finish (여운): 길고 따뜻한 피니시. 계피와 오크, 말린 과일의 여운이 30초 이상 이어진다. 한 모금 마시고 잠깐 멍 때리게 만드는 위스키다.

    총평: 셰리 폭탄을 원하는데 예산이 10만 원 이내라면, 이 위스키가 사실상 유일한 선택이다. 맥캘란 셰리 캐스크 18년이 30~40만 원인 걸 생각하면, 글렌파클라스 12년은 농담이 아니라 ‘가성비 끝판왕’ 칭호를 받을 자격이 있다.

    Top 3 — 스프링뱅크 10년 (Springbank 10Y)

    가격: 약 9만 원~12만 원 (700ml, 46% ABV)

    다크호스라고 했지만, 위스키 커뮤니티에서는 이미 전설적인 존재다. 문제는 국내 일반 대형마트에서 거의 안 팔리고, 수입량 자체가 적어서 ‘아는 사람만 아는’ 위스키로 남아 있다는 것. 캠벨타운 지역의 마지막 생존 증류소 중 하나이며, 몰팅(Malting)부터 보틀링(Bottling)까지 전 공정을 자체적으로 처리하는 세계에서 몇 안 되는 증류소다. 비냉각 여과(Non-chill filtered), 천연 색소 무첨가(Natural colour), 46% ABV. 이 세 가지만 봐도 생산자의 철학이 보인다.

    🟡 Nose (향): 첫 향이 독특하다. 살짝 훈연된 바닷가 느낌(해염, 해초)이 있고, 동시에 왁시(waxy)한 밀랍 향이 올라온다. 버번 캐스크 숙성에서 오는 바닐라와 열대과일 향도 공존한다. 처음엔 낯설지만 5분 에어링 후엔 복잡도가 확 올라간다.

    🟠 Palate (미각): 피트가 약하게 들어가 있지만 아일라 스타일의 강한 스모크는 아니다. 오히려 훈제 연어나 참나무 장작 같은 은은한 스모키함. 시트러스, 바닐라, 살짝의 바다 미네랄감이 레이어를 형성한다. 미디엄-풀 바디에 46% ABV가 시너지를 내서 위스키를 마신다는 느낌이 확실하다.

    🔵 Finish (여운): 길고 복잡한 피니시. 스모크와 소금기, 오크의 잔향이 번갈아 가며 올라온다. 마시고 나서 “이게 뭐지?” 하고 다시 잔을 들게 만드는 위스키.

    총평: 12만 원이라는 가격이 이 리스트에서 가장 비싸지만, 다른 증류소에서 동급 복잡도를 얻으려면 25~30만 원 이상을 써야 한다. 매년 배치가 조금씩 달라지는데 그게 오히려 매력이다.

    📊 2026년 기준 3종 비교표

    항목 글렌모렌지 오리지널 10Y 글렌파클라스 12Y 스프링뱅크 10Y
    가격 (국내 기준) 6.5~7.5만 원 7~8.5만 원 9~12만 원
    ABV 40% 43% 46%
    지역 하이랜드 스페이사이드 캠벨타운
    캐스크 타입 버번 오크 셰리 오크 버번+셰리 혼합
    피트 여부 없음 없음 약함 (2~3 ppm)
    냉각여과 있음 없음 없음
    Nose 키워드 오렌지, 바닐라, 플로럴 건포도, 초콜릿, 시나몬 해염, 밀랍, 열대과일
    Palate 키워드 시트러스, 아몬드, 생강 셰리, 정향, 오크 훈연, 바닐라, 미네랄
    Finish 길이 중간 (15~20초) 길다 (30초+) 매우 길다 (40초+)
    추천 대상 입문자, 선물용 셰리 폭탄 원하는 분 복잡한 위스키 탐구자
    하이볼 적합도 ⭐⭐⭐⭐⭐ ⭐⭐⭐ ⭐⭐⭐⭐
    가성비 점수 9.2 / 10 9.5 / 10 9.0 / 10

    해외 전문가와 커뮤니티는 뭐라고 했나?

    주관적인 테이스팅 노트만 믿을 수 없으니 외부 근거를 붙여본다.

    • Whisky Advocate (2025~2026 리뷰 기준): 글렌모렌지 오리지널에 89점, “모든 위스키의 입문으로 추천할 만한 우아함”이라고 평가. 글렌파클라스 12년은 90점, “가격 대비 셰리 캐릭터가 가장 충실한 병”으로 선정.
    • Master of Malt (영국 주류 전문 사이트): 스프링뱅크 10년을 “캠벨타운 위스키의 교과서”라고 표현. 재고 확보 자체가 어렵다는 주석을 달아둠.
    • 국내 위스키 커뮤니티 (클리앙, 뽐뿌 위스키 게시판 등): 2026년 현재 가성비 투표에서 글렌파클라스 12년이 가장 많은 추천을 받는 흐름. “맥캘란 대신 이거 사면 인생 역전”이라는 댓글이 많다.
    • Jim Murray’s Whisky Bible: 스프링뱅크 10년을 매년 상위 1% 리스트에 꾸준히 올려놓고 있다. 가격 대비 점수(Value Score)에서 특히 높은 평가.

    ❌ 위스키 살 때 절대 하지 말아야 할 실수

    • 마트 입점가만 믿지 말 것: 이마트, 롯데마트 납품가는 수입사 협상 결과에 따라 실제 적정가보다 비쌀 수 있다. 데일리샷, 와인앤모어 앱에서 최저가 비교는 기본이다.
    • “12년산이 10년산보다 무조건 낫다”는 착각: 숙성 연수는 하나의 변수일 뿐이다. 캐스크 품질, 증류 방식, ABV가 더 중요할 때도 많다. 스프링뱅크 10년이 글렌리벳 18년보다 복잡할 수 있다.
    • 냉각 여과 여부 무시하기: 냉각 여과(Chill-filtration)는 시각적 청명도를 위해 맛 성분 일부를 제거하는 과정이다. Non-chill filtered 제품이 같은 가격대라면 무조건 더 높은 밀도의 풍미를 기대할 수 있다.
    • 개봉 후 바로 평가하기: 개봉 직후 약 30~50ml를 버리거나 마신 다음 평가하는 게 맞다. ‘산화(Oxidation)’가 진행되면서 풍미가 열리는 경우가 대부분이다.
    • 유통기한이 지난 병 세일가에 혹하기: 위스키는 유통기한이 없지만, 개봉 후 1년 이상 지난 70% 이하 잔여량은 산화로 맛이 크게 변질될 수 있다. 이걸 세일하는 바(Bar)나 매장에선 주의하자.
    • 유명 브랜드 = 가성비라는 공식: 글렌피딕, 발베니는 훌륭하지만 마케팅 비용이 가격에 많이 반영돼 있다. 같은 돈으로 덜 알려진 글렌파클라스나 스프링뱅크가 더 나은 선택일 수 있다.

    ❓ FAQ

    Q1. 위스키 입문자한테 세 개 중 뭘 먼저 사야 할까요?

    무조건 글렌모렌지 오리지널 10년부터 시작하세요. 피트도 없고, 셰리의 무게감도 없고, ABV도 40%라 부담이 없습니다. “위스키가 원래 이런 건가?”하는 기준점을 잡기에 딱 좋고, 하이볼로 만들어도 훌륭합니다. 이걸 마시고 나서 더 무거운 걸 원하면 글렌파클라스, 더 개성 있는 걸 원하면 스프링뱅크로 넘어가세요.

    Q2. 스프링뱅크는 어디서 구매하나요? 마트에서 못 봤어요.

    맞아요, 대형마트 입점이 거의 안 됩니다. 와인앤모어, 데일리샷 앱, 또는 강남·홍대 주변 위스키 전문 숍을 찾아야 합니다. 수입사인 에드링턴코리아 공식 온라인몰이나 하이트진로 공식몰에서는 취급을 안 해서, 개인 수입 전문 소매상이나 위스키 커뮤니티 공동구매를 이용하는 분들도 많습니다. 재고가 불규칙하니 보이면 바로 사는 걸 추천합니다.

    Q3. 이 세 위스키, 하이볼 만들어 마셔도 괜찮나요?

    가능하지만 어울림의 차이가 있습니다. 글렌모렌지 오리지널은 시트러스 캐릭터가 탄산수와 시너지를 내서 하이볼 최적화입니다. 글렌파클라스 12년은 셰리 무게감이 강해서 하이볼로 만들면 개성이 많이 희석됩니다 — 니트로 마시는 걸 추천. 스프링뱅크 10년은 하이볼로도 꽤 좋습니다. 훈연과 미네랄이 탄산과 만나면 독특한 맛이 나는데, 호불호는 있어요.

    결론 — 한 줄 평

    2026년 현재, 10만 원 이하에서 즐길 수 있는 싱글몰트 삼총사로 이 세 병은 진심으로 추천할 수 있다. 더 비싼 위스키가 더 좋다는 건 반만 맞는 말이다. 제대로 된 증류소에서 제대로 만든 10~12년산 싱글몰트는, 마케팅으로 도배된 25년산 고가 위스키를 뛰어넘는 경험을 줄 수 있다. 이번에 소개한 세 병이 그 증거다.

    🏆 최종 가성비 1위: 글렌파클라스 12년 — 가격 대비 셰리 풍미의 밀도는 이 가격대에서 대체불가.

    혹시 이 글이 도움이 됐다면, 위스키 좋아하는 친구한테 공유해주세요. 술 같이 마실 핑계가 생깁니다.


    📚 관련된 다른 글도 읽어 보세요

    태그: 싱글몰트위스키, 가성비위스키, 글렌모렌지, 글렌파클라스, 스프링뱅크, 위스키추천2026, 위스키테이스팅노트