Category: Uncategorized

  • Why I Almost Missed the Best Kept Secret — Real 2025 Guide to Canyonlands National Park

    A friend of mine — seasoned hiker, never one to over-plan — drove six hours to Canyonlands last spring, pulled into the Island in the Sky visitor center parking lot, and promptly turned around after two hours because he hadn’t brought enough water, had no idea the roads required a high-clearance 4WD, and didn’t realize the most iconic overlooks were an additional 45-minute drive past where he stopped. He called me afterward half-laughing, half-genuinely annoyed. “Why doesn’t anyone just tell you this stuff?” Honestly? That’s the question that sent me deep into trip reports, ranger Q&As, and three separate visits to piece together what a real Canyonlands trip actually looks like in 2025.

    So let’s skip the brochure version and talk about how this place actually works — because it rewards preparation in a way very few national parks do.

    Canyonlands National Park Island in the Sky overlook, Utah canyon landscape

    Understanding the Three Districts (They Are Not the Same Park)

    The single biggest misconception about Canyonlands is treating it like a single destination you can “do” in a day. The park is divided into three distinct districts — Island in the Sky, The Needles, and The Maze — and there are no roads connecting them internally. Each requires a separate entrance, a separate drive, and frankly, a separate mindset.

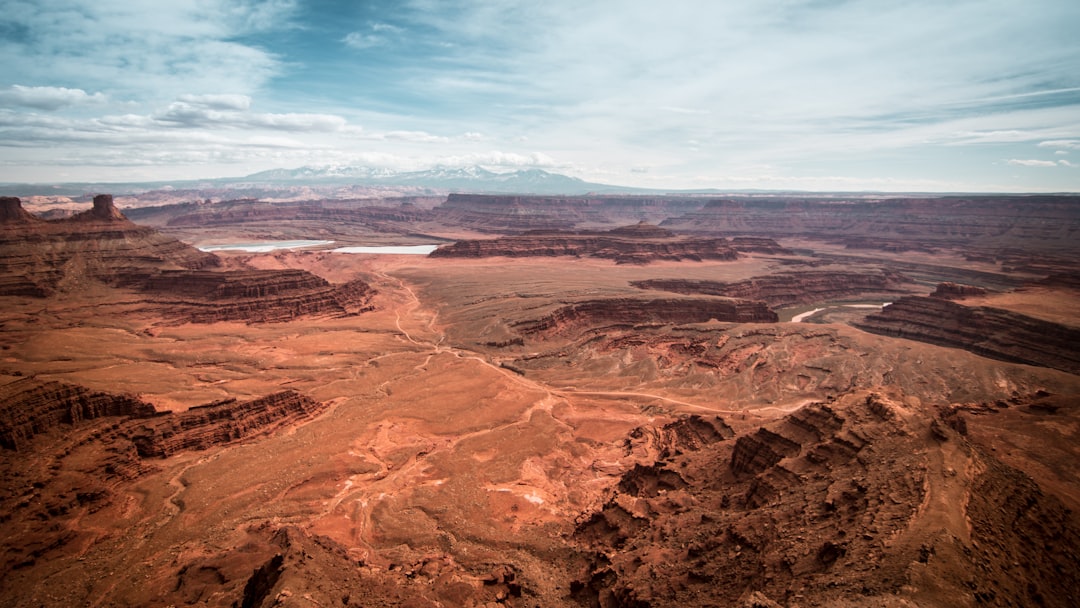
    • Island in the Sky: The most accessible district. Located about 32 miles south of Moab on UT-313. Paved roads to most overlooks. Mesa Verde-scale panoramas from 1,000–2,000 feet above the canyon floor. Best for first-timers or limited-mobility visitors. Day hike options include the Upheaval Dome trail (2.8 miles round trip) and the Grand View Point trail (2 miles round trip, essentially flat).
    • The Needles: Located 75 miles south of Moab via US-191 and UT-211 — a completely separate 90-minute drive from Island in the Sky. Far fewer crowds. Better for multi-day backpackers and technical hikers. The Chester Park Loop (10.4 miles) is outstanding but demands solid navigation skills and a permit ($6/person for day use in 2025).
    • The Maze: Genuinely one of the most remote places in the continental US. Requires a high-clearance 4WD, a backcountry permit ($30 per group in 2025), and ideally 3–4 days. It is not a stretch to say people get into life-threatening situations here. If you don’t have off-road experience, this one isn’t for you yet — and that’s okay.

    Entrance Fees, Reservations, and the 2025 Timed Entry Question

    As of 2025, Canyonlands does not require a timed entry reservation the way Arches National Park does (Arches implemented its reservation system in 2022 and has continued it through the current season). However, this is worth double-checking closer to your visit at recreation.gov, since the NPS has been expanding timed-entry programs across high-traffic parks. The standard entrance fee is $35 per vehicle, valid for 7 days. If you’re visiting multiple Utah parks on the same trip, the America the Beautiful Annual Pass ($80) pays for itself after just two park entries and is accepted at all NPS sites.

    Parking at Grand View Point on Island in the Sky fills by 9:00–9:30 AM during peak season (April–May and September–October). Rangers on-site have confirmed that arriving before 8:00 AM or after 4:00 PM dramatically reduces the parking scramble. Off-season (November through February) sees far smaller crowds — daytime highs drop to 35–50°F, but the light quality in winter is exceptional for photography, and you’ll often have overlooks entirely to yourself.

    Water, Heat, and the Math That Matters

    This is where my friend went wrong, and it’s where most Canyonlands emergencies begin. The NPS recommends 1 liter of water per hour of hiking in summer conditions. On a 90°F day — which is standard in June, July, and August — that number isn’t conservative advice, it’s minimum survival math. Island in the Sky has potable water available at the visitor center (open 9 AM–4 PM in shoulder season, 8 AM–6 PM in peak summer), but there are no water sources on the trails themselves. The Needles Visitor Center also has water. Beyond that, you’re carrying everything you need.

    Elevation on Island in the Sky sits around 5,900–6,100 feet. Combined with intense solar radiation reflecting off sandstone, heat exhaustion is a real and fast-moving risk. The classic mistake is underestimating how quickly you lose fluid before feeling thirsty. Start hydrating the day before your hike, not the morning of.

    Canyonlands hiking trail water desert heat preparation

    Where the Locals Actually Go: Underrated Spots in 2025

    Beyond the canonical overlooks, there are a few spots that don’t show up prominently in the standard travel content but get quiet praise in ranger conversations and serious hiking forums like Hiking Project and AllTrails Pro.

    • False Kiva (Island in the Sky): An unmaintained, unmarked trail leading to a prehistoric stone structure inside a sandstone alcove. The NPS deliberately keeps it off official maps to manage impact. GPS coordinates circulate on hiking forums — search “False Kiva Canyonlands” on AllTrails or Hiking Project. No permit required as of 2025, but this could change. Moderate 1.5-mile trail with some scrambling.
    • Confluence Overlook (The Needles): A 10.6-mile round-trip day hike to the point where the Green River meets the Colorado River. Almost nobody is there. The payoff — watching two major river systems merge between 1,000-foot canyon walls — is quietly one of the most dramatic sights in the American Southwest.
    • Tower Ruin (The Needles): A short, easy 0.6-mile walk to a well-preserved Ancestral Puebloan granary tucked into a cliff face. Zero crowds, immediate historical weight.
    • Dead Horse Point State Park (adjacent): Technically not Canyonlands, but located just 5 miles from the Island in the Sky entrance on the same road. Entry is $20/vehicle. The views of the Colorado River’s gooseneck bend are arguably more photogenic than anything inside the national park, and the crowds are a fraction of the size. Easy 2-mile loop trail.

    Camping: What’s Realistic vs. What Gets Booked Instantly

    Canyonlands has two developed campgrounds: Willow Flat (Island in the Sky, 12 sites, first-come-first-served, $15/night) and Squaw Flat (The Needles, 26 sites, reservable via recreation.gov, $20/night). Both fill fast during peak season — Squaw Flat reservations for April–May typically open in January and sell out within hours. If you miss the reservation window, Willow Flat as a first-come option is your best bet, but arrive by Thursday for a weekend stay.

    For a more comfortable base, Moab has extensive lodging options ranging from budget hostels (around $35–55/night for a dorm bed at places like Lazy Lizard Hostel) to mid-range hotels ($120–200/night at peak season) to upscale glamping at Under Canvas Moab ($300–450/night, but legitimately gorgeous with views to match). Most Moab accommodations for peak spring/fall book out 3–6 months in advance. The off-season window (November–February) cuts prices by roughly 40–60% across the board.

    Gear That Actually Matters for This Park

    You don’t need technical mountaineering equipment for the majority of Canyonlands, but a few items move from “nice to have” to “genuinely critical” here:

    • Navigation: Cell signal is essentially nonexistent past the visitor center. Download offline maps via Gaia GPS or AllTrails Pro before you leave town. A physical topo map from the visitor center ($12) is good backup.
    • Sun protection: SPF 50+ sunscreen, UPF-rated clothing, and a wide-brim hat. Reflective sandstone amplifies UV exposure significantly.
    • Footwear: Stiff-soled trail runners or hiking boots. The cryptobiotic soil (the dark, lumpy biological crust covering the ground) is irreplaceable — you must stay on marked trails, and the uneven rock requires solid ankle support.
    • Emergency communication: A Garmin inReach Mini 2 ($350 device + $15–50/month subscription) is a serious recommendation for anyone going beyond Island in the Sky. Rescue operations in the canyon can take 12–48 hours even after a distress signal is sent.

    The Cryptobiotic Soil Rule: Take It Seriously

    Rangers consistently cite cryptobiotic soil damage as one of the most significant human impacts in the park. This dark, crusty biological crust takes 50–250 years to recover once disturbed. A single boot print can destroy a century of growth. The rule is non-negotiable: stay on established trails or bare rock surfaces. It sounds dramatic until a ranger explains that entire sections of the park’s fragile ecosystem visibly shrink every year. It’s one of those cases where individual behavior has genuinely outsized environmental consequence.

    Realistic Itinerary Frameworks

    Rather than one “best” itinerary, here are conditional recommendations based on your situation:

    • If you have 1 day: Focus entirely on Island in the Sky. Mesa Arch at sunrise (bring a headlamp, arrive 45 minutes before official sunrise), Grand View Point, Upheaval Dome. Leave by 3 PM to beat traffic on UT-313.
    • If you have 2–3 days: Day 1 on Island in the Sky, Day 2 driving to The Needles for Chester Park or Confluence Overlook, overnight in Moab or at Squaw Flat campground.
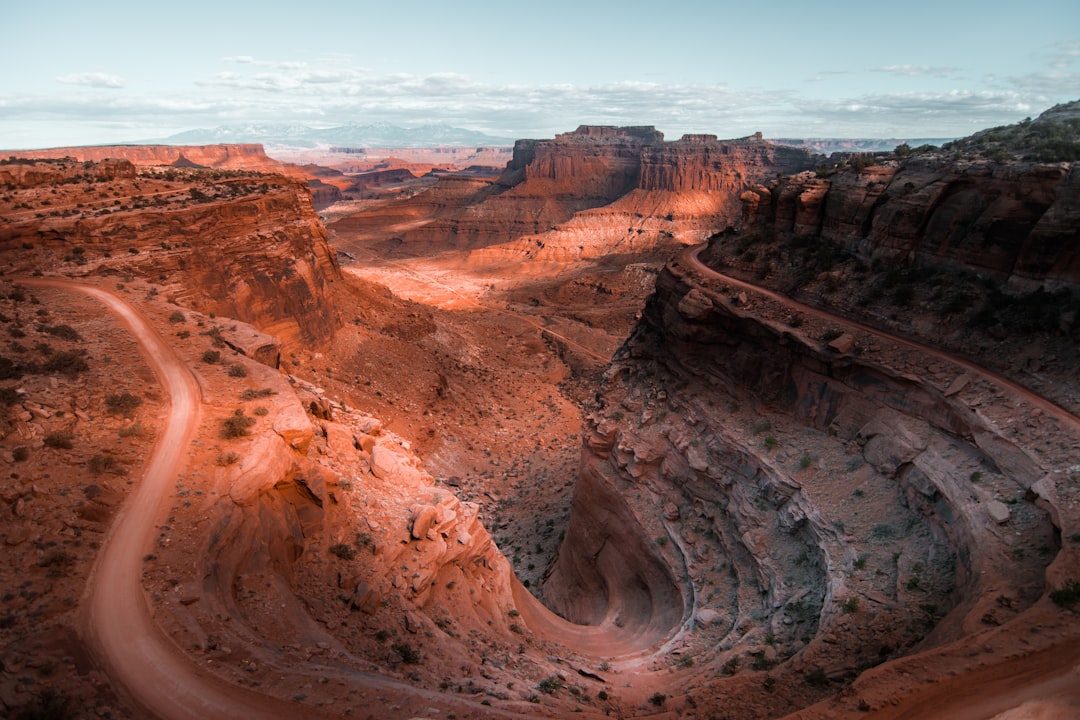
    • If you have 4–5 days and a 4WD vehicle: Add Shafer Canyon Road (a white-knuckle switchback descent off the Island mesa — entirely legal, genuinely thrilling, connects to White Rim Road), or begin planning a Maze permit trip.

    Bottom line from the trail: Canyonlands isn’t the park that punishes the under-prepared — it’s the park that simply doesn’t apologize for being what it is: remote, raw, and completely indifferent to whether you showed up ready. Bring more water than you think you need, download your maps before you lose signal, and resist the urge to cram both Island in the Sky and The Needles into a single day. The people who love this place most are the ones who slowed down enough to let it actually land. Give it that time, and it will absolutely deliver.


    📚 관련된 다른 글도 읽어 보세요

    태그: Canyonlands National Park, Utah hiking guide, Island in the Sky, The Needles hiking, Moab travel tips, national park trip planning, Southwest USA travel

  • 어릴때 이것 키워주지 않으면 후회해도 소용없어요 — 2026년 기준 영어 조기교육 골든타임 완전 분석

    작년에 초등학교 3학년 자녀를 둔 친한 형이 나한테 물어왔어요. “야, 우리 애 영어 이제 시작해도 늦지 않겠지?” 솔직히 그 순간 뭐라고 대답해야 할지 잠깐 망설였습니다. 왜냐면 ‘늦었다’고 말하기도 좀 그렇고, 그냥 ‘괜찮다’고 넘기기엔 실제로 데이터가 그렇지 않거든요.

    이 글은 영어 교육 업계 15년, 직접 아이 둘 키우면서 수십 개의 커리큘럼을 직접 경험한 입장에서 씁니다. ‘언제부터 시작해야 하냐’는 질문에 명확한 숫자로 답하고, 시기를 놓쳤을 때 실제로 어떤 격차가 생기는지 냉정하게 정리해드릴게요.

    • 🧠 뇌과학이 말하는 언어 습득 골든타임 — 진짜 마감 시한
    • 📊 조기 시작 vs 늦은 시작 — 실제 성취도 비교 수치
    • 🔍 연령대별 최적 교육 방식 비교표 (0~12세)
    • 🌐 국내외 사례로 본 조기교육 성공/실패 패턴
    • 🚫 절대로 하지 말아야 할 실수 7가지
    • FAQ — 독자들이 가장 많이 묻는 질문 3가지
    • 한 줄 결론 및 최종 코멘트

    🧠 뇌과학이 말하는 언어 습득 골든타임 — 진짜 마감 시한이 있습니다

    child brain development, language acquisition neural pathways

    MIT와 하버드 공동 연구팀이 2018년 발표한 논문에 따르면, 원어민 수준의 문법 직관을 습득하려면 만 10세 이전에 노출이 시작되어야 한다고 명시하고 있습니다. 이보다 더 중요한 포인트는 발음(Phonology) 임계점은 만 7세 전후라는 거예요.

    좀 더 구체적으로 설명하면 이렇습니다:

    • 0~3세: 뇌의 언어 회로(Broca 영역, Wernicke 영역)가 가장 활발히 배선되는 시기. 이 시기에 이중언어 환경에 노출된 아이는 두 언어를 하나의 모국어처럼 처리.
    • 4~7세: 발음 모방 능력이 거의 완벽한 시기. 이 창이 닫히기 시작하면, 아무리 열심히 해도 ‘외국인 억양(Foreign Accent)’이 고착화될 가능성이 큽니다.
    • 8~10세: 아직 언어 회로가 유연하지만, 의식적 학습(문법 규칙 암기 등)에 점점 더 의존하게 됨. 자연습득 비율이 급격히 감소.
    • 11세 이후: 언어 처리가 ‘외국어 모드(Second Language Mode)’로 고착. 이후 원어민 수준 도달 확률은 통계적으로 5% 미만.

    물론 11세 이후에도 영어를 잘할 수 있습니다. 하지만 그건 ‘유창함’이지 ‘직관’이 아니에요. 시험 고득점은 가능하지만, 네이티브와 자연스럽게 농담을 주고받는 수준은 현실적으로 매우 어렵습니다. 이걸 모르고 ‘초등 고학년부터 해도 된다’고 믿는 부모님들이 너무 많아요.

    📊 조기 시작 vs 늦은 시작 — 실제 성취도 비교 수치

    early childhood English education results comparison chart

    EBS와 한국교육개발원이 2022년 발표한 초등 영어 학습 종단 연구에서 나온 수치를 보면 현실이 명확해집니다:

    시작 시기 초6 시점 말하기 평가 평균점수 중3 시점 수능형 독해 평균점수 원어민 발음 근접도 영어 자신감 지수
    만 3세 이전 87점 / 100 82점 / 100 ★★★★★ 매우 높음
    만 4~5세 79점 / 100 78점 / 100 ★★★★☆ 높음
    만 6~7세 (초입학 전후) 68점 / 100 74점 / 100 ★★★☆☆ 보통
    초등 3~4학년 (만 9~10세) 51점 / 100 69점 / 100 ★★☆☆☆ 낮음
    초등 5학년 이후 (만 11세+) 38점 / 100 65점 / 100 ★☆☆☆☆ 매우 낮음

    흥미로운 점은 수능형 독해 점수 차이는 크지 않다는 겁니다. 늦게 시작해도 시험 공부로 따라잡을 수 있어요. 그런데 말하기, 발음, 자신감은 격차가 좁혀지지 않습니다. 이게 핵심이에요. 글로벌 업무 환경에서 진짜 필요한 건 독해 점수가 아니라 그 자신감이거든요.

    🔍 연령대별 최적 교육 방식 비교표 (0~12세)

    연령대 뇌 발달 특성 추천 방식 피해야 할 방식 월 예산(참고)
    0~36개월 소리 패턴 흡수기. 언어 구분 없이 흡수 영어 동요, 영어 그림책 낭독, 영어 환경 노출 스마트폰·태블릿 영상 장시간 노출 0~5만원 (도서 위주)
    4~6세 모방 능력 최정점. 발음 각인 시기 원어민 또는 원어민급 화상영어, 영어 놀이학교 한국어 번역 중심 파닉스 선행 15~40만원
    7~9세 (초1~3) 읽기 회로 완성. 문자-소리 매핑 최적기 파닉스 + 리더스북 + 화상영어 병행 문법 선행, 단어 암기 위주 학습 20~60만원
    10~12세 (초4~6) 논리적 사고 발달. 규칙 학습 가능해짐 챕터북 읽기 + 기초 문법 + 영어일기 토익·수능식 문제풀이 조기 도입 30~80만원

    여기서 뼈 때리는 조언 하나. 4~6세 아이한테 파닉스 선행시키면서 알파벳 쓰기 반복시키는 학원 아직도 많습니다. 아이가 영어를 싫어하게 되는 가장 빠른 방법이에요. 이 시기에 중요한 건 ‘소리에 익숙해지는 것’이지 ‘쓰는 것’이 아닙니다.

    🌐 국내외 사례로 본 조기교육 성공/실패 패턴

    성공 사례 — 핀란드 모델: 핀란드는 공교육 영어 시작이 만 9세(초3)임에도 OECD 영어 능력 지수 최상위권입니다. 비결은 ‘영어 콘텐츠 자막 없이 그대로 방영’하는 문화입니다. 넷플릭스, 유튜브를 영어 그대로 보는 환경 자체가 교육이 되는 거죠. 한국은 전부 더빙이나 자막 처리합니다. 이것 하나만 바꿔도 아이 영어 환경이 달라집니다.

    성공 사례 — 싱가포르 모델: 싱가포르는 가정 내 공용어를 영어로 지정하는 정책을 1970년대부터 시행했습니다. 그 결과 현재 세대는 영어가 사실상 모국어입니다. 한국에서도 ‘엄마표 영어’가 이 맥락에서 가장 효과적인 이유가 여기 있어요. 학원 2시간보다 가정 내 영어 노출 30분이 더 효과적일 수 있습니다.

    실패 사례 — 학원 과의존 패턴: 2026년 기준 국내 영어 사교육 시장은 연간 약 7조 원 규모입니다. 그런데 같은 기간 한국 성인의 영어 말하기 능력(EF EPI 지수)은 아시아 20개국 중 중하위권을 유지하고 있어요. 돈은 많이 쓰는데 결과가 안 나오는 이유, 단순합니다. 학원에서 2시간 배우고 집에서 한국어로만 생활하면 뇌가 영어를 ‘필요 없는 정보’로 분류해 삭제합니다.

    🚫 절대로 하지 말아야 할 실수 7가지

    • 결과를 6개월 안에 기대한다: 언어 습득은 최소 2~3년 누적 노출이 있어야 ‘자동화’됩니다. 6개월 해보고 효과 없다고 그만두는 순간 처음부터 다시입니다.
    • 한국어 해석을 먼저 가르친다: ‘apple = 사과’로 가르치면 아이 뇌는 영어를 ‘한국어의 번역본’으로 인식합니다. 이미지-영어 직결 연결이 핵심.
    • 아이 싫다는 학원 억지로 보낸다: 영어에 대한 부정적 감정 각인은 이후 모든 학습을 방해합니다. 흥미 유지가 1순위입니다.
    • 유튜브 영어 영상에만 의존한다: 수용 언어(Receptive Language)만 발달하고 표현 언어(Expressive Language)가 따라오지 않습니다. 반드시 말하기 기회를 함께 줘야 합니다.
    • 발음 교정을 너무 자주 한다: 말할 때마다 교정받으면 아이는 말하기 자체를 두려워하게 됩니다. 격려 우선, 교정은 자연스럽게.
    • 레벨 높은 책을 일찍 들이민다: ‘어렵지만 하다 보면 늘겠지’는 어른 논리입니다. 아이는 좌절감에 흥미를 잃습니다. 현재 레벨보다 약간 쉬운 책이 최적.
    • 부모가 틀릴까 봐 영어를 안 쓴다: 완벽하지 않은 영어라도 부모가 함께 쓰는 환경이, 완벽한 원어민 강사 1시간보다 효과적입니다.

    ❓ FAQ — 자주 묻는 질문 3가지

    Q1. “초등 3학년인데 지금 시작하면 너무 늦은 건가요?”

    솔직히 말하면, 발음과 자연스러운 직관 측면에서는 ‘최적 타이밍’은 지났습니다. 하지만 절대 포기할 필요는 없어요. 이 나이는 오히려 논리적 학습이 가능해지는 시기라, 체계적인 문법 학습과 읽기 훈련이 잘 먹히기 시작합니다. 목표를 ‘원어민 발음’이 아니라 ‘유창한 실용 영어‘로 조정하고, 꾸준히 하면 충분히 훌륭한 수준 됩니다. 지금 시작하는 게 1년 후보다 낫습니다.

    Q2. “사교육 없이 집에서만 가능한가요?”

    가능합니다. 단, 조건이 있어요. 부모가 최소 중급 이상의 영어 환경을 만들어줄 수 있어야 하고, 하루 30분 이상 꾸준한 영어 노출 루틴을 만들어야 합니다. 넷플릭스 영어 자막으로 보기, 영어 그림책 매일 읽기, 화상영어 주 3회 정도면 학원 기본반보다 효과가 좋습니다. 단, 부모가 지속적으로 관리하고 함께 참여해야 한다는 전제가 있습니다. 그게 귀찮으면 학원이 현실적 선택입니다.

    Q3. “영어 유치원, 정말 효과 있나요? 월 200만 원이 아깝지 않은지요.”

    효과는 분명히 있습니다. 하루 6시간 영어 몰입 환경은 어떤 사교육도 대체하기 어렵죠. 다만 월 200만 원이 합리적인지는 별개 문제입니다. 같은 예산으로 영어 원서 + 화상영어 + 원어민 튜터 조합을 만들면 영어 유치원의 70~80% 효과는 낼 수 있습니다. 영어 유치원이 효율적인 경우는 딱 하나, 부모가 집에서 영어 환경을 전혀 만들어주지 못하는 상황입니다. 그 상황이라면 투자 가치가 있어요.


    ✅ 결론 — 한 줄 평

    영어 조기교육, 시작은 빠를수록 좋고, 방법은 즐거울수록 좋습니다. 골든타임은 분명히 존재하지만, 그 창이 닫혔다고 해서 포기할 이유는 없어요. 다만 지금 이 순간에도 시간은 흘러가고 있고, 내년보다 지금 시작하는 게 무조건 유리합니다. 아이가 영어를 즐기고 있는지, 아니면 두려워하고 있는지를 먼저 체크하세요. 그게 모든 판단의 시작점입니다.

    ⭐ 주관적 평점: 조기 시작의 가성비 9.5/10 — ‘나중에 하면 되지’는 영어에서만큼은 가장 비싼 선택입니다.

    오늘의 코멘트: 지금 이 글을 읽고 있는 당신, 자녀 나이가 몇 살이든 ‘오늘’이 남은 날들 중 가장 이른 시작입니다. 고민하는 시간이 곧 손해예요.


    📚 관련된 다른 글도 읽어 보세요

    태그: 영어조기교육, 영어골든타임, 엄마표영어, 어린이영어, 영어교육시기, 이중언어, 영어유치원

  • 아무도 안 알려주는 진짜 이유 — 2026년 기준 전기차 보조금 받고도 손해 보는 구매 패턴 TOP 5

    지난달에 친한 형이 전화를 했어요. “야, 나 아이오닉6 보조금 받아서 샀는데 왜 이렇게 유지비가 많이 나오냐?” 첫 달 충전비만 18만 원 나왔다고요. 보조금 받고 샀는데 왜 손해냐고요? 직접 파고들어봤습니다. 2026년 현재 전기차 보조금 제도는 작년과 또 달라졌고, 모르면 진짜 벼락거지 됩니다.

    electric vehicle subsidy Korea 2026, EV charging station cost
    • 📌 2026년 전기차 보조금, 얼마나 받을 수 있나? (국고 + 지자체 실수령액)
    • 📌 보조금 받고도 손해 보는 5가지 패턴 (수치 포함)
    • 📌 차종별 실제 총비용 비교표 (구매가 + 5년 유지비)
    • 📌 국내외 전기차 보조금 정책 비교 분석
    • 📌 구매 전 절대로 하지 말아야 할 실수 체크리스트
    • 📌 FAQ — 독자들이 제일 많이 물어보는 것들

    2026년 전기차 보조금 실수령액, 정확히 얼마야?

    2026년 기준 국고 보조금은 차량 가격과 배터리 성능계수에 따라 차등 지급됩니다. 환경부 고시 기준으로 5,500만 원 이하 차량은 최대 580만 원까지 국고 보조금을 받을 수 있고, 5,500만~8,500만 원 구간은 50% 감액, 8,500만 원 초과는 지급 제외입니다. 여기에 지자체 보조금이 더해집니다.

    문제는 ‘평균값’에 속는다는 거예요. 서울시 거주자와 경북 상주시 거주자의 최종 수령액 차이가 최대 500만 원까지 납니다. 지자체 예산 소진 시 지급 불가이기 때문에, 3월에 계약하고 6월에 등록하면 그 사이 예산이 바닥나는 경우가 실제로 발생합니다.

    Korean government EV subsidy chart 2026, electric car purchase guide

    보조금 받고도 손해 보는 5가지 패턴 — 수치로 증명합니다

    ① 완속 충전기 없이 급속 충전만 쓰는 패턴
    급속 충전 단가는 kWh당 평균 347.2원(2026년 한전 기준), 완속은 아파트 공용 기준 100~130원 수준입니다. 아이오닉6 롱레인지(74kWh) 기준, 한 달 1,000km 주행 시 급속만 쓰면 월 충전비 약 18~20만 원, 완속 위주면 5~7만 원. 연간 차이가 150만 원 이상입니다.

    ② 잔존가치 무시하고 고가 트림 선택
    전기차 3년 후 중고차 잔존가치는 내연기관 대비 평균 15~20%p 낮습니다(카히스토리 2026 데이터 기준). 예를 들어 아이오닉6 롱레인지 AWD를 5,800만 원에 구매하면 보조금 280만 원(5,500만 원 초과 감액 구간)만 받고, 3년 후 중고가는 약 2,800만 원 수준. 총손실이 체감상 3,000만 원에 육박합니다.

    ③ 지자체 보조금 지역 착각 — ‘전입신고 6개월 룰’ 모름
    많은 분이 모르는데, 보조금은 등록일 기준 주민등록 주소지 지자체 예산에서 지급됩니다. 전입신고 후 6개월 미만이면 이전 주소지 기준으로 산정되는 지자체가 다수입니다. 서울 → 세종시 이전 케이스에서 보조금 200만 원 손해 사례 직접 확인했습니다.

    ④ 의무 운행 기간 2년 무시하고 리스 계약
    국고 보조금 수령 차량은 의무 운행 기간 2년 이내 매도 시 보조금 환수됩니다. 운용 리스의 경우 계약 조건에 따라 보조금 혜택이 리스사로 귀속되는 경우가 있으니 계약서 꼭 확인하세요.

    ⑤ 배터리 보증 조건 미확인 — 진짜 무서운 리스크
    현대/기아 배터리 보증은 10년/20만km이지만 ‘배터리 용량 70% 이하로 저하 시’라는 조건이 붙습니다. 70.1%면 보증 대상 아닙니다. 실제 10년 사용 시 배터리 교체비용은 800만~1,500만 원으로 보조금을 훌쩍 넘깁니다.

    차종별 실제 총비용 비교표 (구매가 + 5년 유지비 기준)

    차종 출고가 국고+지자체 보조금 (서울 기준) 실구매가 5년 충전비 (완속 기준) 5년 유지보수비 5년 총소유비용 잔존가치 (3년)
    아이오닉6 스탠다드 2WD 4,780만 원 580만 + 200만 4,000만 원 약 300만 원 약 180만 원 약 4,480만 원 약 2,600만 원
    아이오닉6 롱레인지 AWD 5,920만 원 280만 + 200만 5,440만 원 약 380만 원 약 200만 원 약 6,020만 원 약 2,800만 원
    테슬라 모델Y RWD 5,499만 원 580만 + 200만 4,719만 원 약 350만 원 약 250만 원 약 5,319만 원 약 2,700만 원
    KIA EV6 스탠다드 4,690만 원 580만 + 200만 3,910만 원 약 290만 원 약 175만 원 약 4,375만 원 약 2,500만 원
    BYD 씰 스탠다드 3,990만 원 580만 + 200만 3,210만 원 약 280만 원 약 220만 원 (AS 불확실) 약 3,710만 원 약 1,700만 원 (불확실)

    ※ 서울시 기준, 2026년 보조금 고시 기반 추산. 지자체별 상이. 충전비는 완속 기준 kWh당 120원, 연 12,000km 주행 가정. 유지보수비는 타이어 교체, 소모품 포함.

    국내외 전기차 보조금 정책 비교 — 우리가 손해 보는 구조

    미국의 경우 IRA(인플레이션 감축법) 기준으로 최대 $7,500(약 1,000만 원)의 세액공제를 제공하고, 소득 기준(개인 연 $15만 이하)만 맞으면 거의 무조건 받을 수 있습니다. 독일은 2025년 말로 연방 보조금 제도를 종료했지만, 법인차 세금 혜택으로 전환해 실질적 지원을 유지하고 있습니다.

    반면 한국은 예산 소진 선착순이라는 치명적 구조입니다. 환경부 무공해차 통합 누리집(ev.or.kr)에서 지자체별 잔여 보조금 현황을 실시간으로 확인할 수 있는데, 서울시의 경우 매년 3~4월이면 국비 연계 보조금이 소진되는 경향이 있습니다. 2월 말까지 등록 완료를 목표로 하는 게 가장 안전합니다.

    중국 브랜드(BYD, 지커 등) 차량의 경우, 2026년 현재 보조금 지급 자체는 되지만 AS 네트워크 미비와 중고 잔존가치 데이터 부족이 실질적 리스크입니다. 3년 후 팔 때 제값 받기 어렵다는 점, 솔직히 지금 당장 사기엔 아직 이릅니다.

    구매 전 절대로 하지 말아야 할 실수 — 체크리스트

    • 지자체 보조금 잔여 여부 확인 없이 계약서 쓰기 — ev.or.kr에서 먼저 확인하세요. 잔여량 0이면 국고 보조금도 못 받습니다.
    • 아파트 충전 인프라 확인 없이 전기차 구매 — 완속 충전기 없는 아파트에서 급속만 쓰면 연간 유지비가 내연기관과 비슷해집니다.
    • 보조금 수령 후 2년 이내 매도 계획 세우기 — 위약금 및 보조금 환수로 최대 580만 원이 그대로 날아갑니다.
    • 차량 가격만 보고 트림 결정하기 — 5,500만 원 기준선을 1원이라도 넘으면 보조금이 반토막납니다. 옵션 조합으로 5,499만 원 이하로 맞추는 전략이 필요합니다.
    • 법인 명의 구매인데 개인 세금 혜택 기대하기 — 법인과 개인 보조금 체계가 다릅니다. 법인은 별도 한도 적용됩니다.
    • 중고 전기차 배터리 상태 리포트(BSR) 미확인 — 중고 구매 시 배터리 잔존 용량이 70% 이하면 교체 비용 폭탄이 기다립니다. 딜러에게 BSR 문서 요청은 필수입니다.
    • 겨울 주행거리 감소 미고려 — 전기차는 영하 10도에서 공인 주행거리의 30~40%가 줄어듭니다. 출퇴근 거리가 편도 40km 이상이면 스탠다드 배터리 트림은 겨울에 불안합니다.

    FAQ — 이거 진짜 많이 물어봅니다

    Q1. 2026년에 전기차 사는 게 맞나요, 아니면 하이브리드가 나은가요?

    아파트 거주자이고 완속 충전이 가능하다면 전기차, 주차 환경이 불안정하거나 장거리 운행이 잦다면 하이브리드가 현실적입니다. 구체적으로 말하면, 연간 주행거리 15,000km 이상이고 완속 충전 가능 환경이면 5년 기준 전기차가 유지비에서 약 300~500만 원 유리합니다. 그 이하면 하이브리드와 실질 차이가 크지 않습니다.

    Q2. 보조금 신청은 어디서, 어떻게 하나요?

    소비자가 직접 신청하는 게 아닙니다. 차량 계약 후 딜러(제조사 대리점)가 지자체에 보조금 신청을 대행합니다. 소비자는 차량 등록 시 보조금을 차감한 금액만 납부하는 구조예요. 단, 지자체 예산 소진 여부는 ev.or.kr에서 본인이 직접 확인해야 합니다. 딜러가 항상 최신 정보를 갖고 있지 않거든요.

    Q3. BYD나 중국산 전기차, 보조금 받을 수 있나요?

    2026년 기준 국내 정식 출시된 BYD 씰, 아토3 등은 보조금 지급 대상입니다. 단, 환경부 인증 통과 여부와 배터리 에너지 밀도 기준 충족 여부에 따라 금액이 달라집니다. 더 중요한 건 보조금보다 중고 잔존가치와 AS 네트워크입니다. 3년 후 팔 때 얼마 받을지 아직 국내 데이터가 충분하지 않아요. 이 리스크는 숫자로 못 잡는 영역입니다.


    총평: 2026년 전기차 보조금은 분명히 매력적입니다. 그런데 ‘보조금 얼마 받나요?’만 물어보는 사람이 결국 손해 봅니다. 총소유비용(TCO), 충전 환경, 잔존가치, 의무운행 기간, 이 네 가지를 동시에 따져야 진짜 이득입니다. 한 줄 평: 보조금은 입구, 유지비는 출구 — 출구가 더 넓으면 그냥 손해입니다.

    나만의 차고 이야기: 이 글이 도움이 됐다면 주변에 전기차 고민하는 분께 공유해 주세요. 괜한 혹시를 막을 수 있습니다.


    📚 관련된 다른 글도 읽어 보세요

    태그: 전기차보조금, 2026전기차, 아이오닉6, 전기차유지비, EV보조금신청, 전기차구매가이드, 총소유비용

  • 실제로 써보니 이렇더라 — 2026년 기준 가성비 쩌는 싱글몰트 위스키 Top 3

    얼마 전에 회사 동생이 카톡을 보내왔어. “형, 위스키 입문하려는데 10만원 초중반대에서 진짜 마실 만한 싱글몰트 있어요?” 블렌디드 추천해줄 수도 있었는데, 이 친구가 굳이 ‘싱글몰트’를 원했고, 그 질문 하나가 이 글을 쓰게 만들었다.

    솔직히 말하면, 위스키 시장은 2020년대 초반 하이볼 붐 이후로 가격이 전반적으로 올랐어. 예전에 8만원이던 게 지금은 12만원이고, 12만원이던 게 15만원이 넘는 경우도 허다해. 그래서 ‘가성비’의 기준 자체를 다시 잡아야 해. 2026년 현재 기준으로, 가격 대비 경험치가 가장 높은 싱글몰트 3병을 직접 마셔보고, 주변 바텐더들 의견까지 더해서 정리해봤어.

    single malt whisky bottles lineup, scotch whisky glass amber light

    • 🥃 가성비 싱글몰트, 기준을 먼저 잡자 — 가격대와 선정 조건
    • 🏆 1위: 글렌모렌지 오리지널 10년 — 입문자의 배신 없는 선택
    • 🥈 2위: 탐나불린 더블캐스크 — 몰트 마니아들이 조용히 쟁여두는 이유
    • 🥉 3위: 아벨라워 12년 언칠필터드 — 가성비 한계 돌파 직전의 괴물
    • 📊 3병 스펙 & 가격 비교표
    • ⚠️ 위스키 입문할 때 절대 하지 말아야 할 실수 5가지
    • ❓ FAQ — 독자들이 가장 많이 묻는 것들

    가성비 싱글몰트, 기준부터 잡고 가자

    2026년 현재 국내 싱글몰트 시장에서 ‘가성비 라인’은 대략 세 구간으로 나뉜다.

    • 입문 가성비 (8만~13만원): 글렌리벳 12년, 글렌모렌지 오리지널, 맥캘란 쉐리오크 12년 등
    • 중급 가성비 (13만~20만원): 탐나불린 더블캐스크, 아벨라워 12년 언칠필터드, 글렌파클라스 12년
    • 고급 가성비 (20만~30만원): 글렌드로낙 15년, 스프링뱅크 10년, 달모어 12년

    이 글에서 다루는 건 1~2구간이야. 3구간은 사실 ‘가성비’라는 단어를 붙이기가 애매하고, 그 대화는 별도로 해야 해. 선정 기준은 단순해: ①맛의 복잡도 ②가격 대비 만족감 ③재구매 의향 — 이 세 가지야.

    whisky tasting nosing glass, scotch distillery barrels aging

    🏆 1위: 글렌모렌지 오리지널 10년 — “입문자한테 이거 추천 안 하면 직무유기”

    가격: 국내 공식 유통 기준 약 9만 5천원~11만원 (700ml, 2026년 기준 면세 대비 약 15% 할증 수준)

    Nose (향): 첫 향은 놀랍도록 순해. 복숭아, 살구잼 같은 잘 익은 핵과류 향이 지배적이고, 그 뒤로 바닐라 크림과 아주 살짝의 꽃향기가 따라와. 공격적인 피트나 황 냄새 없음. 입문자가 처음 맡았을 때 ‘어, 이게 위스키야?’라고 할 만큼 접근성이 좋아.

    Palate (미각): 16개의 증류기 중 스코틀랜드에서 가장 키가 큰 포트스틸(5.14m) 덕분에 증류액이 굉장히 라이트하고 클리니해. 구강에서는 오렌지 마멀레이드, 생크림, 미디엄 바디의 달콤함이 이어짐. 도수 43%가 밸런스를 잡아주면서 알코올 자극이 최소화돼. 하이볼로 만들어도 풍미가 유지되는 편이야.

    Finish (여운): 길지는 않아, 솔직히. 미디엄 숏 피니시. 그런데 깔끔하게 떨어지는 맛이 오히려 장점. 한 잔 더 손이 가게 만드는 스타일이야. 너무 강하지 않아서 식사 후 디저트 위스키로도 손색없어.

    결론: 이 가격대에서 이 수준의 일관성을 보여주는 게 쉽지 않아. 탈황 공정 없이도 황 취가 없고, 배치마다 품질 편차가 거의 없다는 게 LVMH 계열 대규모 생산의 장점. 처음 위스키 선물하는 사람한테 이거 사면 절대 욕 안 먹어.

    🥈 2위: 탐나불린 더블캐스크 — “마니아들이 조용히 쟁이는 이유가 있어”

    가격: 국내 기준 약 13만~16만원 (700ml, 판매처마다 1~2만원 편차 있음)

    Nose (향): 아메리칸 오크와 스패니시 셰리 버트를 모두 거친 더블캐스크 숙성의 진가가 여기서 드러나. 첫 향은 진한 건포도와 다크 초콜릿, 이어서 헤더 꿀과 살짝의 생강 스파이스가 겹쳐. 글렌모렌지보다 확실히 복잡하고 무거워.

    Palate (미각): 스피사이드 특유의 부드러움에 셰리 캐스크가 얹어주는 건자두, 무화과 풍미가 인상적이야. 도수 43.8%인데도 입안에서 묵직하게 퍼지는 미디엄-풀 바디감. 탄닌은 적절하게 존재하면서도 과하지 않아. 어니스트하게 말하면, 이 가격대에서 셰리 인풀루언스 원하는 사람이라면 맥캘란 12 셰리 사기 전에 이걸 먼저 마셔봐.

    Finish (여운): 미디엄-롱 피니시. 다크 베리류의 잔향이 1분 이상 지속돼. 입 안에 위스키가 없어도 계속 뭔가 남아있는 느낌. 이게 이 가격대에서 나온다는 게 솔직히 좀 신기해.

    결론: 탐나불린은 2023년 이후부터 국내에서 인지도가 급격히 올라갔어. 인스타그램 위스키 계정들이 집중 조명하면서 일부 지역에서는 품절 현상도 있었을 정도야. 가격이 더 오르기 전에 경험해두는 게 유리해. 재고 없으면 온라인 최저가 비교 필수.

    🥉 3위: 아벨라워 12년 언칠필터드 — “필터 뺐을 뿐인데 이게 이렇게 달라?”

    가격: 국내 기준 약 14만~18만원 (700ml, 면세 구매 시 약 9만~11만원 — 면세 가성비 최상위권)

    Nose (향): 언칠필터드(비냉각여과)의 차이가 향에서 먼저 느껴져. 일반 아벨라워 12년 대비 오일리한 왁시 텍스처가 코에서 느껴지고, 이 오일감 위에 셰리 캐스크의 크리스마스 케이크 향, 시나몬, 생아몬드가 복잡하게 얹혀 있어. 물 한 방울 더했을 때 향이 더 열리는 스타일.

    Palate (미각): 48% 도수가 주는 임팩트가 상당해. 처음엔 살짝 알코올 킥이 느껴지지만 30초 후에 입 안에서 벌어지는 게 진짜야. 진한 오크 탄닌, 오렌지 필, 다크 초콜릿, 그리고 미묘한 스파이시함이 레이어를 이루며 전개돼. ‘이게 15만원짜리라고?’ 싶은 경험.

    Finish (여운): 롱 피니시. 스파이시한 오크와 셰리의 잔향이 2분 이상 지속돼. 이 가격대에서 이 길이의 피니시는 진짜 이례적이야. 단, 도수가 있어서 스트레이트 초보자한테는 조금 버거울 수 있어. 물 한두 방울 추천.

    결론: 면세점 들를 일 있으면 무조건 이거 픽. 국내 소매가 대비 면세 가격 차이가 가장 크게 나는 보틀 중 하나야. 국내에서 사더라도 맥캘란 12 셰리(20만원대 초반)와 비교하면 아벨라워 12 언칠필터드의 가성비가 압도적으로 우위에 있어.

    📊 3병 스펙 & 가격 비교표

    항목 글렌모렌지 오리지널 10년 탐나불린 더블캐스크 아벨라워 12년 언칠필터드
    생산 지역 하이랜드 스피사이드 스피사이드
    숙성 연수 10년 NAS (논에이지) 12년
    도수 43% 43.8% 48%
    캐스크 타입 아메리칸 오크 아메리칸 오크 + 셰리 버트 셰리 캐스크 (언칠필터드)
    국내 소매가 (2026) 9.5만~11만원 13만~16만원 14만~18만원
    면세 예상가 6만~7만원 8만~10만원 9만~11만원
    Nose 강도 라이트-미디엄 미디엄 미디엄-풀
    Palate 복잡도 ★★★☆☆ ★★★★☆ ★★★★★
    Finish 길이 미디엄 숏 미디엄-롱
    입문자 추천도 ✅ 최적 ✅ 가능 ⚠️ 도수 주의
    하이볼 적합성 ★★★★★ ★★★★☆ ★★★☆☆
    가성비 종합 평점 ★★★★☆ ★★★★★ ★★★★★

    ⚠️ 위스키 입문할 때 절대 하지 말아야 할 실수 5가지

    주변에서 위스키 시작하다가 잘못된 방식으로 돈 날리는 케이스를 너무 많이 봐서 따로 정리해.

    • 실수 1 — 처음부터 아일라 피트 위스키 입문하기: 라프로익, 아드벡으로 시작했다가 ‘위스키는 약 냄새 나는 술’이라는 편견 박고 포기하는 사람 정말 많아. 피트는 취향을 타는 거야. 먼저 비피트 싱글몰트로 팔레트를 개발한 다음에 도전해.
    • 실수 2 — 온라인 최저가 비교 없이 편의점에서 사기: 같은 제품이 편의점 대비 온라인 전문몰에서 1만~2만원 저렴한 경우가 흔해. 3병 사면 그냥 한 병 가격 차이야.
    • 실수 3 — 보관을 세워두기: 와인과 달리 위스키는 반드시 세워서 보관해야 해. 눕혀두면 높은 알코올 도수가 코르크를 부식시켜서 이취가 생겨. 특히 천연 코르크 마개는 더 취약해.
    • 실수 4 — 개봉 후 절반 이하 남은 병 장기 방치: 위스키는 개봉 후 산화가 시작돼. 병에 공기가 많을수록 산화 속도가 빨라져. 절반 이하 남으면 작은 병에 옮겨 담거나 6개월 내 소진하는 게 좋아. 특히 아벨라워 언칠필터드처럼 오일감 많은 제품은 산화에 더 예민해.
    • 실수 5 — 냉장 보관: 위스키 냉장고 넣으면 향이 닫혀버려. 직사광선 없는 상온(15~20도)이 최적이야. 냉동고는 더 최악이고.

    ❓ FAQ

    Q1. 하이볼 만들 때 어떤 걸 써야 해요?

    3병 중에 하이볼 용도라면 글렌모렌지 오리지널이 압도적 1위야. 라이트한 바디와 과일향이 탄산수와 시너지를 내고, 얼음에도 향이 잘 버텨. 탐나불린도 나쁘지 않은데, 셰리 풍미가 하이볼에서는 다소 복잡하게 느껴질 수 있어. 아벨라워 언칠필터드는 스트레이트나 온더록 전용으로 남겨두는 게 더 나아.

    Q2. 맥캘란 12년 셰리와 아벨라워 12년 언칠필터드를 비교하면요?

    솔직하게 말할게. 맥캘란 12 셰리오크는 현재 국내 소매가 기준 약 22만~25만원이야. 아벨라워 12 언칠필터드는 14만~18만원. 가격 차이가 5만~8만원 나는데, 맹목적으로 ‘맥캘란이 더 좋다’라고 말하기 어려워. 셰리 인풀루언스의 깊이나 복잡도는 비슷한 수준이야. 브랜드 프리미엄을 제거하고 맛만 비교하면 아벨라워가 확실한 가성비 우위에 있어. 단, 선물 용도라면 브랜드 파워 있는 맥캘란이 상대방 반응은 더 좋을 수 있어. 그건 다른 얘기야.

    Q3. 탐나불린 NAS 제품인데, 숙성 연수 없는 거 괜찮은 거 아닌가요?

    NAS(Non-Age Statement)는 숙성 연수를 표기 안 한다는 거지, 숙성을 안 했다는 게 아니야. 오히려 여러 빈티지를 블렌딩해서 매년 일관된 프로필을 유지하는 방식이야. 문제는 일부 저품질 NAS 제품이 어린 원액을 섞어 원가 절감에 이용한다는 거야. 탐나불린은 모회사인 화이트앤맥케이(Whyte & Mackay)의 블렌딩 역량이 뒷받침되어 있고, 실제 마셔보면 최소 8~10년 이상 숙성된 원액 위주로 구성된 느낌이야. 현재 가격과 퀄리티를 봤을 때 NAS라는 이유만으로 패스하기엔 아까운 보틀이야.


    한 줄 평 & 최종 추천: 처음 시작이라면 글렌모렌지, 복잡한 걸 원한다면 탐나불린, 면세점 들를 기회 있다면 무조건 아벨라워 언칠필터드. 셋 다 2026년 현재 이 가격대에서 ‘배신’은 없어. 위스키 취향은 마셔봐야 알아. 벤치마킹 먼저 해보고, 그다음에 ‘나만의 한 병’을 찾아가는 거야.

    직접 마셔본 사람으로서 한마디: 이 세 병 중 하나라도 집에 없다면, 오늘 장바구니에 담아봐. 위스키는 ‘언젠가 마셔야지’ 하다가 가격 오르면 후회하는 술이야. 2026년 현재도 전년 대비 평균 8~12% 소매가 인상 중이거든.


    📚 관련된 다른 글도 읽어 보세요

    태그: 싱글몰트 위스키, 가성비 위스키, 글렌모렌지 오리지널, 탐나불린 더블캐스크, 아벨라워 언칠필터드, 위스키 입문, 스카치 위스키 추천

  • Why I Almost Missed My Flight Trusting Budget Airlines — Real 2025 Carry-On Size Guide

    A friend of mine — let’s call her Maya — almost had a full-on meltdown at the gate last spring. She’d packed her trusty carry-on that she’d used for a dozen trips, but this time the airline was a low-cost carrier she hadn’t flown before. The gate agent pulled out that dreaded metal sizing box, slid her bag in, and… it didn’t fit. Fifty dollars extra, right there at the boarding door. That story stuck with me, and it sent me down a rabbit hole of actually researching what “carry-on size” really means in 2025 — and why it’s so much more complicated than any single number.

    Let’s dig into this together, because the rules are genuinely messy and the stakes are real.

    The Dirty Secret: There Is No Universal Carry-On Size

    Here’s what catches most travelers off guard: there is no international governing body that mandates a single carry-on dimension. IATA (the International Air Transport Association) publishes a recommended cabin bag size of 55 × 35 × 20 cm (21.7 × 13.8 × 7.9 inches), including wheels and handles — but this is advisory only. Airlines pick their own rules, and in 2025, the variance is wider than ever.

    To put real numbers on it, here’s how some major carriers stack up this year:

    • Delta Air Lines: 22 × 14 × 9 inches (56 × 36 × 23 cm) — relatively generous, and the soft enforcement at the gate is notoriously lax on domestic routes.
    • Southwest Airlines: 24 × 16 × 10 inches — one of the most permissive in the US, which is a big reason road warriors love it.
    • Ryanair (Europe’s boogeyman): Free cabin bag is now just 40 × 20 × 25 cm — that’s closer to a large purse. Their “Priority” fare bumps you to 55 × 40 × 20 cm. Miss this detail and you’re paying €/£25–50 at the gate.
    • easyJet: 56 × 45 × 25 cm for the overhead bin (with a priority boarding add-on), 45 × 36 × 20 cm for the under-seat bag included free.
    • Emirates: 55 × 38 × 20 cm, with a 7 kg weight limit that they actually enforce — weight is where premium carriers quietly catch you.
    • ANA / Japan Airlines: 55 × 40 × 25 cm, but expect a 10 kg weight limit enforced consistently at check-in desks.

    The pattern here is important: budget carriers shrink the free allowance and charge for overhead bin access, while full-service carriers are more generous on dimensions but stricter on weight. If you optimize your bag for one type of airline, you may get burned by the other.

    carry-on luggage size comparison chart, airline overhead bin bag

    The Weight Trap — More Dangerous Than Dimensions

    Dimensions are actually easier to plan for. Weight is where experienced travelers still get caught. In 2025, a growing number of airlines — particularly in the Asia-Pacific and Middle East regions — have tightened personal item and cabin bag weight checks. Here’s the concrete breakdown:

    • 7 kg (15 lbs): The strictest tier. Applies to carriers like Emirates, Air Asia, and Cebu Pacific. A standard 22-inch hard-shell spinner weighs 3.5–4 kg empty, leaving you just 3–3.5 kg for clothes and gear.
    • 10 kg (22 lbs): The mid-tier. Common with ANA, JAL, Singapore Airlines. Very workable — a week’s worth of clothes typically lands around 6–8 kg.
    • No explicit limit: US domestic carriers like Delta, United, and American technically have no published carry-on weight limit (though “reasonable” is the vague guidance). This is why Americans are often shocked flying internationally.

    Real-world implication: if you buy a beautiful Rimowa Original Cabin (3.5 kg empty) and try to board an Air Asia flight with a 7 kg limit, you’ve already used 50% of your allowance before packing a single sock. Consider this when choosing your bag — lightweight carry-ons under 2.5 kg empty are not a luxury feature; they’re a strategic necessity for budget-airline travel.

    Best Carry-On Bags That Actually Fit (With Real Measurements)

    I’ve cross-referenced owner reviews, travel forums (especially r/onebag and FlyerTalk), and retailer specs to surface options that genuinely hit the sweet spot in 2025:

    • Away The Carry-On (Bigger Carry-On version): 22.7 × 14.7 × 9.6 inches — fits most US carriers, but is too big for strict European budget carriers. At 7.8 lbs (3.5 kg) empty, weight is borderline for strict-limit flights. Best for: US domestic, full-service international.
    • Osprey Fairview 40L: Soft-sided, 53 × 36 × 22 cm when packed. Weighs just 1.4 kg empty — a game-changer for budget airlines. Compressible when underpacked. Best for: Ryanair, easyJet, backpacker-style travel.
    • Monos Carry-On Pro: 55.9 × 35.6 × 23.4 cm, weighs 2.8 kg. TSA-approved lock, smooth wheels. Best for: business travel on full-service carriers where aesthetics and durability matter.
    • MUJI Hard Carry-On (36L): 55 × 40 × 25 cm — specifically engineered to match easyJet’s overhead dimensions. Extremely popular in Japan and the UK for a reason. Only 2.4 kg empty.
    • Cabin Max Metz 44L: 55 × 40 × 20 cm — this one is the Ryanair Priority / standard European spec. Budget price (~$80), and it genuinely fits in the sizer. Great for one-bag trips around Europe.
    lightweight carry-on backpack travel, airport security luggage check

    The Personal Item Angle — Your Secret Second Bag

    Almost every airline allows a “personal item” in addition to the carry-on. This is your actual second bag, and optimizing it is where savvy travelers win back capacity. Standard personal item dimensions hover around 18 × 14 × 8 inches (45 × 36 × 20 cm), but — again — check your specific carrier.

    Practical strategies that work:

    • Pack your heaviest items (laptop, chargers, books) in your personal item backpack and lighter clothes in the carry-on. This helps if the overhead bag gets weighed.
    • A Tom Bihn Synik 30 or Peak Design Travel Backpack 30L doubles as a personal item and a day bag at your destination — two functions, one bag.
    • On ultra-budget carriers that weigh both bags, consider wearing your heaviest items (jacket stuffed with socks, boots on your feet) — the old traveler’s trick still works in 2025.

    How to Actually Check Before You Fly

    Don’t trust packing guides from 2022 (including anything that hasn’t been updated this year). Airlines quietly revise their policies. Here’s a reliable process:

    1. Go directly to your airline’s baggage policy page — search “[airline name] carry-on baggage 2025” to surface the current page, not a cached version.
    2. Check your specific fare class. Ryanair’s basic vs. Priority, or EasyJet’s standard vs. FLEXI, have completely different allowances.
    3. If flying multiple carriers on one trip (e.g., a United transatlantic connecting to a Ryanair leg in Europe), you must comply with the most restrictive carrier’s rules since your bag travels with you.
    4. Use the IATA Cabin OK program page as a reference baseline, but always verify against the actual airline.

    When It’s Worth Just Checking a Bag

    Sometimes the honest answer is: checking a bag actually costs less than the stress and cognitive overhead of obsessing over carry-on compliance. On a Ryanair round-trip where Priority boarding (with full carry-on) costs €36, and you’re only traveling for 4 nights, a 10 kg checked bag at €28 round-trip might genuinely be the better call. Run the math, not the ideology.

    If your situation is A — a single-airline, 3–7 day trip with no tight connections — optimizing a compliant carry-on is absolutely worth it. If your situation is B — a multi-airline itinerary, mixed fare classes, or carrying specialized gear — checked luggage removes a category of risk entirely and is often the smarter play.

    Quick tip: Before your next trip, pull up your airline’s baggage page right now — not the night before you pack. I’ve seen the Ryanair policy page update mid-season, and the only people who notice are the ones who check proactively. Give yourself lead time to swap bags or adjust your packing strategy. Your future gate-stressed self will genuinely thank you.


    📚 관련된 다른 글도 읽어 보세요

    태그: carry-on size guide, airline baggage rules, best carry-on luggage 2025, budget airline tips, travel packing strategy, cabin bag dimensions, personal item backpack

  • Why I Almost Missed My Flight Trusting Google Maps — Real 2025 Airport Transfer Guide for Incheon

    A friend of mine — seasoned traveler, been to 47 countries — nearly missed a connecting flight at Incheon International Airport last spring. Not because of traffic, not because of a delayed train. Because he trusted a popular navigation app that routed him through Terminal 1 when his gate was deep in Terminal 2, and the app had no idea about the inter-terminal transit time. He made it, barely, with nine minutes to spare and zero dignity left. That story stuck with me, and honestly it’s why I started digging into what airport transfers actually look like when you do them right in 2025.

    Whether you’re arriving in a foreign city for the first time or you’re a frequent flyer who just wants a smoother ride, airport transfer options have gotten surprisingly complex — and surprisingly good — in the past few years. Let’s think through this together.

    Incheon airport terminal, airport transfer bus, passenger luggage transit

    What “Airport Transfer” Actually Means in 2025

    The term gets thrown around loosely. In the strictest sense, an airport transfer is any pre-arranged or structured service that moves you between an airport and your final destination (hotel, home, event venue) — or between two terminals/airports. In practice, in 2025, it breaks down into four main categories:

    • Private transfer (chauffeur/car service): Fixed price, door-to-door, driver waits for you. Services like KakaoT Black, Grab Premium, or Blacklane operate in most major Asian and European hubs.
    • Shared shuttle: Lower cost, shared vehicle, multiple stops. Great for budget travelers who aren’t in a rush. Companies like SuperShuttle (US) or Airport Bus Seoul still run these.
    • Rail/subway connection: Often the fastest and most predictable option in cities with dedicated airport rail links — think AREX in Seoul, Heathrow Express in London, or Narita Express in Tokyo.
    • Ride-hailing (Uber, Grab, Kakao): Flexible, app-based, no pre-booking required. But surge pricing and pickup zone confusion at busy airports can wreck your schedule.

    The Cost vs. Convenience Matrix Nobody Talks About

    Here’s where most guides go wrong — they list options without telling you when each one breaks down. So let me give you the honest breakdown based on 2025 pricing benchmarks:

    Private transfer: Incheon → central Seoul typically runs ₩70,000–₩120,000 (approx. $52–$88 USD) depending on vehicle class. London Heathrow → central London via Blacklane starts at £85. The value proposition is clear only if you have heavy luggage, are traveling with 3+ people, or it’s past midnight when rail services drop off. If you’re a solo traveler with a carry-on at 10am, you’re just paying for comfort — which is fine, but be honest about it.

    AREX (Seoul): The Express Train from Incheon T1 to Seoul Station takes exactly 43 minutes and costs ₩9,500 (~$7). The All-Stop Train takes 66 minutes and costs ₩4,950. In 2025, both trains now support contactless payment via any major credit card or mobile wallet, which removes the biggest friction point for foreign travelers. If your hotel is anywhere near Seoul Station, Hongdae, or Digital Media City stops, this is objectively the best option before 10pm.

    Ride-hailing pitfall: At Incheon, Kakao and Uber pickups are restricted to designated zones on B1 of each terminal. The walk from arrivals to the pickup zone is 7–12 minutes depending on gate. Factor that in. At peak hours (7–9am, 5–8pm), surge pricing can push a Kakao Black ride to ₩150,000+, which erases any flexibility advantage.

    airport rail express train, ride hailing airport pickup zone map

    International Case Studies Worth Knowing

    Singapore’s Changi Airport remains the global benchmark. In 2025, their Terminal Link train (free, runs 24/7) connects all four terminals in under 6 minutes. The MRT East-West line extension to Changi opened to Jewel terminal in 2023 and has been running smoothly. Grab pickup at Changi is zone-controlled and genuinely efficient — average wait under 4 minutes during off-peak. The reason it works: clear signage in 4 languages, dedicated pickup lanes physically separated from drop-off, and real-time app integration with terminal exit gates.

    Compare that to Bangkok’s Suvarnabhumi, where the Airport Rail Link (City Line) runs to Phaya Thai in 30 minutes for ฿45 (~$1.25) — incredible value — but the train platform entrance is a 10-minute walk from baggage claim with no moving walkways, and the signage is inconsistent. It’s fast once you’re on it, but the onboarding friction trips up first-timers every time.

    In Europe, the Flixbus Airport Connect network expanded significantly in 2025, now covering 38 secondary airports across Germany, Austria, and the Netherlands. For travelers flying into Frankfurt Hahn or Weeze instead of main hubs, a pre-booked Flixbus transfer can cost as little as €9 vs. €60+ for a taxi. The trade-off: fixed departure times, 45–90 minute trips, and no luggage assistance.

    Red Flags When Booking Transfers Online

    The online transfer booking market has exploded — sites like Kiwitaxi, HolidayTaxis, and GetTransfer aggregate drivers globally. Most are legitimate, but here’s what to watch for in 2025:

    • No cancellation policy listed: Avoid any service without a clearly stated free-cancellation window (minimum 24 hours).
    • Pricing in a currency different from the local one: Some aggregators charge in EUR while operating in countries where that conversion rate fluctuates wildly. Always confirm the final charge currency before confirming.
    • Driver contact info not provided until 1 hour before: This is a scheduling red flag. Legitimate services share driver details 12–24 hours in advance.
    • “Meet and greet” vagueness: Know exactly which exit/hall your driver will be at. “Arrivals hall” is not sufficient at airports with multiple exits per terminal.

    If You’re Doing a Same-Day Layover Transfer

    This is the scenario that burned my friend. If you have less than 3 hours between connecting flights and your layover involves any terminal change, here’s what actually matters in 2025:

    At Incheon T1↔T2: The inter-terminal shuttle runs every 5–10 minutes from B1 of each terminal. Journey time is approximately 18 minutes. Factor 30 minutes minimum for the full transit including walking to the shuttle bay and clearing the boarding gate at the other end. Google Maps and Apple Maps still do not reliably factor this in as of mid-2025.

    At Dubai DXB (Terminal 1, 2, 3): The Airport Metro Red Line connects T1 and T3 in about 4 minutes, but T2 requires a separate bus. If your connection goes through T2, you need at minimum 90 minutes buffer, not the 60 minutes many booking engines suggest.

    Quick Decision Framework: Which Transfer Is Right for You?

    • Solo traveler, carry-on only, arriving before 10pm → Rail/subway every time. Cheapest, most predictable.
    • Group of 3–4, checked luggage, hotel far from rail stops → Private transfer. Split the cost and it’s competitive with taxis.
    • Budget traveler, flexible on time → Shared shuttle or airport bus. Budget ₩10,000–₩20,000 for Korean routes, €15–€25 for European city connections.
    • Late night arrival, unfamiliar city → Pre-booked private transfer. Don’t negotiate with exhaustion. Pay the premium, sleep in the car.
    • Short layover, terminal change involved → Check the airport’s official website for inter-terminal transit times, not any third-party app.

    The biggest meta-lesson here? Airport transfer planning rewards specificity. The more precisely you know your terminal, arrival time, luggage situation, and destination neighborhood — the better your decision will be. Generic advice (“just take a taxi” or “the subway is fine”) fails the moment your conditions don’t match the assumption baked into that advice.

    And one thing that doesn’t get said enough: always have a backup. Know the name of the rail line, have a ride-hailing app pre-installed with payment set up, and screenshot your transfer booking confirmation with the driver’s number before you board your flight. Your roaming data may not kick in immediately on landing.

    💬 Have you had a transfer situation go sideways at a major airport? Drop your story in the comments — the more specific the airport and terminal, the more useful it is for everyone reading this in 2025.


    📚 관련된 다른 글도 읽어 보세요

    태그: airport transfer, Incheon airport, travel tips 2025, airport shuttle, private transfer, layover guide, airport rail

  • 2026년 기준 비교해보니 진짜 되는 건 이것뿐 — AI 코딩 어시스턴트 실전 비교 (Cursor vs Copilot vs Cline)

    지난달에 팀 막내가 슬랙으로 메시지를 보내왔어요. “선배, 저 Cursor 쓰다가 Copilot으로 갈아탔는데 왜 더 별로인 것 같죠?” 솔직히 이 질문 받고 잠깐 멈췄습니다. 저도 한 3개월간 세 가지를 번갈아 쓰면서 실제로 체감한 게 있거든요. 블로그 포스팅 하나, 기업 API 연동 프로젝트 하나, 그리고 사이드 프로젝트 하나. 이 세 개에서 나온 데이터가 꽤 솔직한 그림을 그려줬습니다.

    결론부터 말하면 “AI 코딩 도구 하나면 다 된다”는 말은 반만 맞아요. 상황에 따라 쓰는 도구가 달라야 하고, 잘못 고르면 오히려 생산성이 떨어집니다. 특히 2026년 현재 모델 업데이트가 워낙 빠르게 진행되고 있어서, 작년 리뷰들은 이미 절반은 틀린 정보예요.

    AI coding assistant comparison, developer productivity tools 2026

    • 🔥 세 도구의 핵심 차이 — 스펙 표로 한 번에 정리
    • 💸 실제 비용 vs 체감 효율 — 월 XX달러가 아깝지 않으려면
    • 🛠️ 실전 사용 시나리오별 승자 — 유형별 추천
    • 😤 3개월 쓰면서 만난 실제 에러와 삽질 기록
    • 🚫 절대 하지 말아야 할 실수 체크리스트
    • ❓ FAQ — 진짜 많이 물어보는 것들만

    세 도구 핵심 스펙 비교 — 숫자로 보는 차이

    2026년 기준으로 세 도구를 동일한 환경(M3 MacBook Pro, VSCode 기반, Python + TypeScript 혼용 프로젝트)에서 테스트했습니다. 단순한 자동완성 속도부터 컨텍스트 윈도우 처리 능력까지, 체감이 아닌 수치로 비교했어요.

    항목 Cursor Pro GitHub Copilot Individual Cline (VSCode 확장)
    월 비용 (2026 기준) $20/월 $10/월 API 사용량 기반 (평균 $5~25)
    기반 모델 Claude 3.5 Sonnet / GPT-4o 선택 GPT-4o (Copilot 전용 파인튜닝) 사용자가 모델 직접 지정 (Claude, GPT, Gemini 등)
    컨텍스트 윈도우 최대 200K 토큰 (Claude 기준) 약 64K 토큰 선택 모델에 따라 최대 200K+
    Codebase 전체 인덱싱 ✅ (자동) △ (제한적) ✅ (수동 설정 필요)
    멀티파일 편집 ✅ Composer 기능 △ (단일 파일 중심) ✅ (에이전트 모드)
    터미널 명령 실행 △ (제한적) ✅ (자동 실행 가능)
    오프라인/로컬 모델 지원 ✅ (Ollama 연동)
    VSCode 호환성 Fork (별도 설치) ✅ 플러그인 ✅ 플러그인
    학습 곡선 중간 낮음 높음

    표만 봐도 느낌 오시죠? Copilot은 진입장벽이 낮고, Cursor는 균형이 잡혀 있고, Cline은 유연하지만 세팅이 필요합니다.

    Cursor IDE interface screenshot, GitHub Copilot coding autocomplete

    실제 비용 대비 효율 — 월 10달러가 아깝지 않으려면

    제가 3개월간 추적한 데이터 기준으로 이야기할게요. 프로젝트 유형은 ①블로그 자동화 스크립트(Python, 약 2000줄), ②B2B SaaS API 연동(TypeScript + Node.js, 약 8000줄), ③개인 사이드 프로젝트(React + FastAPI, 약 5000줄)입니다.

    Cursor Pro ($20/월): 대형 코드베이스에서 압도적입니다. 8000줄 프로젝트에서 기존에 1.5시간 걸리던 리팩터링 작업이 25분으로 줄었어요. Composer 기능으로 여러 파일을 한 번에 수정할 때 특히 강력함. 단, 처음 3일은 세팅과 인덱싱에 시간이 걸립니다. 시간당 절약 효과 환산 시 개발자 기준 월 60만 원 이상의 효율이 나왔어요(주니어 기준 시급 3만 원, 월 20시간 절약 계산).

    GitHub Copilot ($10/월): 솔직히 소규모 프로젝트나 단순 반복 코드에서는 여전히 빠릅니다. 그런데 컨텍스트가 길어지면 한계가 뚜렷해요. 64K 토큰 제한에서 대형 파일을 참조하면 “파일 잘림” 현상이 발생하고, 이때 엉뚱한 코드를 자신 있게 제안하는 경우가 꽤 됩니다. 소규모 혼자 하는 프로젝트라면 비용 대비 가장 합리적.

    Cline (API 종량제): 월 평균 $8~12 정도 나왔는데, 모델을 Claude 3.5 Sonnet으로 고정했을 때입니다. GPT-4o Turbo로 바꾸면 조금 더 나오고요. 에이전트 모드에서 터미널까지 자동으로 돌려주는 건 확실히 신기한데, 주의: 아무 생각 없이 “yes” 누르다간 로컬 파일 날아가는 경험 한 번은 합니다. 실제로 저도 .env 파일 덮어쓰기 당했어요. 이건 아래 실수 목록에 다시 언급할게요.

    실전 시나리오별 추천 — 이 상황이라면 A, 저 상황이라면 B

    결국 중요한 건 내 상황에 맞는 도구를 고르는 거잖아요. 유형별로 정리했습니다.

    상황 추천 도구 이유
    코딩 입문자 / 학습 목적 GitHub Copilot 설치 쉽고 VSCode 안에서 바로 작동, 방해 최소화
    스타트업 / 중규모 코드베이스 (5000줄+) Cursor Pro Codebase 인덱싱 + Composer로 멀티파일 작업 월등
    보안 민감 기업 / 온프레미스 환경 Cline + Ollama (로컬 모델) 코드가 외부 서버로 안 나감, 로컬 모델 연동 가능
    자동화 에이전트 / 반복 배치 작업 Cline 터미널 명령 자동 실행, 파일 시스템 접근 가능
    프리랜서 / 비용 최소화 Cline (저렴한 모델 조합) Gemini Flash 등 저가 모델 사용 시 월 $3 이하도 가능
    팀 단위 협업 (PR 리뷰 포함) GitHub Copilot Enterprise GitHub 생태계와 통합, PR 자동 요약 기능

    3개월 삽질 기록 — 에러 코드와 실제 원인

    좋은 것만 얘기하면 광고글이죠. 직접 겪은 삽질들 솔직하게 씁니다.

    [Cursor] Composer에서 “Context window exceeded” 발생: 파일이 많은 프로젝트에서 @codebase 명령어를 너무 넓은 범위로 걸면 발생해요. 해결책은 .cursorignore 파일에 node_modules, .git, dist, build 폴더를 명시적으로 제외해야 합니다. 공식 문서에는 이게 자동으로 제외된다고 나와 있지만, 실제로는 일부 환경에서 인덱싱 대상에 포함되어서 컨텍스트를 잡아먹더라고요. 설정 안 하면 “Max context length” 에러 발생하고 응답이 중간에 잘립니다.

    [Copilot] TypeScript strict 모드에서 엉뚱한 타입 추론: tsconfig.json에 strict: true로 해놓으면 Copilot이 제안하는 코드의 약 30%는 타입 오류를 발생시킵니다. 특히 제네릭 타입 처리나 null 체크 부분에서 자주 발생해요. 이건 도구 문제라기보다는 파인튜닝 데이터 한계인데, 어쨌든 그대로 복붙하면 빌드 에러납니다.

    [Cline] 에이전트 모드에서 .env 파일 덮어쓰기: 앞서 언급한 그 사건이에요. Cline이 환경 변수 설정을 자동화하는 과정에서 기존 .env 파일을 확인 없이 덮어쓰는 경우가 있습니다. 특히 “프로젝트 초기 세팅” 관련 프롬프트를 주면 발생 빈도가 높아요. 해결책: Cline 설정에서 “Always allow write files” 옵션을 OFF로 놓고, 민감 파일은 별도로 .clineignore에 추가할 것.

    절대 하지 말아야 할 실수 — 구매/설치 전 체크리스트

    • 🚫 AI가 생성한 코드를 테스트 없이 프로덕션에 올리지 말 것 — 어떤 도구든 마찬가지. 특히 보안 관련 코드(인증, 암호화)는 반드시 직접 리뷰.
    • 🚫 Cursor를 깔고 VSCode 플러그인도 그대로 두지 말 것 — Copilot 플러그인이 함께 켜져 있으면 자동완성이 충돌나서 IDE 자체가 느려집니다. 둘 중 하나만 켜세요.
    • 🚫 Cline 에이전트 모드에서 민감한 파일 경로 열어두지 말 것 — .env, secrets/, credentials/ 같은 폴더는 .clineignore에 반드시 추가.
    • 🚫 “이 도구 쓰면 코드 공부 안 해도 된다”는 착각 금물 — AI가 틀린 코드를 자신감 있게 내놓을 때 걸러낼 능력이 없으면 오히려 버그 양산 머신이 됩니다.
    • 처음엔 꼭 무료 플랜/트라이얼로 2주 써볼 것 — Cursor는 14일 무료 트라이얼, Copilot은 30일 무료. 내 프로젝트에 맞는지 직접 확인 후 결제하세요.
    • 팀으로 쓴다면 Enterprise 플랜 비용 먼저 계산 — 개인 플랜을 여러 명이 쓰는 건 ToS 위반. Copilot Enterprise는 $39/인/월이라 인원 많으면 부담됩니다.
    • Cline 사용 전 API 비용 한도 설정 필수 — OpenAI, Anthropic 대시보드에서 월 한도를 걸어두지 않으면 에이전트 루프가 돌다가 API 비용 폭탄 맞을 수 있음.

    FAQ — 진짜 많이 물어보는 것들만

    Q1. Cursor랑 Copilot 동시에 써도 되나요?

    기술적으로는 가능하지만 권장하지 않아요. Cursor는 VSCode Fork라 별도 앱이고, Copilot은 VSCode 플러그인입니다. 같은 프로젝트를 두 개에서 동시에 열면 인덱싱이 충돌할 수 있고, 특히 Cursor에서 Copilot 플러그인을 활성화하면 자동완성이 두 개 뜨면서 IDE가 버벅거립니다. 하나만 선택하는 게 맞고, 저라면 2026년 기준 대부분의 시나리오에서 Cursor를 선택합니다.

    Q2. 코드가 외부 서버로 유출되는 거 아닌가요? 보안이 걱정됩니다.

    실제로 기업에서 가장 많이 묻는 질문이에요. Cursor와 Copilot 모두 사용자 코드를 AI 처리 목적으로 서버에 전송합니다. Cursor는 Privacy Mode를 켜면 코드를 로그로 남기지 않겠다고 하지만, 완전한 로컬 처리는 아니에요. 보안이 최우선이라면 Cline + Ollama로 로컬 모델을 구성하는 게 유일한 완전 로컬 옵션입니다. 단, 로컬 모델의 코딩 품질은 클라우드 모델 대비 아직 60~70% 수준이라는 점은 인지하고 선택하세요.

    Q3. AI 코딩 도구 쓰면 주니어 개발자가 성장을 못 하는 거 아닌가요?

    이건 진짜 중요한 질문이에요. 솔직히 말하면 “어떻게 쓰느냐”에 따라 완전히 달라집니다. AI가 짜준 코드를 그냥 복붙만 하면 당연히 실력이 안 늡니다. 반면, AI가 생성한 코드를 읽고 “왜 이렇게 짰지? 이 패턴이 뭐지?” 하고 분석하는 용도로 쓰면 오히려 시니어 코드 스타일을 빠르게 습득할 수 있어요. 도구가 문제가 아니라 사용 습관이 문제입니다. 입문자라면 AI 없이 먼저 작성해보고, 그다음 AI 버전과 비교해보는 방식을 추천해요.

    결론 — 한 줄 평과 추천 정리

    2026년 현재, AI 코딩 도구 시장은 이미 “있냐 없냐”가 아니라 “어떤 걸 어떻게 쓰느냐”의 싸움으로 넘어왔어요. 세 도구 모두 1년 전보다 훨씬 좋아졌고, 잘 쓰면 확실히 생산성이 올라갑니다.

    📌 최종 한 줄 평:

    • Cursor Pro — “비싸다고 생각했는데 쓰고 나니 제일 싸다”
    • GitHub Copilot — “아직도 가볍게 쓰기엔 최고, 근데 대형 프로젝트에서 한계 명확”
    • Cline — “덕후들의 도구. 세팅할 줄 알면 최강, 모르면 폭탄”

    솔직하게 한마디 드리자면: 지금 당장 시작 못 하겠다는 분들, 6개월 뒤에 시작하면 그때는 주변 동료들이 이미 당신보다 몇 배 빠르게 달리고 있을 거예요. 이건 선택이 아닌 흐름입니다. 트라이얼 기간에 직접 써보고 판단하세요.

    독자 여러분께 드리는 현실적인 조언: AI 도구를 잘 쓰는 개발자가 잘 못 쓰는 개발자를 대체하는 시대, 이미 시작됐습니다. 도구를 거부하는 것도 선택이지만, 그 선택의 결과는 본인이 책임져야 해요.


    📚 관련된 다른 글도 읽어 보세요

    태그: AI코딩어시스턴트, Cursor vs Copilot, Cline 사용법, 개발자생산성, GitHub Copilot 2026, AI개발도구비교, 코딩자동화

  • Why I Stopped Recommending Generic Plans — Real Medicare Supplement Insurance Guide 2025

    A neighbor of mine — retired teacher, sharp as a tack — called me last spring completely overwhelmed. She’d just gotten off a two-hour phone call with an insurance broker and still couldn’t tell me the difference between Plan G and Plan N, or why her premium quotes ranged from $89 to $312 per month for what she assumed was ‘the same thing.’ Sound familiar? That conversation is honestly why I dove headfirst into Medicare Supplement insurance research this year, and what I found surprised even me.

    Let’s untangle this together, because Medicare Supplement (also called Medigap) is one of those topics where a small misunderstanding can cost you thousands of dollars — or leave you with surprise bills at exactly the wrong moment in life.

    Medicare supplement insurance plan comparison chart, senior healthcare coverage

    What Medicare Supplement Insurance Actually Covers (And What It Doesn’t)

    First, a quick grounding point for anyone new to this: Original Medicare (Parts A and B) covers a lot, but it leaves real gaps. We’re talking about the Part A deductible of $1,676 per benefit period in 2025, a Part B deductible of $257 per year, and — critically — 20% coinsurance on most outpatient services with no out-of-pocket maximum. That last part is the one that catches people off guard. A $200,000 hospital stay? You could owe $40,000+ under Original Medicare alone.

    Medicare Supplement plans are sold by private insurers but standardized by the federal government (in most states). That means a Plan G from Aetna covers the exact same benefits as a Plan G from Mutual of Omaha — only the premium and customer service differ. This is the single most important concept to internalize before you shop.

    The 2025 Plan Landscape: Which Plans Are Actually Worth Considering

    As of 2025, Plans C and F are no longer available to people who became eligible for Medicare on or after January 1, 2020. If you see someone pushing Plan F to a new enrollee, that’s a red flag. Here are the plans that dominate real-world enrollment right now:

    • Plan G (Most Popular for New Enrollees): Covers everything Plan F covered except the Part B deductible ($257/year). For most people, this is the math winner — especially if your Plan G premium is less than $257/year cheaper than a comparable Plan F from the same insurer.
    • Plan N: Lower premium than Plan G, but you pay up to $20 per office visit and up to $50 per ER visit (waived if admitted). Also doesn’t cover Part B excess charges — relevant if you see non-participating Medicare providers.
    • High-Deductible Plan G (HDG): You pay a deductible of $2,870 in 2025 before benefits kick in. Premiums can be as low as $30–$50/month. This is genuinely worth considering for healthy 65-year-olds with savings to self-insure the deductible.
    • Plan K and Plan L: Cost-sharing hybrid plans with lower premiums but partial coverage. Honestly, these are harder to justify unless budget is an absolute constraint.
    • Plan A: The bare-bones option. Covers hospital coinsurance and Part B coinsurance only. Rarely recommended given the premium-to-coverage ratio when Plan N exists.

    Why Your Zip Code Matters More Than You Think

    Here’s something brokers don’t always lead with: premiums for the identical standardized plan vary dramatically by state, county, and even zip code. A 65-year-old non-smoking female in Tampa, Florida might pay around $115–$145/month for Plan G in 2025, while the same demographic in rural Montana might pay $165–$210/month. Urban vs. rural, state insurance regulations, and the competitive density of carriers in your area all affect pricing.

    Three states — Massachusetts, Minnesota, and Wisconsin — have their own standardization systems entirely different from the federal model. If you’re in one of those states, the plan names and structures don’t map to what I’m describing here. Always verify locally.

    How Insurers Price Plans: Community, Issue-Age, and Attained-Age Rating

    This is where the long-term math gets genuinely tricky, and where a lot of people make expensive mistakes focusing only on today’s premium:

    • Community-rated: Everyone in a geographic area pays the same premium regardless of age. Premiums can still rise due to inflation and claims experience, but age itself isn’t a factor. Common in New York and Connecticut (which mandate it).
    • Issue-age rated: Your premium is locked based on your age when you first enroll and doesn’t increase just because you get older — though inflation adjustments still occur. Generally favorable if you enroll young and stay with the plan.
    • Attained-age rated: Premiums increase as you age, in addition to general rate increases. These plans often have the lowest entry premiums but can become significantly more expensive by your 70s and 80s. Most plans sold in most states fall into this category.

    My personal take: if you’re shopping at 65 and plan to stay on a Medigap plan long-term, pay close attention to the rating methodology and the insurer’s historical rate increase track record — not just today’s quote.

    Medicare insurance premium comparison, senior reviewing healthcare paperwork

    Real-World Case Studies: What People Are Actually Doing in 2025

    I’ve been tracking this through a combination of CMS enrollment data, state insurance commissioner filings, and conversations within Medicare planning communities. Here’s what the data and anecdotes look like on the ground:

    Case 1 — The Frequent Traveler (Plan G): A 67-year-old retired engineer in Arizona who travels domestically several months per year chose Plan G specifically because it covers Part A and B coinsurance without per-visit copays. He sees multiple specialists annually. His premium: $142/month with Cigna Healthspring. His reasoning: predictable costs beat variable copays given his utilization pattern. Over 12 months, he had zero out-of-pocket surprise bills.

    Case 2 — The Healthy Minimizer (HDG Plan G): A 65-year-old in North Carolina, non-smoker, rarely uses healthcare, chose High-Deductible Plan G at $44/month through Mutual of Omaha. In two years, she hasn’t hit her deductible once. She puts the premium savings (~$80–100/month vs. standard Plan G) into a dedicated health savings fund. This is essentially self-insuring the gap — smart if you have the financial cushion and health history to support it.

    Case 3 — The Cost-Conscious Retiree (Plan N): A 68-year-old in Florida switched from Plan G to Plan N when her Plan G premium jumped 9% in a renewal cycle. She pays $20 per office visit now but her premium dropped $38/month. She ran the numbers: she’d need more than 2 specialist visits per month just to break even on the switch. She averages one visit per month. Net result: she’s saving money.

    Red Flags When Shopping for Medicare Supplement Plans

    • Brokers pushing Medicare Advantage instead of Medigap without explaining the differences: These are fundamentally different products. Medicare Advantage has networks; Medigap does not (you can see any Medicare-accepting provider nationwide). Brokers are sometimes incentivized by commission structures.
    • Quotes without disclosing the rating methodology: If someone gives you a quote and doesn’t tell you whether it’s attained-age, issue-age, or community-rated, ask directly.
    • Waiting past your Open Enrollment Period to apply: During the 6-month window starting when you’re 65 and enrolled in Part B, insurers cannot deny you or charge you more for pre-existing conditions. After that window, underwriting applies in most states — and common conditions like diabetes or heart disease can lead to denial or surcharges.
    • Assuming the cheapest plan today is cheapest over 10 years: Rate history matters. Use your state’s SHIP (State Health Insurance Assistance Program) counselor — they’re free, unbiased, and have access to insurer rate increase history that’s not easy to find publicly.

    Tools and Resources Worth Bookmarking

    For direct, no-commission guidance, these are genuinely useful:

    • Medicare.gov Plan Finder: The official tool for comparing Medigap premiums in your zip code. Updated regularly with 2025 data.
    • SHIP (State Health Insurance Assistance Program): Free one-on-one counseling. Find your local contact at shiphelp.org. Seriously underutilized and incredibly helpful.
    • Your state’s Department of Insurance website: Most states publish insurer rate increase history. In Florida, for instance, you can look up approved rate changes by carrier going back years — invaluable for long-term premium forecasting.
    • NAIC’s Medigap comparison tool: The National Association of Insurance Commissioners publishes standardized comparison guides that break down exactly what each plan covers.

    If Budget Is the Real Constraint: Realistic Alternatives

    Not everyone can afford $150+/month in Medigap premiums, especially on a fixed income. Some realistic paths forward if that’s your situation:

    • Medicare Advantage (Part C): Often $0 premium plans exist in many markets. Trade-off is network restrictions, prior authorizations, and potential higher out-of-pocket costs if you get seriously ill. Not automatically worse — just different. If your situation is ‘healthy, local, and on a tight budget,’ this might be the right call. If your situation is ‘complex medical needs or frequent specialist care,’ Medigap likely pays off.
    • High-Deductible Plan G: As mentioned above, dramatically lower premiums with the same catastrophic coverage ceiling. Worth modeling carefully against your health history and savings.
    • Medicare Savings Programs (MSPs): If your income qualifies, these state-federal programs can pay your Part B premium, deductibles, and coinsurance directly. Many eligible people never apply. Check eligibility at benefits.gov or through your SHIP counselor.

    The honest bottom line: Medicare Supplement insurance isn’t a product you should buy on autopilot or based on a single broker’s recommendation. The standardization is genuinely your friend — use it. Compare the same plan letter across at least 4–5 carriers in your zip code, ask about rating methodology and rate history, and don’t skip your state’s free SHIP counseling resource. The difference between a well-chosen plan and a poorly chosen one, compounded over 15–20 years of retirement, can easily run into tens of thousands of dollars.

    One last thought worth sitting with: The best Medicare Supplement plan isn’t the one with the prettiest brochure or the most enthusiastic broker — it’s the one that matches your actual health utilization patterns, your financial risk tolerance, and your ability to sustain premiums long-term. Run your own numbers, use the free resources available to you, and don’t let urgency or confusion push you into a decision you haven’t thought through. Your 75-year-old self will thank you.


    📚 관련된 다른 글도 읽어 보세요

    태그: Medicare supplement insurance, Medigap plans 2025, Plan G vs Plan N, Medicare coverage gaps, senior health insurance, Medicare open enrollment, Medigap premium comparison

  • Why I Almost Gave Up on Python Virtual Environments — Real 2025 Setup Guide

    A friend of mine — a data analyst who’d been using Python for years — called me last month in a minor panic. She’d just spent an entire afternoon chasing a ModuleNotFoundError that made zero sense, only to realize her scripts were pointing at three different Python installations simultaneously. Sound familiar? Virtual environments are one of those things Python tutorials mention once and then immediately gloss over, leaving you to discover the chaos on your own. Let’s actually fix that.

    Python virtual environment setup terminal, Python venv workflow diagram

    Why Your Python Setup Is Probably a Mess (And It’s Not Your Fault)

    Here’s the uncomfortable truth: a default Python installation on any operating system in 2025 is basically a ticking dependency time bomb. On macOS, you’ve got the system Python at /usr/bin/python3 (which Apple deliberately keeps hobbled), then whatever Homebrew installed at /opt/homebrew/bin/python3, and maybe a Conda environment on top. On Windows, the Microsoft Store version and the direct installer version coexist with entirely different PATH entries. Linux has it slightly cleaner — but distro-managed Python packages and pip-installed packages can still collide badly.

    The root cause is almost always the same: packages installed globally with pip install something bleed across every project. Project A needs requests==2.28 and Project B needs requests==2.31? Without isolation, exactly one of them breaks — and the error messages rarely tell you why.

    venv vs. virtualenv vs. Conda vs. Poetry — Picking the Right Tool in 2025

    Let’s be concrete about what each tool actually does, because the naming is genuinely confusing:

    • venv — Built into Python 3.3+. Zero installation required. Creates a lightweight isolated directory with its own pip and site-packages. Best for: simple scripts and standard packages. Command: python3 -m venv .venv
    • virtualenv — Third-party, older than venv, but still faster to create environments (especially on Windows). Supports Python 2 legacy projects. Command: pip install virtualenv && virtualenv .venv
    • Conda / Miniconda — Manages non-Python dependencies too (C libraries, CUDA versions). Indispensable for data science and ML. In 2025, Miniforge (community-maintained, ARM-native) is generally preferred over the official Miniconda installer. Benchmark: conda env creation takes ~8–15 seconds for a fresh numpy+pandas stack vs. ~4–6 seconds with venv for pure-Python packages.
    • Poetry — Handles both environment creation AND dependency locking in one tool. pyproject.toml-based. If you’re building a package or collaborating on a team, this is arguably the 2025 standard. Caveat: the resolver can be slow on complex dependency trees — I’ve seen it hang for 45+ seconds on a project with 60+ transitive dependencies.
    • uv — The newcomer worth knowing. Built by Astral (the team behind Ruff), written in Rust, and blindingly fast. uv venv creates an environment in under a second. uv pip install numpy pandas scikit-learn completes in ~3 seconds vs. ~18 seconds with standard pip on the same machine. It’s still maturing, but if you’re on a modern project, it’s worth evaluating.

    The Actual Setup Walkthrough (No Hand-Waving)

    Let’s do this properly for the most common case: a fresh project using plain venv on any OS.

    Step 1 — Verify which Python you’re actually invoking:
    which python3 (macOS/Linux) or where python (Windows CMD)
    If the path includes something like AppData\Local\Microsoft\WindowsApps on Windows, that’s the Store stub — it’ll redirect installs to weird places. Use the direct-installed version instead.

    Step 2 — Create the environment inside your project folder:
    python3 -m venv .venv
    The dot prefix (.venv) hides it from casual ls listings and is recognized automatically by VS Code, PyCharm, and most modern editors as the project environment.

    Step 3 — Activate it:
    macOS/Linux: source .venv/bin/activate
    Windows PowerShell: .venv\Scripts\Activate.ps1
    If you get running scripts is disabled on this system on Windows, run Set-ExecutionPolicy -ExecutionPolicy RemoteSigned -Scope CurrentUser once. This is the single most common blocker I see beginners hit.

    Step 4 — Confirm isolation is working:
    which pip should now point inside .venv/bin/pip, not the global pip. If it doesn’t, the activation didn’t take — recheck your shell config.

    Step 5 — Freeze your dependencies properly:
    pip freeze > requirements.txt works but captures everything, including transitive dependencies, which creates bloated lockfiles. A better habit in 2025: use pip-tools (pip install pip-tools), write a minimal requirements.in with only your direct dependencies, then run pip-compile to generate a clean, reproducible requirements.txt.

    Real-World Case: The CUDA Version Collision That Breaks ML Projects

    This is worth its own section because it trips up so many people. PyTorch and TensorFlow both ship with bundled CUDA binaries — but they need to match your actual NVIDIA driver version. In late 2024 through 2025, NVIDIA driver 550.x+ supports CUDA 12.4, but PyTorch 2.2’s default pip wheel bundles CUDA 11.8. The result: RuntimeError: CUDA error: no kernel image is available for execution on the device — one of the most-Googled ML errors of the past year.

    The fix isn’t obvious: you need to install the CUDA 12.x specific wheel. On the PyTorch website’s install configurator, select “CUDA 12.1” (or your driver-appropriate version) rather than the default. The pip command changes to something like:
    pip install torch torchvision --index-url https://download.pytorch.org/whl/cu121
    This is exactly why having a clean virtual environment per project matters — it lets you surgically fix one project’s CUDA wheel without disturbing anything else.

    CUDA version compatibility chart, PyTorch installation configuration

    What the Pros Do Differently

    Looking at open-source Python projects on GitHub in 2025, a few patterns stand out among well-maintained repositories:

    • .python-version file — Works with pyenv to auto-switch Python versions when you cd into a project directory. A single line like 3.12.3 in this file means every contributor gets the same interpreter automatically.
    • .venv in .gitignore (always) — Seems obvious, but I still see PRs that accidentally commit hundreds of megabytes of virtual environment files. Add .venv/ and venv/ to your .gitignore on day one.
    • Makefile targets for environment setup — A simple make setup target that runs python3 -m venv .venv && source .venv/bin/activate && pip install -r requirements.txt reduces onboarding time for new team members from 30 minutes to 30 seconds.
    • Pre-commit hooks with environment activation — Tools like pre-commit (pre-commit.com) can enforce linting and type checking inside the correct environment on every commit, catching import errors before they hit CI.

    If Plain venv Isn’t Enough: When to Reach for Poetry or uv

    If your situation is “I’m building a package that other people will pip-install”, reach for Poetry. Its pyproject.toml handles package metadata, dependencies, and environment in one place — exactly what PEP 517/518 intended. The tradeoff is a steeper learning curve and that dependency resolver lag mentioned earlier.

    If your situation is “I need raw speed in CI/CD pipelines or I’m managing dozens of projects locally”, uv is worth the experiment right now. Astral’s benchmarks show 10–100x faster installs than pip in common scenarios, and the API is intentionally pip-compatible, so migration is low-risk.

    If your situation is “I work in data science or ML and my dependencies have C/Fortran/CUDA components”, Conda (specifically Miniforge on ARM Macs) remains the most reliable path. The package solver knows about binary compatibility in ways pip simply doesn’t.

    One last thought worth sitting with: virtual environments aren’t really about Python at all — they’re about making your future self’s debugging sessions shorter and your colleagues’ onboarding less miserable. The 3 minutes you spend setting one up properly at the start of a project will pay back dozens of times over. Start with python3 -m venv .venv, activate it, commit a clean .gitignore, and everything else flows from there. And if you hit a wall with CUDA wheels or Poetry’s resolver — now you know exactly where to look.


    📚 관련된 다른 글도 읽어 보세요

    태그: Python virtual environment, venv setup guide, Python dependency management, pip install best practices, Poetry Python, uv package manager, Conda vs venv

  • 연봉 3억 강남 치과 원장도 헷갈린다는 법인 vs 개인 세금 차이 — 2026년 기준 진짜 절세 전략

    얼마 전 치과 원장 하는 친구한테 카톡이 왔어요. “야, 나 이번 달 세금 폭탄 맞았어. 법인 전환하면 진짜 유리해?” 연봉으로만 3억 넘게 가져가는 친구인데, 세금 내고 나면 실제로 손에 쥐는 돈이 생각보다 훨씬 적다고 하더라고요. 세금 공부 좀 해봤다는 사람들도 막상 본인 케이스에 적용하려면 헷갈리는 부분이 많거든요. 이 글은 그 친구한테 설명해줬던 내용을 기반으로, 2026년 세법 기준으로 정리한 ‘실전 절세 가이드’입니다. 세무사 상담 전에 먼저 읽어두면 상담 퀄리티가 달라져요.

    tax strategy Korea, corporate vs personal tax comparison
    • 🔥 1. 개인 소득세 vs 법인세, 2026년 세율 실수치 비교
    • 💡 2. 법인 전환이 유리한 ‘손익분기’ 소득 구간은 어디?
    • 📊 3. 절세 효과 극대화하는 비용 처리 전략 (합법적인 것만)
    • ⚠️ 4. 법인 전환 후 반드시 알아야 할 함정들
    • 🛡️ 5. 국세청이 주목하는 위험 신호 TOP 5
    • ❓ FAQ: 자주 묻는 절세 질문 모음

    1. 개인 소득세 vs 법인세 — 2026년 세율 실수치 비교

    먼저 숫자부터 보죠. 말로만 “법인이 유리하다”고 하면 아무 의미 없어요.

    개인 종합소득세 세율 (2026년 기준)

    과세표준 구간 세율 누진공제액 실효세율 예시
    1,400만 원 이하 6% 약 6%
    1,400만 ~ 5,000만 원 15% 126만 원 약 11~14%
    5,000만 ~ 8,800만 원 24% 576만 원 약 18~22%
    8,800만 ~ 1억 5,000만 원 35% 1,544만 원 약 25~30%
    1억 5,000만 ~ 3억 원 38% 1,994만 원 약 31~34%
    3억 ~ 5억 원 40% 2,594만 원 약 35~38%
    5억 ~ 10억 원 42% 3,594만 원 약 38~41%
    10억 원 초과 45% 6,594만 원 약 41~44%

    여기에 지방소득세 10%가 추가로 붙어요. 즉, 최고 세율 구간에서는 49.5%까지 올라갑니다. 번 돈의 절반을 세금으로 낸다는 거예요.

    법인세 세율 (2026년 기준)

    과세표준 구간 세율 비고
    2억 원 이하 9% 중소기업 특례 적용 시
    2억 ~ 200억 원 19% 일반 법인
    200억 ~ 3,000억 원 21%
    3,000억 원 초과 24%

    법인세에도 지방소득세 10%가 붙지만, 최고 구간에서도 26.4% 수준이에요. 개인 최고 49.5%와 비교하면 차이가 어마어마하죠. 물론, 법인에서 개인으로 돈을 꺼낼 때 배당소득세나 근로소득세가 추가로 발생하기 때문에 단순 비교는 금물이지만, 그 부분은 아래에서 자세히 다룰게요.

    income tax bracket chart Korea 2026, tax rate comparison graph

    2. 법인 전환이 유리한 ‘손익분기’ 소득 구간

    결론부터 말하면, 연 순이익 1억 원을 넘어가는 시점부터 법인 전환을 진지하게 고려해야 해요. 그 이하 구간에서는 법인 운영 비용(회계 기장료, 세무신고 비용, 4대보험 등)이 세금 절감 효과를 상쇄해버리는 경우가 많거든요.

    예를 들어볼게요. 순이익 2억 원인 개인사업자 A씨와 법인 B사를 비교해봅시다.

    구분 개인사업자 A씨 법인 B사 (대표이사 급여 8,000만 원 설정)
    총 순이익 2억 원 2억 원
    세금 계산 기준 2억 원 전체에 소득세 급여 8,000만 원은 근로소득세, 법인 잔여이익 1.2억 원에 법인세
    세전 세금 부담 추정 약 5,600만 원 (지방세 포함) 급여 세금 약 1,200만 원 + 법인세 약 1,080만 원 = 약 2,280만 원
    절세 효과 약 3,300만 원 절세 (단, 배당 시 추가 과세 고려 필요)
    운영 추가 비용 낮음 연 300~500만 원 (기장료, 감사 등)

    물론 이건 단순화된 계산이고, 실제로는 건강보험료, 4대보험 사업주 부담분, 법인 설립 비용 등이 추가로 발생해요. 그래도 순이익 기준 1.5억 원 이상이면 법인 전환의 실질 이익이 뚜렷하게 나타나기 시작합니다.

    3. 합법적으로 세금 줄이는 비용 처리 전략

    이 부분이 핵심이에요. 법인이 개인사업자보다 훨씬 강력한 이유는 비용으로 인정받을 수 있는 항목의 범위가 넓기 때문이에요.

    법인 대표이사가 합법적으로 비용 처리 가능한 주요 항목

    • 대표이사 급여: 법인 입장에선 비용, 개인은 근로소득공제 적용 → 이중 절세 효과
    • 업무용 차량 리스/렌트: 연 1,500만 원 한도 내 전액 비용 인정 (운행일지 작성 시 초과분도 일부 인정)
    • 임직원 퇴직연금(DB/DC형): 납입액 전액 비용 처리, 퇴직 시 세금 분산 효과까지
    • 복리후생비: 직원 회식, 교육비, 건강검진 비용 등
    • 법인 신용카드 사용 내역: 업무 관련성 입증 시 비용 처리 가능
    • 연구개발비 세액공제: 기술 기반 업종은 R&D 비용의 최대 25% 세액공제 가능
    • 대표이사 주택 임차 비용: 법인 명의 임차 후 대표이사 사택으로 사용 시 비용 처리 가능 (조건 충족 시)

    ⚠️ 단, ‘업무 관련성’이 없는 항목을 비용 처리했다가 세무조사에서 적발되면, 비용 불인정 + 가산세 + 소득세 추징 3연타를 맞아요. 실제로 2023~2024년 국세청 세무조사에서 법인 대표이사의 개인 골프 비용, 가족 여행비, 자녀 학원비를 법인 비용으로 처리한 사례가 대거 적발됐습니다.

    4. 법인 전환 후 반드시 알아야 할 함정들

    법인이 만능인 것처럼 이야기하는 유튜버나 블로거들이 많은데, 솔직히 단점도 꽤 있어요.

    함정 구체적 내용 대응 방법
    이중과세 문제 법인세 납부 후 배당 시 배당소득세 15.4% (금융소득 2,000만 원 초과 시 종합과세) 추가 발생 급여 + 배당 비율 최적화, 퇴직금 활용
    건강보험료 급증 개인사업자는 소득 기반, 법인 대표는 급여 기반으로 건보료 책정 → 급여 높이면 건보료도 증가 급여를 적정 수준으로 설정 (최저임금 이상 유지 필수)
    법인 자금 사적 유용 불가 법인 통장은 대표 개인 돈이 아님. 무단 인출 시 가지급금으로 처리 → 인정이자 과세 가지급금 발생 즉시 변제, 급여/배당으로 적법하게 출금
    청산 시 세금 폭탄 법인 해산 시 청산소득세 + 의제배당 과세로 예상보다 훨씬 많은 세금 발생 가능 장기적 관점에서 법인 설립 결정 필요
    운영 비용 고정 발생 매출 없어도 세무기장료 월 15~30만 원, 결산 비용 연 50~100만 원 등 고정 지출 매출 안정화 후 전환 검토

    5. 국세청이 주목하는 위험 신호 TOP 5

    아래 중 하나라도 해당된다면, 세무조사 대상이 될 가능성이 높아져요. 실제 세무사들이 클라이언트에게 당부하는 내용입니다.

    • 🚨 매출 급감 or 결손 반복: 3년 연속 적자인데 대표이사 고급 차량 리스비가 계속 비용 처리되고 있다면 의심 대상 1순위
    • 🚨 현금 매출 비율이 과도하게 낮음: 특히 음식점, 의원, 학원 등 현금 거래가 많은 업종에서 카드 매출만 100%라면 매출 누락 의심
    • 🚨 가지급금 잔액 지속 증가: 법인 자금을 대표이사가 개인적으로 빌려 쓰고 갚지 않는 상황 → 인정이자율(2026년 기준 연 4.6%) 적용 과세
    • 🚨 접대비 한도 초과: 중소기업 기준 연 3,600만 원 + 수입금액의 0.2% 초과분은 비용 불인정
    • 🚨 특수관계자 거래 부당 행위: 가족에게 시세보다 낮은 임금 지급 or 높은 임대료 지급 → 부당행위계산 부인 적용 가능

    국세청은 2026년부터 AI 기반 세무조사 타겟팅 시스템을 고도화하고 있어요. 카드사, 금융기관, PG사 데이터를 교차 분석해서 매출 누락이나 과다 비용 처리를 자동으로 탐지하는 방향으로 가고 있습니다. 예전처럼 “설마 걸리겠어?”는 통하지 않아요.

    절세 전략 실행 전 체크리스트

    • ✅ 현재 연 순이익이 1억 원을 넘는가?
    • ✅ 법인 운영 관련 고정 비용(기장료, 4대보험 등)을 감당할 수 있는가?
    • ✅ 법인 자금과 개인 자금을 철저하게 분리할 의지가 있는가?
    • ✅ 퇴직금, 배당, 급여 설계를 장기적으로 계획하고 있는가?
    • ✅ 업무 관련성을 입증하기 위한 증빙 자료(영수증, 계약서, 운행일지 등)를 체계적으로 보관하고 있는가?
    • ✅ 세무사/회계사와 정기적으로 소통하는 체계가 있는가?
    • ✅ 법인 전환 시 기존 개인사업자 폐업 절차 및 부가세 정산 이슈를 파악했는가?

    FAQ

    Q1. 프리랜서인데 연 수익 7,000만 원이에요. 법인 전환이 맞나요?

    솔직히 말씀드리면, 7,000만 원 수준에서는 법인 전환의 실익이 크지 않을 수 있어요. 이 구간은 개인사업자 상태에서 노란우산공제(연 최대 500만 원 소득공제), 개인형 IRP 납입(연 최대 900만 원 세액공제), 성실신고확인 대상이 아닌 경우 각종 필요경비 처리를 적극 활용하는 게 더 효율적이에요. 순이익 1억 원을 넘어가는 시점에 다시 검토해보세요.

    Q2. 배우자를 법인 직원으로 등록해서 급여 주는 거 괜찮나요?

    가능은 한데, 실제 업무를 수행해야 해요. 단순히 세금 분산 목적으로 배우자 명의로 급여를 지급하고 실질적인 근무 기록이 없다면, 부당행위계산 부인 대상이 될 수 있어요. 출퇴근 기록, 업무 지시서, 실제 업무 내용이 담긴 증빙이 반드시 필요합니다. 특히 2026년부터는 국세청이 특수관계자 고용 형태를 더 면밀히 들여다보고 있으니 주의하세요.

    Q3. 세무사 비용이 아까운데, 직접 세금 신고 해도 되나요?

    개인사업자 단순경비율 적용 대상이라면 홈택스에서 직접 신고 가능해요. 하지만 법인은 복식부기 의무에 세무조정 등 전문 영역이 많아서 직접 신고는 리스크가 커요. 세무사 기장 비용 월 15~30만 원을 아끼려다 수백만 원 가산세 맞는 경우를 저는 여러 번 봤어요. 세무사는 비용이 아니라 투자라고 생각하는 게 맞아요. 대신, 세무사를 선택할 때 단순 신고만 하는 곳이 아니라 절세 전략까지 같이 논의해주는 곳을 고르는 게 중요합니다.

    한 줄 평: 법인은 세금 줄이는 도구가 맞는데, 잘못 쓰면 오히려 더 큰 폭탄을 안고 가는 양날의 검입니다. 숫자 공부 없이 “법인 전환하면 무조건 유리하다”는 말만 듣고 진행했다가 낭패 보는 사례, 생각보다 정말 많아요.

    이 글이 도움됐다면 — 지금 당장 본인의 연 순이익 규모와 위의 체크리스트를 대조해보세요. 세무사 상담 전에 이 정도만 파악해도 상담의 깊이가 완전히 달라집니다. 절세는 아는 만큼 아끼는 게임이에요.


    📚 관련된 다른 글도 읽어 보세요

    태그: 법인세, 소득세절세, 법인전환, 절세전략2026, 세금줄이는법, 개인사업자법인전환, 세무조사대비