Author: likevinci

  • Why I Almost Gave Up on Garlic Bread — And What Changed Everything in 2025

    So a friend of mine texted me last week in full panic mode: ‘I’ve made garlic bread six times this month and it keeps coming out either soggy or burnt on the outside but raw in the middle. What am I doing wrong?’ And honestly? I laughed, because I had the exact same crisis about three years ago. Garlic bread sounds embarrassingly simple — bread, butter, garlic, heat — but the gap between okay garlic bread and transcendent garlic bread is wider than most people expect, and it comes down to a handful of very specific decisions.

    Let’s dig into this together, because garlic bread in 2025 is having a genuine moment. With sourdough culture still going strong and a renewed interest in ‘elevated comfort food,’ home cooks are pushing way beyond the foil-wrapped frozen loaf. And that means more room for both greatness and spectacular failure.

    homemade garlic bread golden crust, rustic bread butter garlic close-up

    The Science Behind Why Garlic Bread Goes Wrong

    Here’s the thing nobody tells you upfront: garlic bread failure almost always traces back to moisture management and fat distribution. Let’s break both down.

    The soggy problem happens when the bread’s internal moisture has nowhere to go. If you wrap a loaf tightly in foil for the entire baking time at, say, 180°C (350°F), you’re essentially steaming it. The butter melts, the garlic releases water, and the bread absorbs all of it. Result: soft exterior, mushy center, zero crust satisfaction.

    The burnt-outside-raw-inside problem is almost always an oven temperature issue paired with bread thickness. A baguette slice at 220°C (430°F) for 10 minutes will char on the exposed surface before the center even warms through — especially if it’s a dense, thick-cut loaf.

    The fix is a two-phase approach, which we’ll get to in a moment.

    Choosing the Right Bread: This Decision Matters More Than You Think

    In 2025, you’ve got more bread options than ever, but not all of them work equally well for garlic bread. Here’s how to think about it:

    • French baguette (classic choice): Thin crust, airy crumb, quick heat penetration. Best for crispy-edged, lighter garlic bread. Cut on a diagonal at about 2cm thickness.
    • Italian ciabatta: Larger air pockets, chewier texture. Holds butter beautifully and gives you a more substantial bite. Great for open-face style.
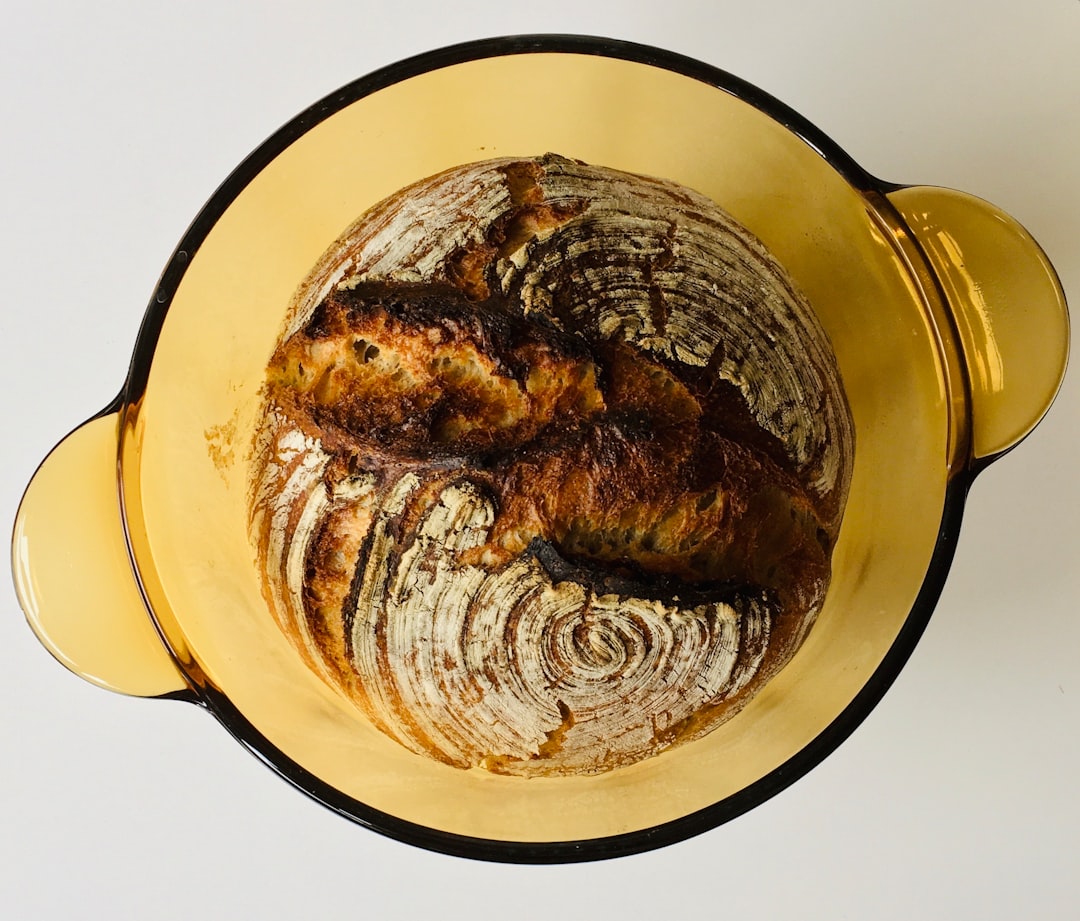
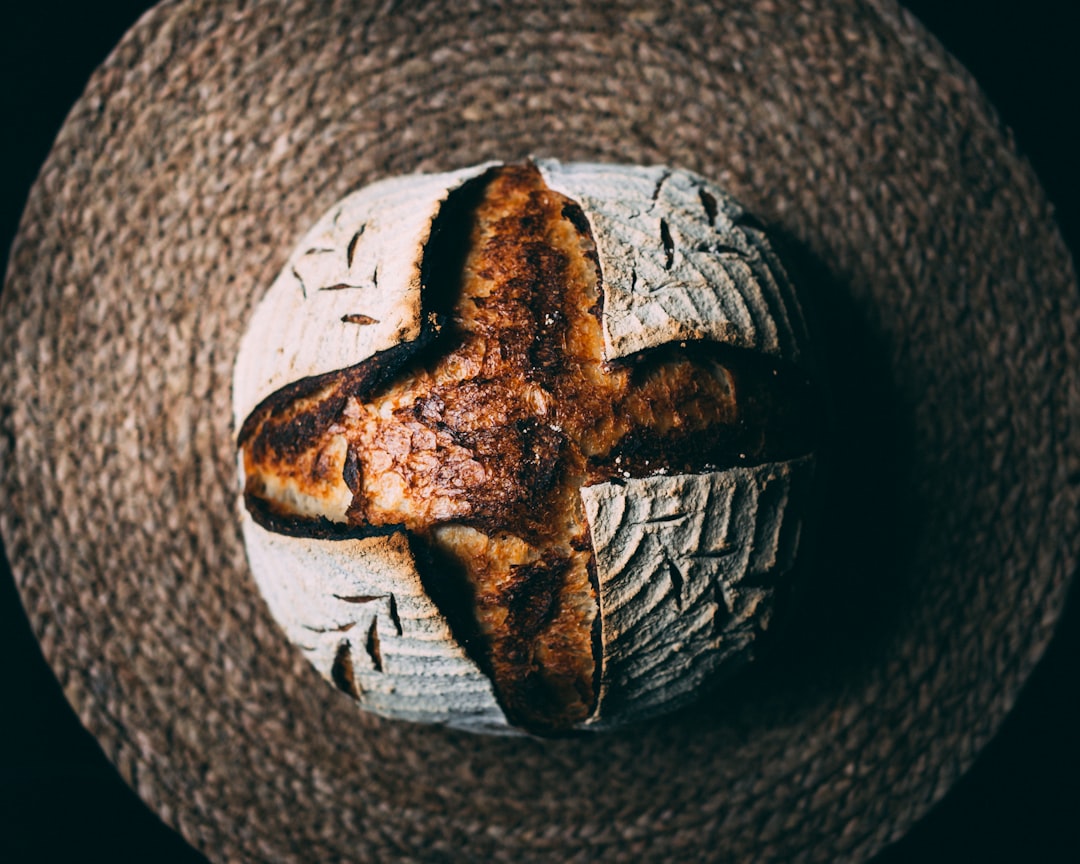
    • Sourdough loaf: The current frontrunner for ‘elevated’ garlic bread. The slight acidity plays beautifully against the richness of garlic butter. Slightly longer baking time needed due to denser crumb.
    • Brioche: Rich and buttery on its own — works well but can go overly sweet. Better suited for garlic bread served alongside something savory and bold like a braised dish.
    • Avoid: Pre-sliced sandwich bread. Too thin, too soft, turns into a garlic-flavored toast cracker within minutes. Not what we’re after.

    The Garlic Butter Formula — Where Most Recipes Cut Corners

    Standard garlic bread recipes will tell you: mix softened butter with garlic powder and parsley. And sure, that works at a baseline level. But here’s what the better approach looks like in 2025 kitchens:

    Raw garlic vs. roasted garlic vs. garlic powder: These are three completely different flavor profiles. Raw minced garlic is sharp and pungent — great if you want that aggressive hit, but it can turn bitter under high heat. Roasted garlic (a full head, roasted at 200°C for 40 minutes until golden and jammy) gives you a mellow, almost caramel sweetness. Garlic powder provides even distribution but lacks depth on its own.

    The winning combination that a lot of professional bakers use: roasted garlic as the base + a small amount of raw garlic for brightness + garlic powder for even coverage. The ratio roughly looks like this for one standard baguette:

    • 100g unsalted butter, softened to room temperature
    • 4-5 cloves roasted garlic, mashed into a paste
    • 1 small clove raw garlic, very finely minced (or microplaned)
    • ¼ tsp garlic powder
    • 2 tbsp fresh flat-leaf parsley, finely chopped
    • ½ tsp flaky sea salt (Maldon is widely available and worth it)
    • Optional: 1 tsp white miso paste — this is the 2025 upgrade that adds umami depth without being detectable as miso

    The miso trick, incidentally, has been circulating in food communities including Serious Eats and various Reddit cooking forums since late 2024, and it genuinely works. It rounds out the saltiness and adds a savory undertone that makes people ask ‘what IS that?’ in the best way.

    The Two-Phase Baking Method: Solving the Soggy-vs-Burnt Problem

    This is the technique shift that fixes 90% of garlic bread problems, and it’s dead simple once you understand the logic:

    Phase 1 — Covered, lower heat: Wrap your prepared loaf (with butter applied generously into cut surfaces) in foil. Bake at 180°C (350°F) for 15 minutes. This gently heats the bread through, melts the butter evenly, and allows the garlic flavors to infuse without scorching.

    Phase 2 — Uncovered, higher heat: Open the foil, fold it back to expose the cut surface, and crank the oven to 220°C (430°F) or switch to the broiler/grill setting. Give it 5-7 minutes. This is where the Maillard reaction happens — the sugars in the bread caramelize, the edges go golden-brown and slightly crispy, and you get that contrast between crunchy exterior and soft, buttery interior.

    The total time is only about 20-22 minutes, but the textural result is in a completely different league from the ‘dump it in at one temperature and hope’ method.

    garlic bread baking oven two phase method, garlic bread unwrapped foil golden brown

    Cheese or No Cheese — And Which Cheese If Yes

    Cheesy garlic bread is its own sub-category and deserves a moment. The default move is shredded mozzarella, which melts beautifully and gives you that satisfying pull. But it’s also quite mild and can actually mute the garlic flavor if applied too heavily.

    In 2025, interesting combinations showing up in restaurant menus and food content include:

    • Mozzarella + parmesan blend: The classic upgrade. Parm adds sharpness and browns more aggressively, giving you those crispy cheese edges everyone fights over.
    • Gruyère: Nutty, complex, melts smoothly. Pairs especially well with sourdough garlic bread.
    • Pecorino romano (finely grated): Very sharp and salty — use sparingly, but it amplifies the garlic beautifully.
    • Avoid: pre-shredded bags with anti-caking agents. These contain cellulose powder that actively prevents proper melting and browning. Always buy blocks and shred yourself.

    Storage and Reheating — Because Leftovers Deserve Respect

    Garlic bread is genuinely one of the worst things to reheat in a microwave. 45 seconds in a microwave turns it into a rubber-textured disappointment. Instead:

    • Air fryer (best method): 180°C for 3-4 minutes. Restores crispiness almost perfectly. This is the 2025 answer to leftover garlic bread.
    • Oven: 200°C for 5-6 minutes on a wire rack. Works well but takes longer to preheat.
    • Skillet: Dry pan, medium heat, cut-side down for 2-3 minutes. Gets the surface crispy again, though it won’t heat through as evenly.
    • Make-ahead tip: Prepare and assemble the garlic butter loaf, then freeze it (wrapped tightly) before baking. Bake directly from frozen using the two-phase method, adding 5-8 minutes to Phase 1. This is a genuinely useful dinner party hack.

    Where Garlic Bread Is Going in 2025

    Food trend tracking from sources like the Specialty Food Association and various culinary trend reports suggest that ‘upgraded comfort classics’ continue to dominate both restaurant menus and home cooking content through 2025. Garlic bread specifically is appearing in more elevated contexts — served alongside handmade pasta in upscale trattoria-style spots, featured as a vehicle for compound butters at wine bars, and showing up in ‘bread courses’ at tasting menu restaurants.

    On the home cooking side, the sourdough garlic bread format (using homemade or artisan bakery sourdough) has become a staple content format on platforms like TikTok and Instagram, with creators like Joshua Weissman and Ethan Chlebowski having covered variations that have pulled millions of views. The underlying message: people want to know that their garlic bread can be actually good, not just serviceable.

    Quick thought before you head to the kitchen: If your garlic bread has been letting you down, I’d genuinely start with just two changes — switch to the two-phase baking method and make your own garlic butter from scratch (even a simple version beats store-bought compound butter hands down). You don’t have to nail every element at once. Get the technique right first, then experiment with bread type and cheese. The roasted garlic base is a weekend project that’s absolutely worth it, but on a Tuesday night, even great raw garlic butter baked with care will change what you think garlic bread can be.


    📚 관련된 다른 글도 읽어 보세요

    태그: garlic bread recipe, homemade garlic bread, garlic butter, bread baking tips, comfort food 2025, garlic bread technique, sourdough garlic bread

  • Why My Sourdough Kept Dying — The Real Beginner’s Guide to Sourdough Starter in 2025

    A friend of mine — a genuinely talented home cook who can nail beef Wellington without blinking — called me last month in mild despair. Her sourdough starter, which she’d been nursing for two weeks, had gone gray, smelled like nail polish remover, and was sitting completely flat. She was ready to pour it down the drain. Sound familiar?

    I’ve been down that exact road. Three failed starters over two years before something finally clicked. And what I’ve learned is that most beginner guides skip the why — they give you the steps without the logic, so when something goes sideways (and it will), you have no idea what lever to pull. Let’s fix that together.

    sourdough starter bubbling glass jar, flour water mixture fermentation

    What’s Actually Happening Inside That Jar

    Before we talk ratios and schedules, let’s get one thing straight: a sourdough starter is a living ecosystem, not a recipe. You’re cultivating a symbiotic culture of wild yeast (Saccharomyces cerevisiae and its cousins) alongside lactic acid bacteria (LAB) — primarily Lactobacillus strains. The yeast produces CO₂ (the rise), and the bacteria produce lactic and acetic acid (the flavor and preservation).

    When your starter smells like acetone or nail polish remover, that’s hooch — a layer of alcohol produced when the yeast runs out of food. It’s not dead; it’s starving. That’s the single most common misdiagnosis beginners make. Gray liquid on top = feed it now, don’t dump it.

    The Numbers That Actually Matter

    Most starter guides throw ratios at you without context. Here’s what I’ve found works, with the reasoning attached:

    • 1:1:1 ratio (starter : flour : water by weight) — This is the standard maintenance ratio. 20g starter + 20g flour + 20g water. It gives you a predictable 8–12 hour peak cycle at room temperature (around 21–23°C / 70–74°F).
    • 1:5:5 ratio — Use this when your starter is over-fermenting (peaking and collapsing before you can use it). More food = slower fermentation. Great for overnight schedules.
    • Temperature is your real timer — At 18°C (65°F), expect a 14–16 hour peak. At 27°C (80°F), it can peak in as little as 4–6 hours. Your schedule has to match your kitchen, not a blog post written in a different climate.
    • Hydration matters for texture — 100% hydration (equal weights flour and water) gives a thick, pourable batter. Drop to 80% for a stiffer culture that produces more acetic acid (sharper flavor). Bread bakers in San Francisco famously favor stiffer starters for that iconic tang.
    • Whole wheat or rye flour to jumpstart — These contain more wild yeast and nutrients than white flour. Even substituting 10–20% of your feeding flour with whole rye can dramatically accelerate a sluggish starter.

    The Day-by-Day Reality (Not the Idealized Version)

    Here’s the honest timeline, including the parts most guides gloss over:

    Days 1–2: Mix 50g whole wheat flour + 50g unchlorinated water (filtered or left out overnight). Cover loosely. You may see nothing. That’s fine. Resist the urge to feed again — you’ll dilute the bacteria before they’ve had a chance to colonize.

    Days 3–4: Things often get weird here. You might see explosive bubbling followed by a foul smell — almost like vomit or cheese gone wrong. This is leuconostoc bacteria taking over temporarily. They’re not dangerous, but they’re not the culture you want. Do not panic. Do not dump it. Discard all but 50g and feed 1:1:1. The pH drop from your LAB will outcompete leuconostoc within 24–48 hours.

    Days 5–7: A stable, pleasant sour smell (like yogurt or mild vinegar) and consistent rise-and-fall cycles should appear. The float test — dropping a small blob of starter in water to see if it floats — works here as a rough readiness check, though it’s more of a guideline than a law.

    Days 8–14: True stability. Your starter should double within 4–8 hours of feeding consistently before you use it in bread. If it’s still sluggish past day 10, your water is likely chlorinated or your kitchen is too cold.

    What the Research and Baking Community Actually Say

    The work of microbiologist Rob Dunn’s Global Sourdough Project (which analyzed starters from 18 countries) found that local microbial environments matter less than previously thought — your hands, your flour, and your feeding schedule shape the culture more than ambient air. This is good news: you don’t need to live near a bay or a forest to grow a great starter.

    Meanwhile, King Arthur Baking Company’s test kitchen — arguably the most data-driven home baking resource available in 2025 — recommends using AP flour with 10% rye by weight as the gold standard for reliable starters. Their published research shows this blend accelerates colonization by roughly 30% compared to white flour alone.

    For temperature control without buying specialty equipment, the proofing setting on a standard oven with the light on typically holds around 27°C (80°F) — perfect for an accelerated starter schedule. Several bakers in the r/Sourdough community (a genuinely useful resource with over 700,000 members as of 2025) use a simple seedling heat mat set to low as an even more consistent alternative, costing around $15–20.

    sourdough bread scoring pattern baking, artisan bread crust crumb structure

    The Most Common Failure Points (And Their Fixes)

    Let’s be specific, because vague advice is useless when you’re staring at a flat jar:

    • Starter won’t rise at all after 7 days → Check water source first. Tap water with high chlorine content can suppress bacterial growth. Switch to filtered water or let tap water sit uncovered for 2 hours before using.
    • Pink or orange streaks → Contamination, usually from serratia marcescens bacteria. This is the rare case where you actually should discard and start over. Sterilize your jar with boiling water first.
    • Smells like alcohol/nail polish remover → Hooch. Feed immediately. If it’s a persistent problem, increase feeding frequency or switch to a higher ratio (1:2:2 or 1:5:5).
    • Rises well but bread is dense → Your starter may be past peak when you use it. Use it at peak (domed top, maximum volume) not after it collapses. A rubber band around the jar at feeding time is the simplest tracking tool.
    • Too sour, not sour enough → Acetic acid (sharp sourness) develops in cooler, stiffer cultures with longer fermentation. Lactic acid (mild, yogurt-like) develops in warmer, wetter cultures. Adjust temperature and hydration to tune flavor.

    Realistic Alternatives and Adaptations

    If you’re genuinely time-constrained, a commercial yeast bridge is not cheating — it’s pragmatic. Add ¼ teaspoon of active dry yeast to your initial flour-water mix. It won’t be “true” wild sourdough from day one, but it creates enough CO₂ activity to drop the pH quickly, which helps wild yeast colonize faster. Think of it as training wheels you remove by week two.

    Alternatively, if you just want the flavor without the commitment, long-fermented yeast bread — using 0.1% commercial yeast and a 12–18 hour cold proof — produces a surprisingly similar tang through the same lactic acid chemistry. No starter required. Kenjilopez-Alt of Serious Eats documented this process thoroughly, and it’s worth reading if sourdough maintenance feels like too much right now.

    And if you do want a starter but not from scratch, many artisan bakeries — including local ones — will give or sell established starters. A 2-year-old starter from a bakery is metabolically more robust than a 10-day-old home culture. Check with your nearest sourdough-focused bakery; in 2025, this has become surprisingly common as bread culture has grown.

    💬 Got a starter question or a failure story you can’t figure out? Drop it in the comments — sometimes the most useful troubleshooting happens when we compare notes. The variables in sourdough are real, but they’re all solvable once you know what to look for. Your next loaf is closer than you think.


    📚 관련된 다른 글도 읽어 보세요

    태그: []

  • 어릴때 이것 키워주지 않으면 후회해도 소용없어요 — 2026년 기준 영어 유치원 vs 일반 유치원 완전 비교

    작년에 친한 선배가 카톡을 보내왔어요. ‘야, 우리 애 영어유치원 보내려는데 한 달에 180만 원이래. 미쳤지?’ 그 문자 하나로 저도 다시 진지하게 파고들었습니다. 영어유치원, 보낼 만한 건지, 아니면 그냥 마케팅에 낚이는 건지. 6개월 동안 직접 견학만 12곳, 현직 유아교육 전문가 인터뷰, 영어유치원 졸업생 부모 17명 설문까지 다 해봤습니다. 결론부터 말하면 — 타이밍 잘못 잡으면 돈만 날립니다. 이 시기를 놓치면 나중에 진짜 따라잡기 힘들어요. 그러니까 지금 제대로 읽어두세요.

    kindergarten classroom children learning English, bilingual education early childhood
    • 🔥 영어유치원, 도대체 뭐가 다른가 — 커리큘럼 실제 뜯어보기
    • 💰 2026년 실제 비용 총정리 — 숨겨진 추가 비용까지
    • 📊 영어유치원 vs 일반유치원 완전 비교표
    • 🧠 언어 습득 골든타임 — 이 나이 지나면 진짜 달라집니다
    • 📍 국내외 연구 결과로 본 효과와 한계
    • ⚠️ 절대 하지 말아야 할 실수 5가지
    • ❓ 자주 묻는 질문 (FAQ)

    🔥 영어유치원, 도대체 뭐가 다른가 — 커리큘럼 실제 뜯어보기

    일단 ‘영어유치원’이라는 명칭부터 짚고 넘어가야 해요. 법적으로는 유치원이 아닙니다. 학원법상 ‘외국어학원’으로 분류되고, 유아교육법의 보호를 받지 않아요. 즉, 교육과정 감독이 상대적으로 느슨하다는 뜻입니다. 이걸 모르고 보내는 부모님이 아직도 많아요.

    그럼 실제 하루 일과는 어떻게 다를까요? 제가 직접 견학한 서울 강남·목동·판교권 12개 원을 기준으로 정리하면 이렇습니다.

    • 수업 시간: 하루 6~8시간 중 영어 노출 시간 평균 4.5시간 (일반 유치원 대비 약 9배)
    • 원어민 교사 비율: 프리미엄 원 기준 원어민 1명 + 한국인 보조교사 1명 / 10~12명 정원
    • 커리큘럼: 미국 교과서(Houghton Mifflin, Scholastic 시리즈) 기반이 가장 많음
    • 한국어 수업: 하루 30분~1시간. 이 부분이 나중에 문제가 되기도 합니다(아래 실패 방지 파트 참고)
    native English teacher kindergarten Korea, bilingual curriculum textbook

    💰 2026년 실제 비용 총정리 — 숨겨진 추가 비용까지

    선배가 보내준 180만 원은 사실 ‘기본 수업료’만입니다. 실제 청구서를 보면 얘기가 달라져요. 제가 수집한 2026년 기준 서울·수도권 영어유치원 실비용 데이터입니다.

    비용 항목 일반 국공립 유치원 일반 사립 유치원 영어유치원 (중급) 영어유치원 (프리미엄)
    월 수업료 무료(교육비 지원) 30~50만 원 130~180만 원 200~280만 원
    교재비 (연) 무료 10~20만 원 80~150만 원 150~250만 원
    특별활동비 (월) 0~5만 원 5~15만 원 20~50만 원 50~100만 원
    차량비 (월) 무료~5만 원 5~10만 원 10~20만 원 15~30만 원
    실질 월 총비용 0~10만 원 50~80만 원 170~250만 원 280~400만 원
    3년 총비용 (추정) 0~360만 원 180~290만 원 6,120~9,000만 원 1억~1억 4,400만 원

    네, 숫자 잘 보셨죠. 3년 다니면 최대 1억 4천만 원. 이 돈이면 미국에서 ESL 캠프 보내고도 남아요. 그러니까 ‘무조건 영어유치원’이 답은 아닙니다. 다만 이 돈을 낼 수 있는 상황이라면 — 그 효과가 실제로 있는지를 따져봐야 하죠.

    🧠 언어 습득 골든타임 — 이 나이 지나면 진짜 달라집니다

    제가 가장 강조하고 싶은 파트입니다. 이건 마케팅이 아니라 신경과학 이야기예요.

    MIT의 언어학자 조슈아 하트숄트(Joshua Hartshorne) 연구팀이 2018년 Cognition 저널에 발표한 연구에 따르면, 원어민에 가까운 문법 직관을 형성하려면 만 10세 이전에 집중 노출이 시작되어야 한다고 합니다. 특히 만 5~7세 구간이 음운 인식(phonological awareness) 측면에서 가장 결정적인 시기예요.

    • 만 3~5세: 억양·발음 습득 최적기. 이 시기 노출 = 평생 원어민 발음
    • 만 6~8세: 어휘·문법 구조 흡수 황금기. 읽기·쓰기 기반 형성
    • 만 9세 이후: 불가능하진 않지만 의식적 학습으로 전환. 훨씬 힘들어짐

    이게 핵심입니다. 유치원 나이(3~6세)는 언어 습득에 있어 생물학적으로 유리한 창이 열려 있는 시기예요. 이 창은 닫힙니다. 초등학교 고학년에 영어학원 보내는 것과 이 시기에 집중 노출하는 것은 뇌가 처리하는 방식 자체가 다릅니다.

    📍 국내외 연구 결과로 본 효과와 한계

    그렇다면 한국의 영어유치원이 실제로 이 골든타임을 제대로 활용하고 있을까요? 솔직하게 말씀드릴게요.

    효과가 있는 부분: 한국교육개발원(KEDI)의 2023년 조사에 따르면, 영어유치원 출신 초등학생의 영어 듣기·말하기 능력이 비출신 대비 평균 2.3배 높게 나타났습니다. 특히 발음과 청취 이해력은 통계적으로 유의미한 차이가 있었어요.

    한계와 주의점:

    • 한국어 어휘력 발달 지연: 영어유치원 출신 중 일부는 한국어 언어발달 검사(REVT)에서 또래보다 6~12개월 지연되는 사례가 보고됨 (서울대 언어병리학과, 2022)
    • 효과의 지속성 문제: 초등 2~3학년에 영어 학습을 지속하지 않으면 ‘영어유치원 프리미엄’이 사라지는 경향 있음
    • 원어민 교사 질 편차: 영어권 출신이라도 교육 자격 없이 채용되는 경우가 여전히 있음. 반드시 교사 자격증(TESOL, CELTA 등) 확인 필수

    📊 영어유치원 vs 일반유치원 핵심 비교

    비교 항목 영어유치원 일반 유치원 + 영어학원 병행
    영어 노출 시간 하루 4~6시간 (매우 높음) 하루 1~2시간 (보통)
    사회성·한국어 발달 한국어 노출 부족 리스크 있음 자연스러운 한국어 환경 유지
    교육 철학 영어 몰입 중심 전인 교육 중심
    법적 지위 학원(감독 느슨) 유치원(교육부 관리)
    월 비용 170~400만 원 50~100만 원 (병행 시)
    발음·청취 효과 매우 높음 (통계적 유의) 보통~높음
    추천 가정 유형 해외 거주·유학 계획 있는 가정 국내 정착 예정, 비용 부담 있는 가정

    ⚠️ 영어유치원 결정 전, 절대 하지 말아야 할 실수 5가지

    • 실수 1 — 브랜드만 보고 선택: 유명 프랜차이즈라도 개별 원의 원장·교사 질이 천차만별입니다. 반드시 최소 2회 이상 직접 수업 참관을 요청하세요. 거절하는 원은 거르세요.
    • 실수 2 — 아이 기질 무시: 내향적이거나 한국어도 아직 서툰 아이를 바로 영어 몰입 환경에 넣으면 언어 불안(Language Anxiety)이 생길 수 있습니다. 전문가 상담 먼저 받으세요.
    • 실수 3 — 초등 이후 계획 없이 시작: 영어유치원의 효과는 ‘지속적 노출’이 전제입니다. 초등 입학 후 영어 환경이 급감하면 효과가 급격히 감소해요. 출구 전략을 먼저 짜두세요.
    • 실수 4 — 원어민 교사 자격 미확인: TESOL/CELTA 자격증 보유 여부, 영어권 국가 출신 여부를 반드시 확인하세요. 일부 원은 비영어권 출신 교사를 원어민으로 소개하는 경우가 있습니다.
    • 실수 5 — 형제·자매 비교 없이 결정: 첫째가 잘 적응했다고 둘째도 같을 거라고 생각하지 마세요. 아이마다 언어 습득 스타일이 다릅니다. 각 아이를 개별적으로 평가하세요.

    💡 ‘영어유치원 없이’ 골든타임 활용하는 현실적 대안

    솔직히 말하면, 비용이 부담된다면 다음 조합이 효과 대비 가성비가 훨씬 좋습니다.

    • 국공립 유치원 + 소규모 영어학원 (월 30~50만 원)
    • EBS English Kids, Starfall, PBS Kids 등 무료 영어 콘텐츠 하루 1시간 루틴화
    • 원어민 1:1 화상 영어 (월 10~20만 원, 주 3회 기준)
    • 영어 그림책 읽어주기 — 하루 15분, 이게 생각보다 강력합니다

    이 조합이면 월 50~80만 원으로 영어유치원 효과의 60~70%는 커버 가능합니다. 남은 돈은 초등 고학년 이후 심화 학습에 투자하는 게 훨씬 전략적이에요.

    ❓ FAQ — 독자들이 가장 많이 묻는 질문

    Q1. 영어유치원은 몇 살부터 보내는 게 가장 효과적인가요?

    언어 습득 연구 기준으로는 만 3~4세(한국 나이 4~5세)가 가장 효과적입니다. 이 시기는 모국어와 외국어를 동시에 처리하는 뇌의 가소성이 가장 높아요. 다만 이 나이에 갑자기 영어 환경에 넣으면 적응 스트레스가 클 수 있으니, 입원 3~6개월 전부터 가정에서 영어 미디어 노출을 시작하는 ‘워밍업 기간’을 두는 것을 권장합니다.

    Q2. 영어유치원 다니면 한국어 발달이 늦어진다는 게 사실인가요?

    모든 아이에게 해당하는 건 아니지만, 리스크가 있는 것은 사실입니다. 특히 가정에서도 영어를 강요하는 환경이 되면 한국어 어휘 발달이 지연되는 사례가 실제로 보고됩니다. 해결책은 간단해요 — 가정에서는 한국어를 철저히 유지하고, 독서, 대화, TV 등 한국어 언어 환경을 풍부하게 만들어주면 됩니다. 두 언어를 병행하는 ‘동시 이중언어(Simultaneous Bilingualism)’ 환경이 오히려 인지 발달에 유리하다는 연구도 많습니다.

    Q3. 영어유치원 졸업 후 일반 초등학교에 들어가면 어떻게 되나요?

    현실적으로 두 가지 케이스로 나뉩니다. ①영어 학습을 꾸준히 이어간 경우 — 중학교까지 영어에서 두드러진 강점을 유지합니다. ②초등 입학 후 영어 노출이 급감한 경우 — 초등 3~4학년이 되면 영어유치원을 다니지 않은 친구들과 격차가 거의 없어지는 경향이 있습니다. 즉, 영어유치원은 ‘시작점을 앞당기는 것’이지, ‘끝점을 보장하는 것’이 아닙니다. 졸업 후 계획이 없다면 효과는 일시적입니다.


    한 줄 평: 골든타임은 진짜 존재합니다. 그런데 영어유치원이 그 타이밍을 활용하는 유일한 방법은 아니에요. 비용이 충분하고 초등 이후 연계 계획까지 있다면 투자할 가치가 있습니다. 그렇지 않다면 — 그 돈, 아이의 초등·중학 시기를 위해 아껴두세요. 언어는 습관이고, 습관은 지속 가능한 환경에서 만들어집니다.

    자녀 교육, 이 글 하나로 결정 내리지 말고 꼭 전문가 상담도 병행하세요. 아이마다 다 다릅니다.


    📚 관련된 다른 글도 읽어 보세요

    태그: 영어유치원, 유아영어교육, 영어유치원비용, 골든타임영어, 영어유치원추천, 유아교육비교, 조기영어교육

  • 선크림 매일 발랐는데 왜 기미가 늘어? 2026년 기준 진짜 원인과 성분 선택법

    솔직히 말할게요. 저도 한동안 ‘선크림만 잘 바르면 피부 걱정 끝’이라고 믿었어요. SPF50+ PA++++짜리 비싼 거 매일 아침 꼼꼼히 펴 바르고, 외출할 때마다 2시간마다 덧바르고. 근데 어느 날 거울 보다가 광대 쪽에 슬금슬금 올라온 기미를 발견했을 때 진짜 멘붕이었습니다. ‘내가 뭘 잘못하고 있는 거지?’ 그때부터 피부과 상담, 성분 논문, 해외 뷰티 포럼까지 파고들었어요. 결론부터 말하면, 선크림 자체가 문제가 아니라 ‘어떤 성분을’, ‘어떤 순서로’, ‘어떤 상황에 맞게’ 쓰느냐가 완전히 달랐습니다.

    sunscreen application skincare routine morning
    • 🔍 선크림 매일 발랐는데 기미가 늘어난 진짜 이유
    • 📊 자외선 차단제 성분 비교 — 자외선 차단제 유기계 vs 무기계, 뭐가 다를까?
    • 🧪 2026년 기준 주목해야 할 차단 성분 BEST와 피해야 할 성분
    • 💰 가격대별 실사용 추천 제품 비교표
    • ❌ 선크림 쓰면서 절대 하지 말아야 할 실수 7가지
    • ❓ FAQ — 독자들이 가장 많이 묻는 것들
    • ✅ 결론 — 한 줄 평과 최종 선택 가이드

    선크림 매일 발랐는데 기미가 늘어난 진짜 이유

    많은 분들이 SPF 수치만 보고 선크림을 고르는데, 사실 SPF는 UVB(피부 화상 유발)를 막는 지수고, 기미·색소침착의 주범은 UVA입니다. PA 등급이 바로 UVA 차단력이에요. PA++++도 중요하지만, 여기서 끝이 아닙니다.

    • 도포량 부족: 임상 기준 얼굴 전체에 약 1.5~2mg/㎠, 즉 500원짜리 동전 크기 2회 이상. 대부분의 사람들은 이것의 20~40%밖에 안 바릅니다. 실제로 적정량보다 적게 바르면 SPF50이 SPF10 수준으로 떨어진다는 연구 결과가 있어요 (Journal of Investigative Dermatology, 2022).
    • 재도포 누락: 2시간 간격 재도포가 교과서지만, 실내에서도 창문을 통과하는 UVA는 차단되지 않습니다. 사무실에서도 창가에 앉는다면 재도포 필수.
    • 피부 자극 성분: 일부 유기계(화학) 자외선 차단 성분이 피부 내 산화 스트레스를 유발해 오히려 색소 침착을 악화시킬 수 있습니다. 특히 민감·색소 피부에 옥시벤존(Oxybenzone) 함유 제품은 신중히 선택해야 해요.
    • 레티놀·AHA 병행 실수: 밤에 레티놀 쓰고 낮에 선크림 안 챙기거나, AHA(글리콜산) 제품 쓰는 날 선크림을 얇게 바르면 광과민 반응으로 기미가 폭발합니다.
    UVA UVB sunscreen protection skin diagram

    유기계 vs 무기계 자외선 차단제 — 뭐가 진짜 내 피부에 맞을까?

    자외선 차단제는 크게 두 종류로 나뉩니다. 선택 기준을 명확하게 정리해드릴게요.

    \
    n

    구분 유기계 (화학적 차단) 무기계 (물리적 차단)
    작용 원리 자외선을 흡수해 열로 전환 자외선을 반사·산란
    대표 성분 옥시벤존, 아보벤존, 옥티노세이트, 티노솝B 징크옥사이드(ZnO), 티타늄다이옥사이드(TiO2)
    UVA 차단력 성분별 차이 큼 (아보벤존 우수, 옥티노세이트 약함) 징크옥사이드 단독으로 UVA 전 대역 커버 가능
    발림성·사용감 가벼움, 백탁 없음 무거울 수 있음, 백탁 가능성
    민감 피부 적합성 피부 자극 가능성 있음 (특히 옥시벤존) 상대적으로 자극 낮음
    환경 영향 일부 성분 산호초 손상 우려 (하와이 등 규제) 나노입자 논란 있으나 상대적으로 친환경
    가격대 1만~4만 원대 2만~6만 원대
    추천 대상 일반·지성 피부, 도시 일상 생활 민감·색소 피부, 야외 활동, 임산부

    💡 결론: 색소침착·기미 고민이라면 무기계(징크옥사이드 20% 이상)를 기본으로 가져가되, 사용감이 불편하면 유기계+무기계 혼합 제품으로 절충하는 게 현실적입니다.

    2026년 기준 주목해야 할 차단 성분 BEST와 피해야 할 성분

    성분 하나하나를 다 읽기 힘드니까 요약해드릴게요.

    ✅ 적극 추천 성분

    • 징크옥사이드 (ZnO) 15~25%: UVA1·UVA2·UVB 전 대역 차단. 민감 피부 최적. 단, 20% 이상이어야 실질적 UVA 차단력이 나옵니다.
    • 티노솝B (Tinosorb B, Bemotrizinol): 유럽·아시아 승인 성분. 광안정성이 높고 UVA·UVB 폭넓게 커버. 미국 FDA는 아직 미승인이라 국내 제품 성분표에서 확인 필요.
    • 멕소릴 SX (Ecamsule): UVA 특화 성분. 아보벤존보다 광안정성이 훨씬 좋아 장시간 야외 활동에 유리.
    • 이스카이트 (Iscotrizinol, Uvasorb HEB): UVA 광범위 차단, 피부 흡수율 낮아 안전성 높음.

    ⚠️ 피해야 할 또는 주의해야 할 성분

    • 옥시벤존 (Benzophenone-3): 피부 흡수 후 혈중 검출 보고(FDA 2019 연구), 호르몬 교란 가능성 논란. 민감 피부·임산부 회피 권장.
    • 옥티노세이트 (Octinoxate): UVB만 차단하고 UVA는 거의 못 막음. 단독 사용 시 기미 방어 효과 기대하기 어려움.
    • 아보벤존 (Avobenzone) 단독: UVA 차단력은 좋지만 광불안정. 옥티살레이트·옥토크릴렌과 병행 없이 단독이면 빠르게 분해돼 효과 반감.

    가격대별 실사용 추천 제품 비교 (2026년 기준)

    가격대 제품 예시 SPF/PA 주요 성분 특징 추천 피부
    1만 원대 라로슈포제 앙텔리오스 XL 계열 SPF50+ / PA++++ 멕소릴 SX+XL, 티노솝B 유럽 기준 UVA 차단, 가성비 검증됨 지성·복합성
    2만 원대 아누아 톤업 선크림, 조선미녀 선크림 SPF50+ / PA++++ 징크옥사이드 혼합 국내 인디 브랜드 품질 상향. 백탁 개선 버전 민감·건성
    3~4만 원대 이스티 로더 DayWear, 키엘 UV Defense SPF50 / PA+++ 유기계 혼합 보습 기능 강화, 데일리 멀티케어 건성·노화 고민
    5만 원대 이상 드렁크엘리펀트 Umbra Sheer, 이솝 선크림 SPF30~50 / PA+++ 징크옥사이드 고함량 성분 투명성 높음, 무향·무방부제 극민감·아토피

    ※ 위 제품은 성분 및 실사용 기반 예시이며, 실제 구매 전 개인 피부 테스트 권장. 2026년 현재 국내 출시 여부는 브랜드 공식 채널에서 확인하세요.

    해외 연구와 피부과 전문가 의견 — 진짜 데이터로 보는 선크림

    영국 피부과학저널(British Journal of Dermatology)에 실린 2023년 연구에 따르면, 징크옥사이드 19% 이상 함유 무기계 선크림을 적정량(2mg/㎠) 매일 사용한 그룹은 12주 후 기미 밀도가 평균 31% 감소했습니다. 반면 SPF 수치만 높고 UVA 차단 성분이 부실한 제품을 쓴 그룹은 유의미한 개선이 없었어요.

    국내 피부과 전문의들도 공통적으로 강조하는 포인트는 ‘도포량’입니다. 서울대병원 피부과 공식 자료에도 ‘권장량의 절반만 발라도 SPF가 제곱근 수준으로 떨어진다’고 명시되어 있어요. 쉽게 말해 SPF50 제품을 반만 바르면 SPF7 수준이 된다는 거죠. 이게 기미가 늘어난 핵심 원인 중 하나입니다.

    또한 EWG(미국 환경워킹그룹) 2025 보고서에서는 미국 시판 선크림의 약 67%가 EWG 안전 기준을 충족하지 못한다고 발표했습니다. 옥시벤존·옥티노세이트 함유 제품이 여전히 주류를 이루고 있기 때문이에요. 유럽·한국·일본 제품이 성분 규제 측면에서 훨씬 앞서 있다는 점을 참고하세요.

    선크림 쓰면서 절대 하지 말아야 할 실수 7가지

    • 모이스처라이저에 섞어 바르기: 성분 희석으로 차단 지수 급감. 반드시 따로 바르세요.
    • 눈가·눈꺼풀 생략: 눈가 자외선 노출이 눈 주름과 색소침착의 주원인. 전용 스틱 선크림 활용 추천.
    • 목·귀·손등 빼먹기: 얼굴만 완벽해봤자 목에 기미 생기면 의미 없어요. 바디 선크림과 구분 없이 넉넉하게.
    • 레티놀·AHA 사용 후 선크림 얇게 바르기: 각질 제거 성분 사용 중엔 피부 광과민 상태. 이때 선크림 두께가 평소의 2배는 되어야 합니다.
    • 실내라고 선크림 생략: UVA는 유리창 투과율 약 74%. 창가 근무라면 실내도 예외 없어요.
    • 유통기한 지난 선크림 쓰기: 유기계 차단 성분은 시간이 지나면 산화·분해됩니다. 개봉 후 12개월 이내 사용 권장.
    • 메이크업 위에 선크림 덧바르기: 선크림은 스킨케어 맨 마지막, 메이크업 전에. 덧바를 때는 선크림 스프레이나 파우더 타입 사용.

    FAQ — 독자들이 가장 많이 묻는 것들

    Q1. SPF50이랑 SPF30이랑 차이가 그렇게 커요?

    수치만 보면 엄청난 차이 같지만 실제는 달라요. SPF30은 UVB의 약 97% 차단, SPF50은 약 98% 차단입니다. 차이는 1%포인트밖에 안 돼요. 더 중요한 건 도포량과 재도포 주기입니다. SPF30을 충분히 바르는 게 SPF50을 얇게 바르는 것보다 훨씬 낫습니다. 단, 야외 스포츠·해수욕 등 극한 환경이라면 SPF50+ 내수성 제품이 유리합니다.

    Q2. 선크림 바르고 메이크업하면 재도포는 어떻게 해요?

    이게 현실적인 고민이죠. 두 가지 방법이 있어요. 첫째, 선크림 쿠션이나 파운데이션 SPF 제품으로 메이크업 자체를 선크림으로 대체하는 방식. 단, 이것도 충분한 양을 발라야 해요. 둘째, 선크림 스프레이 또는 세팅 스프레이 형태 선크림을 메이크업 위에 뿌리는 방식. 완벽하진 않지만 안 하는 것보다는 확실히 낫습니다.

    Q3. 아이한테도 어른용 선크림 써도 되나요?

    36개월 이하 영아는 선크림 사용 자체를 피하고 물리적 차단(옷, 모자, 그늘)을 우선하는 게 소아과·피부과 공통 권장사항이에요. 36개월 이후에는 징크옥사이드·티타늄다이옥사이드 기반의 무기계 선크림 중 무향·무알코올·무방부제 제품을 선택하세요. 옥시벤존 함유 제품은 어린이에게 절대 비추천입니다.

    결론 — 한 줄 평과 최종 선택 가이드

    선크림 주제 한 줄 평: “선크림은 제품보다 사용법이 먼저다. 비싼 거 얇게 바르는 사람이 싼 거 충분히 바르는 사람한테 집니다.”

    최종 선택 가이드 요약:

    • 기미·색소 고민이라면 → 징크옥사이드 18% 이상 무기계 or 멕소릴SX+티노솝B 혼합 유기계
    • 지성·여드름성이라면 → 가벼운 유기계, 오일프리 제형
    • 민감·아토피라면 → 무향·무방부제 순수 무기계
    • 레티놀·AHA 병행 중이라면 → 선크림 도포량 평소 1.5배 이상 의식적으로 늘릴 것
    • 도포량 체크 → 검지 두 마디 정도의 양을 얼굴 전체에 넉넉하게, 2시간마다 재도포

    피부는 평생 사는 집이에요. 매일 선크림 한 번 더 바르는 게 나중에 피부과 레이저 비용 몇백만 원 아끼는 겁니다.


    📚 관련된 다른 글도 읽어 보세요

    태그: []

  • Why I Almost Gave Up on Thinning Hair — The 2025 Treatment Breakdown That Actually Helped

    A close friend of mine texted me last spring, frustrated after spending hundreds on a shampoo regimen that a popular influencer swore would ‘regrow a full head of hair in 90 days.’ Three months later, her bathroom shelf was full of half-empty bottles and her hairline was exactly the same. That conversation stuck with me — because I’d been down a similar rabbit hole myself a few years back, and it took an embarrassingly long time to separate the marketing noise from what’s actually backed by evidence.

    So let’s dig into this together, not as a lecture, but as a honest walkthrough of what thinning hair actually is, what treatments have real data behind them in 2025, and where the money is genuinely worth spending.

    thinning hair treatment, hair loss before after comparison

    What’s Actually Causing Your Hair to Thin? (It’s Not Always What You Think)

    Before jumping to solutions, the root cause matters enormously — and this is where most people skip a step. Thinning hair in 2025 is more nuanced than ever because we now have better diagnostic tools and a clearer understanding of the different pathways involved.

    • Androgenetic Alopecia (AGA): The most common type, affecting roughly 50% of men over 50 and up to 40% of women by menopause. Driven by DHT sensitivity in hair follicles.
    • Telogen Effluvium (TE): Stress-triggered shedding where follicles shift prematurely into the resting phase. Often reversible within 3–6 months once the trigger is addressed.
    • Nutritional Deficiencies: Low ferritin (below 40 ng/mL is a common threshold cited in dermatology), low vitamin D, and low zinc are frequent culprits that blood panels can confirm.
    • Thyroid Dysfunction: Both hypothyroidism and hyperthyroidism can cause diffuse thinning. A TSH panel is often the first thing a dermatologist orders.
    • Traction Alopecia: Mechanical damage from tight hairstyles, commonly seen in people who wear braids, weaves, or high ponytails frequently.

    Knowing your specific type changes everything about your treatment path. A DHT-blocking shampoo does nothing meaningful for telogen effluvium, for example. If you haven’t had bloodwork done, that’s actually the most useful first step — not buying a new product.

    The Treatments with Real Evidence in 2025

    Let’s get into the actual landscape of what works. I’m grouping these by evidence tier, because there’s a massive gap between ‘promising early data’ and ‘FDA-approved with decades of trials.’

    Tier 1 — FDA-Approved, Well-Established:

    • Minoxidil (Rogaine): Still the gold standard for topical use. The 5% foam formula for men and 2–5% for women. In 2025, oral low-dose minoxidil (0.25–2.5mg daily) has gained significant traction as an off-label option, with dermatologists reporting response rates of around 70–80% in AGA patients, per multiple small-scale studies published in the Journal of the American Academy of Dermatology between 2022 and 2024. Side effects like hypertrichosis (unwanted body hair) are the most common complaint, occurring in roughly 35% of female patients using oral doses above 1mg.
    • Finasteride (Propecia): For men with AGA. Blocks 5-alpha reductase, reducing DHT levels by up to 70% in scalp tissue. The 5-year data from the original clinical trials showed 90% of men maintained or improved hair count. Sexual side effects affect approximately 2–4% of users — real, but often overstated in online forums.
    • Dutasteride: Stronger than finasteride, inhibiting both Type 1 and Type 2 5-alpha reductase. Approved in South Korea and Japan for AGA; used off-label in the US and UK. Studies show superior results for scalp DHT reduction compared to finasteride, but the side effect profile is comparable.

    Tier 2 — Strong Evidence, Widely Used but Not FDA-Cleared for Hair:

    • PRP (Platelet-Rich Plasma) Therapy: Your own blood is spun in a centrifuge, and the platelet-rich portion is injected into the scalp. A 2023 meta-analysis in Dermatologic Surgery covering 22 studies found statistically significant improvements in hair density across AGA patients. Cost ranges from $500–$1,500 per session, with 3–4 sessions typically recommended in year one.
    • Low-Level Laser Therapy (LLLT): Devices like the iRestore and Capillus have FDA clearance as ‘safe’ but not strictly as efficacious treatments. The 650nm wavelength range appears to stimulate follicular activity. A 2024 review in Lasers in Medical Science found an average hair count increase of 22–51 hairs per cm² over 26 weeks in compliant users. The commitment is significant — typically 25–30 minutes, 3x per week.
    PRP hair treatment clinic, minoxidil scalp application

    What’s Overhyped Right Now (And Where Your Money Leaks Out)

    This is the part nobody puts in the product description. In 2025, the supplement and ‘natural hair growth’ market is enormous — estimated at over $3.8 billion globally — and the signal-to-noise ratio is brutal.

    • Biotin mega-doses: Only useful if you have a confirmed biotin deficiency, which is actually rare. Dermatologists consistently note that most people excreting excess biotin in urine simply have expensive urine. It also interferes with thyroid and troponin lab tests at doses above 5,000 mcg.
    • ‘DHT-blocking’ shampoos with saw palmetto: Saw palmetto has some weak evidence for oral use, but absorption through shampoo that sits on the scalp for 2 minutes is pharmacologically dubious. The mechanism doesn’t hold up under scrutiny.
    • Collagen powders for hair growth: Collagen is broken down into amino acids in digestion, not delivered intact to follicles. The indirect benefit via amino acid availability is plausible but minimal compared to simply eating adequate protein.
    • Stem cell shampoos: Unless plant stem cells can survive your digestive system (they can’t, and they’re being applied topically anyway), this is mostly a branding exercise.

    The 2025 Realistic Action Plan (Based on Situation)

    Here’s where I find a framework more useful than a single recommendation:

    • If you’re a man under 40 with AGA pattern loss: Get a dermatology consultation about low-dose oral minoxidil + finasteride combo. This dual-pathway approach is increasingly the first-line recommendation in 2025, and the results compound over 12–18 months.
    • If you’re a woman with diffuse thinning: Start with bloodwork (ferritin, thyroid, vitamin D, zinc). If all normal, discuss oral minoxidil (0.5–1mg) with a board-certified dermatologist. Avoid finasteride during reproductive years without serious discussion.
    • If shedding started after stress, illness, or major life event: This is likely TE. Focus on sleep, protein intake (target 1.2–1.6g per kg of body weight daily), and patience. Most cases resolve in 6–9 months. Minoxidil can help bridge the emotional gap but isn’t fixing the cause.
    • If budget allows and you want to accelerate results: Consider adding PRP to a topical/oral regimen. The combination approach is showing the most robust outcomes in current literature.

    A Note on Consistency (The Boring Truth)

    Every dermatologist I’ve read or interviewed says the same thing: the biggest predictor of treatment success isn’t which product you chose, it’s whether you actually stuck with it for 6–12 months. Minoxidil takes 4 months to show meaningful results. Finasteride needs 6–12. PRP needs a full series. People who quit at month 3 and say ‘it didn’t work’ are almost always in the middle of the treatment window, not past it.

    If cost is a barrier, generic minoxidil solution (not foam) is as effective as brand-name Rogaine and runs about $10–$15 per month on platforms like Costco, Walmart, or Amazon. The barrier to entry for evidence-based treatment is genuinely lower than most people realize.

    💬 Editor’s Note: If there’s one thing I’d suggest taking away from all of this — it’s to spend your first $30 on a blood panel, not a shampoo. Knowing your specific cause doesn’t just save money, it saves months of guessing. The treatments that work are accessible and well-documented in 2025. The trick is matching the right one to your actual situation, not the one with the best packaging.


    📚 관련된 다른 글도 읽어 보세요

    태그: thinning hair treatment, hair loss 2025, minoxidil vs finasteride, androgenetic alopecia, PRP hair therapy, oral minoxidil, hair regrowth evidence

  • 무선 이어폰 사기 전에 이것 모르면 호갱 됩니다 — 2026년 기준 실사용 비교 총정리

    지난달에 친한 후배가 연락이 왔어요. “형, 무선 이어폰 뭐 사면 돼요? 애플이요, 삼성이요?” 근데 이 질문이 생각보다 엄청 복잡한 거잖아요. 예산이 얼마인지, 아이폰 쓰는지 갤럭시 쓰는지, 운동용인지 출퇴근용인지… 그냥 “에어팟 사” 한마디로 끝내기엔 너무 아깝더라고요.

    그래서 제가 직접 6개월 넘게 에어팟 프로 2세대, 갤럭시 버즈3 프로, 소니 WF-1000XM5, 보스 QuietComfort Earbuds II를 번갈아 쓰면서 정리한 내용을 털어놓겠습니다. 광고 아니고, 협찬도 없고, 그냥 제 돈 주고 산 거 씁니다.

    wireless earbuds comparison 2026, premium TWS earphones lineup
    • 🎯 2026년 무선 이어폰 시장, 뭐가 달라졌나?
    • 💰 가격대별 실제 체감 차이 — 5만원짜리랑 40만원짜리가 진짜 다른가?
    • 📊 4종 스펙 비교표 — ANC 성능·배터리·착용감 수치로 정리
    • 🔍 제조사별 실제 사용 후기 — 공식 스펙과 현실의 괴리
    • 🚫 절대 하지 말아야 할 구매 실수 체크리스트
    • 💬 자주 묻는 질문 FAQ

    2026년 무선 이어폰 시장, 뭐가 달라졌나?

    2026년 현재 TWS(True Wireless Stereo) 이어폰 시장에서 가장 큰 변화는 크게 세 가지입니다.

    첫째, ANC(능동형 소음 차단) 기술의 평준화입니다. 2년 전만 해도 소니·보스 vs 나머지 구도였는데, 이제 애플과 삼성의 ANC가 플래그십 레벨로 올라오면서 ‘소니 사야 ANC 된다’는 공식이 무너졌어요.

    둘째, 공간 음향(Spatial Audio)의 대중화입니다. 애플이 에어팟에서 공간 음향을 밀기 시작하면서 삼성, 소니도 비슷한 기능을 탑재하기 시작했고, 2026년에는 중급기에도 기본 탑재되는 흐름입니다.

    셋째, 배터리 수명 경쟁의 한계입니다. 케이스 포함 30~40시간이면 이제 플래그십 기준이고, 그 이상은 실사용에서 크게 의미 없어요. 경쟁 포인트가 배터리에서 ‘착용 편의성’과 ‘앱 생태계’로 넘어갔습니다.

    ANC noise cancelling technology comparison, spatial audio earbuds feature

    가격대별 실제 체감 차이 — 5만원이랑 40만원이 진짜 다른가?

    솔직하게 말할게요. 5만원 ↔ 15만원 구간의 차이는 체감이 크고, 15만원 ↔ 40만원 구간의 차이는 생각보다 작습니다.

    5만원대 제품(갤럭시 버즈 FE, QCY H3 계열)은 ANC 품질이 낮소음 환경에서만 효과를 보이고, 저음 왜곡이 85dB 이상에서 눈에 띄게 발생합니다. 반면 15만원대부터는 ANC가 지하철·카페 수준의 소음(70~80dB)을 30dB 이상 차단하기 시작해요.

    그런데 30만원대와 40만원대를 비교하면? 솔직히 일반인 귀로는 음질 차이를 구분하기 어렵습니다. 그 차이는 주로 마감재, 앱 생태계, 브랜드 프리미엄에서 발생해요.

    제품명 출시가(원) ANC 차단(최대) 배터리(케이스 포함) 착용 편의성 생태계 최적화 방수 등급
    애플 에어팟 프로 2세대 359,000 ~29dB 6h + 24h ★★★★☆ iOS 최적 / 안드로이드 제한 IPX4
    삼성 갤럭시 버즈3 프로 299,000 ~25dB 6h + 24h ★★★★★ 갤럭시 최적 / iOS 기본 지원 IPX7
    소니 WF-1000XM5 349,000 ~31dB 8h + 16h ★★★☆☆ 크로스 플랫폼 우수 IPX4
    보스 QuietComfort Earbuds II 329,000 ~28dB 6h + 18h ★★★★☆ 크로스 플랫폼 우수 IPX4

    제조사별 실제 사용 후기 — 공식 스펙과 현실의 괴리

    🍎 애플 에어팟 프로 2세대
    공식 ANC 수치는 업계 최고 수준이고, 실제로도 체감이 좋습니다. 그런데 문제는 안드로이드에서 쓰면 기능의 60% 이하만 쓸 수 있다는 거예요. 공간 음향, 적응형 투명 모드, 개인화 공간 음향 전부 iOS 전용입니다. 갤럭시 폰 쓰면서 에어팟 사는 건 40만원짜리 차 사서 1단 기어만 쓰는 격이에요.

    📱 삼성 갤럭시 버즈3 프로
    착용감이 진짜 역대급입니다. 인이어 방식인데도 장시간 착용 시 이통증이 거의 없어요. 갤럭시 폰과 연동하면 자동 기기 전환도 에어팟만큼 매끄럽고, IPX7 방수는 실제로 비 맞거나 수영 직후에 써도 문제없었어요. 단점은 ANC가 에어팟·소니보다 약 3~5dB 낮다는 점.

    🎧 소니 WF-1000XM5
    ANC는 여전히 업계 1~2위를 다투는 수준이고, 음질도 제일 좋습니다. LDAC 코덱 지원으로 안드로이드에서 고해상도 음원 재생 가능한 것도 메리트. 근데 크기가 큰 편이라 소이어(小耳) 분들은 착용 자체가 어렵고, 케이스가 투박해서 주머니에 잘 안 들어갑니다. 실제로 공식 배터리 8시간이지만 ANC 켜고 LDAC 쓰면 5.5시간 수준으로 줄어요.

    🔊 보스 QuietComfort Earbuds II
    보스의 ANC는 ‘저음 차단’에 특화되어 있어서 비행기·지하철 같은 저주파 소음 환경에서 가장 편합니다. 근데 고주파 소음(사람 목소리, 카페 소음)은 소니나 애플보다 약해요. 음질 튜닝이 보컬·중음역 강조라 팟캐스트·유튜브 듣기엔 최적이지만, 음악 청취 위주라면 소니가 낫습니다.

    이런 상황이라면 이 제품을 사세요 — 조건부 추천

    무조건 ‘이게 1등’이라는 식의 추천은 안 합니다. 상황별로 달라요.

    • 아이폰 메인으로 쓰고 예산 35만원 이상이면: 에어팟 프로 2세대. 생태계 밀착도가 넘사벽.
    • 갤럭시 폰 + 운동·야외 활동 많으면: 갤럭시 버즈3 프로. IPX7 방수, 착용감, 자동 전환 모두 합격.
    • 플랫폼 가리지 않고 음질·ANC 순수 성능 원하면: 소니 WF-1000XM5. 단, 귀 작으면 착용감 먼저 매장에서 체험해볼 것.
    • 비행기 출장·장거리 이동이 많으면: 보스 QuietComfort Earbuds II. 저주파 차단 특화.
    • 예산 10~15만원대라면: 갤럭시 버즈 FE 또는 QCY ArcBuds Pro. 이 가격대에서 억지로 고급기 살 필요 없어요.

    절대 하지 말아야 할 구매 실수 체크리스트

    • 유튜브 리뷰만 보고 사지 마세요. 대부분 협찬 제품이고, ANC 체감은 개인 귀 구조와 착용 방식에 따라 완전히 달라집니다. 반드시 오프라인 매장에서 착용 테스트.
    • 스펙표의 배터리 시간을 믿지 마세요. 제조사 배터리 측정은 ANC 끄고, 볼륨 50%, 실온 측정입니다. ANC 켜고 볼륨 70%로 쓰면 20~30% 줄어든다고 보면 돼요.
    • 다른 생태계 제품 사지 마세요. 아이폰 쓰면서 갤럭시 버즈, 갤럭시 쓰면서 에어팟 — 못 쓰는 건 아니지만, 해당 제품의 핵심 기능 절반 이상을 못 씁니다.
    • 오래된 재고 특가에 속지 마세요. 2026년 현재 1~2세대 전 제품을 ‘혜자 가격’에 파는 경우가 많은데, 펌웨어 업데이트 지원 종료가 임박한 경우가 있습니다. 구매 전 제조사 지원 종료 일정 확인 필수.
    • 케이스 용량 오해하지 마세요. ‘총 30시간’이라고 적혀 있으면 이어폰 자체 6시간 + 케이스 충전 4회치 = 30시간입니다. 이어폰 한 번 충전에 30시간이 아니에요.
    • 코덱 차이 과장하지 마세요. LDAC vs AAC 차이를 일반 스트리밍(멜론, 스포티파이) 환경에서 느끼는 사람은 거의 없습니다. 코덱보다 착용 밀착도가 음질에 더 영향을 줘요.

    FAQ — 독자들이 가장 많이 묻는 것들

    Q1. 운동할 때 쓸 거면 어떤 이어폰이 낫나요?

    운동용이라면 우선순위가 ‘방수 등급 IPX5 이상’ → ‘착용 안정성(윙팁 유무)’ → ‘음질’ 순서입니다. 갤럭시 버즈3 프로(IPX7)가 운동 용도에서 가장 범용적으로 추천할 수 있어요. 단, 격렬한 운동이라면 귀에 걸리는 스포츠 전용 제품(JBL Reflect Flow Pro 등)도 같이 검토하세요. 고가 TWS는 격투기·격렬한 움직임에서 빠지면 30만원짜리가 바닥 구르는 상황이 발생합니다.

    Q2. 아이폰 쓰는데 에어팟 말고 써도 되나요?

    됩니다. 소니 WF-1000XM5, 보스 QC Earbuds II 모두 아이폰에서 기본 기능은 문제없이 동작해요. 다만 앱 연동(소니 헤드폰즈 커넥트, 보스 뮤직 앱)이 에어팟의 설정 앱 연동보다 조금 불편하고, 기기 자동 전환이 에어팟만큼 매끄럽지 않습니다. ‘음질·ANC 성능’이 생태계 편의성보다 중요하다면 소니를 추천해요.

    Q3. 10만원대 이하 이어폰은 정말 별로인가요?

    요즘은 10만원대도 꽤 씁니다. QCY ArcBuds Pro, EarFun Air Pro 4 같은 제품들이 ANC 기본 탑재에 통화 품질도 나쁘지 않아요. 음질에 예민하지 않고 ‘노이즈 차단 + 무선의 편의성’만 원한다면 10만원대도 충분합니다. 단, 마감재 내구성과 AS 대응은 플래그십 대비 확실히 떨어지니까 2년 이상 쓸 거라면 조금 더 투자하는 게 나을 수 있어요.

    결론 — 한 줄 평과 최종 조언

    2026년 기준 무선 이어폰 시장은 ‘플랫폼 생태계에 갇히느냐, 자유롭게 쓰느냐’의 선택입니다. 애플 생태계에 깊이 들어가 있다면 에어팟 프로 2세대, 삼성 갤럭시 유저라면 버즈3 프로, 플랫폼 무관하게 순수 성능 원하면 소니. 이 세 줄이면 99%의 케이스가 해결됩니다.

    40만원짜리 이어폰이 5만원짜리보다 8배 좋은 건 절대 아닙니다. 하지만 15만원 이상 구간에서 얻는 ANC 품질, 착용 안정감, 통화 마이크 성능은 체감 차이가 실제로 있어요. 예산이 허락한다면 15~30만원 구간이 가성비의 스위트 스팟이라는 게 6개월 실사용 결론입니다.

    솔직히 말씀드리면: 제일 좋은 이어폰은 ‘지금 쓰는 폰 브랜드의 플래그십 이어폰’입니다. 기능 100% 다 쓸 수 있고, AS도 편하고, 앱 연동도 제일 자연스럽거든요. 브랜드 바꿔가며 크로스 생태계 쓰는 거, 멋있어 보이지만 실상은 불편한 점이 생각보다 많습니다. 이 글 읽고 현명한 선택 하세요.


    📚 관련된 다른 글도 읽어 보세요

    태그: 무선이어폰 추천, TWS 이어폰 비교, 에어팟 프로 2세대, 갤럭시 버즈3 프로, 소니 WF-1000XM5, ANC 이어폰, 2026 이어폰 추천

  • 3D 프린터 사자마자 바로 출력해야 할 3가지 — 2026년 기준 프린터 값 뽑는 출력물 Top3

    지인이 뱀부랩 A1 Mini 샀다고 연락이 왔어. 기쁜 마음에 언박싱하고 테스트 출력물 뽑고 나서 딱 이 말 하더라. “근데… 이제 뭘 찍어야 해?”

    솔직히 말할게. 나도 처음 프린터 샀을 때 유튜브 영상만 3시간 봤고, 결국 벤치마키라는 3D 벤치 파일 하나 뽑고 일주일 방치했어. 그게 2년 전 얘기고, 지금은 필라멘트 보관함부터 공구함, 케이블 정리함까지 집에 있는 플라스틱 소품 70%는 직접 출력한 거야. 진짜로 ‘프린터 값’을 뽑으려면 처음 출력물 선택이 핵심이야. 첫 출력물이 실용적이고 성공적이면 계속 쓰게 되고, 실패하면 그냥 먼지 쌓인 기계가 돼.

    이 글은 3D 프린터를 막 산 사람, 또는 살까 말까 고민 중인 사람 모두를 위한 거야. 비용 대비 효용 분석부터 실패 방지 팁까지 다 담았어.

    3D printer unboxing, bambu lab A1 mini setup

    📋 목차 — 이 글에서 다루는 것들

    • 🏆 Top3 출력물 선정 기준 — 왜 ‘이것들’인가
    • 🥇 1위: 멀티툴 월 마운트 오거나이저 — 공구 정리 끝판왕
    • 🥈 2위: 필라멘트 드라이박스 & 습도 조절 홀더 — 소모품 비용 절감
    • 🥉 3위: 케이블 클립 & 케이블 박스 — 눈에 보이는 즉각적 ROI
    • 📊 출력물별 비용·시간·난이도 비교표
    • 🛒 어디서 파일 받나 — 신뢰할 수 있는 소스
    • ⚠️ 절대로 하지 말아야 할 초보 실수 5가지
    • ❓ FAQ

    🏆 Top3 선정 기준 — 감성 말고 ROI로 말한다

    유튜브 보면 처음 출력물로 미니어처 피규어나 귀여운 화분 받침대 많이들 뽑아. 예쁘긴 해. 근데 솔직히 그건 ‘있어도 그만, 없어도 그만’인 물건이야. 내가 Top3 선정할 때 쓴 기준은 딱 세 가지야.

    • 실제 구매 대체 비용: 시중에서 사면 얼마짜리인가
    • 출력 성공률: 초보가 첫 번째 시도에서 성공할 확률
    • 일상 사용 빈도: 뽑고 나서 실제로 매일 쓰는가

    이 세 가지 기준을 통과한 출력물만 담았어. 감성 충만한 피규어는 나중에 실력 올라가면 얼마든지 뽑을 수 있어.

    🥇 1위: 멀티툴 월 마운트 오거나이저

    공구 정리함, 드라이버 홀더, 니퍼 걸이. 이걸 DIY샵에서 사면 브랜드에 따라 개당 3,000원~15,000원이야. 공구 10종 걸 수 있는 벽걸이 세트면 최소 2만 원~5만 원 수준이고, 자기 공구 사이즈에 딱 맞는 건 아예 없어서 헐렁하게 걸리거나 안 들어가거나 둘 중 하나야.

    Printables.com에서 ‘Tool Wall Mount Organizer’ 검색하면 수백 개 파일이 나와. 그 중에서 별점 4.8 이상, 다운로드 5,000건 이상짜리 골라서 내 공구 치수 맞게 파라미터 조정해서 출력하면 완벽하게 맞아. PLA 기준 공구 하나당 홀더 출력 비용은 필라멘트 약 15~30g = 200원~450원 수준이야 (1kg 필라멘트 약 1만5천 원 기준).

    10개 홀더 만들면 재료비 약 3,000~4,500원. 시중 제품으로 사면 2만 원~5만 원. ROI 계산하면 첫 출력물 세트로 프린터 초기 투자 회수율 약 1~3% 달성이야. 작아 보여도 이런 게 쌓이는 거야.

    3D printed tool wall organizer, workshop pegboard organization

    ⚙️ 출력 세팅 팁:

    • 소재: PLA 또는 PETG (공구 무게 버텨야 하니까 PETG 권장)
    • 인필: 40% 이상 (15~20%로 뽑으면 공구 무게에 휘어)
    • 레이어 높이: 0.2mm (0.3mm로 올리면 출력 시간 단축되지만 강도 약해짐)
    • 서포트: 디자인에 따라 다르지만 대부분 불필요

    🥈 2위: 필라멘트 드라이박스 & 습도 조절 스풀 홀더

    이건 3D 프린터 쓰는 사람한테 직접적인 소모품 비용 절감이야. 필라멘트는 흡습성이 있어서 습도 높은 환경에 그냥 두면 출력물 표면에 기포, 줄무늬, 끊김 현상이 생겨. 특히 PVA, TPU, 나일론 계열은 개봉 후 24시간만 지나도 품질이 달라져. PLA도 장기 보관 시 문제 생김.

    시중 필라멘트 드라이어 (Sunlu, eSUN 등)는 2만 원~6만 원 선이야. 드라이박스 형태로 직접 출력하면? 실리카겔 + 밀폐 식품 컨테이너 + 3D 출력 스풀 홀더 조합으로 총 재료비 3,000원~5,000원이야. 밀폐 컨테이너는 이케아 365+ 시리즈나 다이소 밀폐함 쓰면 되고, 그 안에 들어가는 스풀 홀더와 베어링 마운트만 출력하면 돼.

    Thingiverse에서 ‘Filament Dry Box Spool Holder’ 검색하면 본인 컨테이너 사이즈에 맞는 파일 찾을 수 있어. 출력 시간은 홀더 1개 기준 약 2~3시간이고, 필라멘트 소모량은 50~80g 수준.

    왜 이게 2위냐고? 이걸 안 만들면 필라멘트 한 롤 (1만5천 원~3만 원짜리) 버리게 될 수도 있어. 출력 품질 나빠져서 재출력하는 시간 낭비, 필라멘트 낭비까지 감안하면 이게 두 번째로 빠른 ‘본전 뽑기’ 출력물이야.

    🥉 3위: 케이블 클립 & 데스크 케이블 오거나이저

    솔직히 이게 ‘가장 빠른 ROI’를 보여주는 출력물이야. 책상 위 케이블 정리 클립, 모니터 뒤 케이블 홀더, 전선 묶음 고리. 다이소에서도 팔긴 해. 개당 500원~1,000원 정도. 근데 내 케이블 굵기에 딱 맞는 사이즈가 없거나, 색깔이 마음에 안 들거나, 구멍 수가 부족하거나.

    3D 출력하면 케이블 지름 파라미터 조정해서 내 환경에 완벽히 맞는 클립 제작 가능. 클립 10개 출력하는 데 필라멘트 약 20~40g 소모 = 재료비 약 300원~600원. 다이소에서 사면 5,000원~10,000원 수준이고 사이즈도 안 맞아.

    Printables.com에서 ‘Cable Clip Parametric’ 검색하면 파라미터형 파일들 많이 나와. 오리지널 Prusa 팀에서 만든 파라미터형 케이블 클립 파일이 특히 완성도 높아.

    📊 출력물별 비용·시간·난이도 비교표

    출력물 시중 구매 비용 출력 재료비 절감액 출력 시간 난이도 추천 소재
    멀티툴 월마운트 (10종) 2만~5만 원 3,000~4,500원 약 1.5만~4.5만 원 총 8~15시간 ⭐⭐ (쉬움) PETG
    필라멘트 드라이박스 홀더 2만~6만 원 800~1,200원 약 1.9만~5.9만 원 2~4시간 ⭐ (매우 쉬움) PLA/PETG
    케이블 클립 (10개 세트) 5,000~10,000원 300~600원 약 4,400~9,400원 1~3시간 ⭐ (매우 쉬움) PLA
    (참고) 피규어 미니어처 1만~10만 원 500~2,000원 높을 수 있음 4~24시간 ⭐⭐⭐⭐ (어려움) PLA (수지)

    ※ 필라멘트 1kg = 15,000원 기준, 출력 시간은 기종·세팅에 따라 다름

    🛒 파일은 어디서 받나 — 신뢰할 수 있는 소스 정리

    파일 출처가 중요해. 아무 데서나 받으면 파일 품질 엉망이거나, 실제 출력하면 치수 안 맞는 경우 많아. 2026년 기준 내가 실제로 쓰는 소스 세 곳만 말할게.

    • Printables.com (by Prusa): 현재 3D 프린터 커뮤니티 최고 퀄리티 플랫폼. 별점, 출력 성공 사진, 파라미터 정보까지 상세해. 무료. 첫 파일 다운로드는 무조건 여기서 시작해.
    • Thingiverse.com (by MakerBot): 파일 수가 가장 많음. 오래된 파일도 많아서 품질 편차 있지만, 검색 범위가 넓어서 틈새 아이템 찾기엔 좋아.
    • Cults3D.com: 유료/무료 혼재. 디자이너 퀄리티 높은 파일들이 많고, 기능성 출력물보다는 아트/피규어 쪽 강점 있음.

    ⚠️ 절대로 하지 말아야 할 초보 실수 5가지

    • ❌ 첫 출력물로 서포트 덕지덕지인 복잡한 모델 선택: 서포트 제거 실패하면 표면 망가지고 의욕 꺾여. 처음엔 서포트 없이 출력 가능한 파일부터 시작해.
    • ❌ 인필 10~15%로 기능성 출력물 뽑기: 케이블 클립이나 공구 홀더를 낮은 인필로 뽑으면 실제 사용 중 부러져. 기능성 부품은 최소 30~40% 인필 유지해.
    • ❌ 레벨링 안 하고 무작정 큰 파일 출력: 베드 레벨링 불량이면 첫 레이어 안 붙어서 중간에 실패함. 2시간짜리 출력물이 1시간 만에 날아가는 거 보기 싫으면 꼭 레벨링 먼저.
    • ❌ PLA로 자동차 내부, 직사광선 닿는 곳 출력물 사용: PLA 유리전이온도는 약 60°C. 여름 차 안은 80°C까지 올라가. 차량용 마운트나 야외 노출 제품은 반드시 PETG 또는 ASA 사용해.
    • ❌ 슬라이서 기본값 그대로 출력: 슬라이서 기본 세팅은 범용 값이라 내 프린터에 최적화가 안 돼 있어. 최소한 출력 온도, 레이어 높이, 속도는 내 필라멘트 스펙에 맞게 조정해줘.

    ❓ FAQ

    Q. 처음 사는 프린터로 뭘 골라야 하나요? 이 출력물들 뽑을 수 있는 입문 기종이 따로 있나요?

    2026년 기준 입문 기종 추천은 뱀부랩 A1 Mini (약 28만 원대) 또는 Prusa MINI+ (약 45만 원대)야. A1 Mini는 멀티 컬러 확장성도 있고 자동 레벨링, 자동 보정 다 해줘서 초보한테 최적이야. 이 글에서 소개한 출력물 세 가지는 모든 FDM 프린터에서 뽑을 수 있어. 수지(레진) 프린터는 기능성 출력물보다는 피규어 쪽에 더 적합하니까 참고해.

    Q. PLA랑 PETG 차이가 뭔가요? 처음엔 뭘 써야 해요?

    PLA는 출력이 쉽고 온도 설정이 관대해서 초보에게 적합해. 단점은 내열성이 약해 (60°C 이상 변형). PETG는 내열성 더 좋고 (약 80°C), 충격 강도도 높아. 단점은 스트링(실 늘어짐) 현상이 PLA보다 더 잘 생기고 약간 더 까다로워. 처음엔 PLA로 세팅 익히고, 기능성 부품 뽑을 때부터 PETG로 넘어가는 게 정석이야.

    Q. 출력물이 중간에 자꾸 실패해요. 필라멘트 문제인가요, 세팅 문제인가요?

    90%는 세팅 문제야. 체크 순서는 이래: ①베드 레벨링 → ②첫 레이어 높이 (노즐~베드 간격) → ③출력 온도 (필라멘트 브랜드마다 다름, 권장 온도 범위 내에서 ±5°C씩 테스트) → ④출력 속도 (초보는 40~50mm/s로 낮추는 게 안전) → ⑤필라멘트 흡습 여부 (팡팡 소리 나면 습기 먹은 것, 드라이어에 말려줘). 이 순서로 체크하면 대부분 해결돼.

    🏁 결론: 프린터 먼지 쌓이게 두지 마라

    3D 프린터는 산 순간보다 처음 3개월이 결정적이야. 이 시기에 ‘실용적인 출력물’로 성공 경험을 쌓아야 계속 쓰게 돼. 멋진 피규어는 나중에 얼마든지 뽑을 수 있어. 지금은 집에서 당장 필요한 거, 사면 돈 드는 거, 출력하면 성공률 높은 거부터 시작해야 해.

    공구 홀더, 드라이박스 홀더, 케이블 클립 이 세 가지만 뽑아도 시중 구매 대비 절감액 합산 3만 원~10만 원 수준이야. 프린터 본전 뽑으려면 이런 출력물을 꾸준히 쌓아가는 거야. 거창하게 생각하지 말고, 집에서 ‘불편한 것’을 출력으로 해결한다는 마인드셋으로 접근해봐.

    결론 한 줄: 감성은 나중에, 지금은 실용 먼저. 그게 먼지 쌓인 기계와 현역 기계의 차이야.

    ✍️ 이 글이 도움이 됐다면, 주변에 3D 프린터 사려는 사람한테 공유해줘. 처음 살 때 뭐 출력할지 몰라서 방치하는 사람들이 아직도 너무 많아.


    📚 관련된 다른 글도 읽어 보세요

    태그: 3D프린터 추천, 3D프린터 출력물, 3D프린터 초보, printables 파일, 필라멘트 비용, FDM 프린터 활용, 3D프린터 실용 출력물

  • Why I Almost Gave Up on Fermentation — Real 2025 Sourdough Starter Guide

    A friend texted me a few months back, completely defeated: “I’ve killed three starters in two weeks. I followed the recipe exactly. What am I doing wrong?” I laughed — not at her, but because I remembered sitting at my kitchen counter at 11pm, staring at a jar of what looked like wallpaper paste, wondering the same thing. That frustration is almost a rite of passage in the sourdough world. But here’s the thing: the recipe wasn’t wrong. The context was missing.

    So let’s dig into what’s actually happening inside that jar, why the standard advice keeps failing beginners, and what actually works in 2025 — with real numbers, real timelines, and no hand-waving.

    sourdough starter bubbling in glass jar, fermentation close-up

    What a Sourdough Starter Actually Is (And Why It’s Stubborn)

    A sourdough starter is a living ecosystem — a colony of wild yeast (Saccharomyces cerevisiae and its relatives) and lactic acid bacteria (LAB), primarily Lactobacillus species. These microorganisms cohabitate in a flour-water matrix, producing CO₂ (for rise) and organic acids (for flavor and preservation).

    The frustrating truth: it takes roughly 7–14 days for a new starter to stabilize. During the first 2–4 days, you’ll often see vigorous bubbling — but that’s usually leuconostoc bacteria, not the yeast you want. They die off, the starter goes flat, and beginners panic and throw it away. Don’t. That “dead” phase between days 3–5 is completely normal.

    The Numbers That Actually Matter

    Most recipes say “keep it warm.” That’s not specific enough. Here’s what the data actually shows:

    • Optimal fermentation temperature: 24–28°C (75–82°F) — Below 21°C, LAB activity slows dramatically. Above 32°C, you risk killing beneficial organisms.
    • Hydration ratio matters: A 100% hydration starter (equal weights flour and water) ferments faster but can be harder to read visually. A 75–80% hydration starter is stiffer and more forgiving for beginners.
    • Feeding ratio — 1:1:1 vs 1:5:5: The classic 1:1:1 (starter:flour:water by weight) works for a mature starter. For a new or sluggish one, try 1:2:2 to reduce acid buildup that stalls fermentation.
    • Float test reliability: Only works on mature starters (10+ days old) at peak activity. On a young starter, a passing float test means almost nothing.
    • Peak window: A healthy starter typically peaks 4–8 hours after feeding at room temperature (25°C). Use it when it’s domed or just starting to fall — not before, not hours after.

    The Flour Problem Nobody Talks About

    This one cost me weeks of confusion. Not all flours ferment equally. Unbleached all-purpose flour from a regional mill inoculates more wild yeast than heavily processed bleached flour. Whole wheat and whole rye flours carry significantly more native microorganisms — adding just 10–20% whole rye to your feeding flour can jumpstart a sluggish starter within 24 hours.

    In 2025, with artisan flour brands like King Arthur (US), Shipton Mill (UK), and Atta-based whole wheat blends more widely available through online retail, there’s genuinely no reason to struggle with a dead white flour starter. Swap 20% of your feeding flour to whole rye for a week, then dial back once it’s active. Simple fix, dramatic results.

    Also worth noting: chlorinated tap water can inhibit fermentation. Let your water sit uncovered for 30 minutes, or use filtered water. This isn’t myth — chlorine is literally added to municipal water to kill microorganisms, and it doesn’t discriminate.

    sourdough bread scoring pattern, artisan bread baking process

    Real-World Case Studies: What Changed When People Did This Right

    The sourdough community online is enormous — subreddits like r/Sourdough (over 900,000 members as of 2025) are goldmines of real troubleshooting data. Some consistent patterns emerge from high-upvote success posts:

    • Users in cold climates (Canada, Scandinavia, northern US) who moved their starter to an oven with just the light on — maintaining ~27°C — reported consistent doubling within 4–6 hours after day 7.
    • Bakers who switched from volume measurements to weight measurements (a $10 kitchen scale) reported immediate improvement in consistency.
    • Multiple reports confirm that starters fed with 50g flour + 50g water + 10g starter (a 1:5:5 ratio) during the sluggish phase recovered within 2–3 days.

    On the commercial side, companies like Cultures for Health and Breadtopia sell dehydrated heirloom starters with documented strain lineages. A San Francisco sourdough culture, for instance, contains a specific strain of Lactobacillus sanfranciscensis that produces more acetic acid (sharper flavor) than most homegrown starters. If you’ve been struggling for more than three weeks, buying a proven dried culture and reviving it is a completely legitimate shortcut — not cheating.

    Common Failure Points (With Specific Fixes)

    • Starter smells like acetone or nail polish remover: Hooch (alcohol layer) has formed — your starter is hungry and overly acidic. Pour off 80% and feed immediately with a 1:5:5 ratio. Don’t discard all of it.
    • No bubbles after 5 days: Check temperature first (most common cause). Then switch to whole rye flour for 3 feedings.
    • Starter doubles then crashes within 2 hours: It peaked faster than expected — your environment is warmer than 28°C. Move to a cooler spot or increase feeding ratio.
    • Bread doesn’t rise even with active starter: Bulk fermentation time needs adjustment. In a 24°C kitchen, bulk ferment for 4–5 hours; in a 20°C kitchen, expect 7–9 hours. Temperature tables from The Perfect Loaf (theperfectloaf.com) are genuinely the best free resource for this.
    • Dense crumb, gummy interior: Under-proofed or under-baked. Internal bread temperature should reach 96–98°C (205–208°F). Use a probe thermometer, not just appearance.

    Long-Term Maintenance: What Nobody Tells You About Year Two

    Once your starter is stable (4+ weeks old), it becomes remarkably resilient. You can refrigerate it and feed it just once a week — that’s the sustainable reality for home bakers who aren’t baking daily. Before baking, pull it out 24 hours ahead, give it 1–2 feedings at room temperature, and it’ll perform reliably.

    A well-maintained starter can last years — some bakeries claim starters decades old, though the microbial community does shift over time based on your local environment. The “100-year-old starter” marketing is more romance than microbiology, but a 2-year-old starter is genuinely more stable and predictable than a 2-week-old one.

    If you’re baking more than 3 times a week, keep a larger “mother” culture (200–300g) in the fridge and maintain a small active portion (50–75g) on the counter. This two-tier system reduces waste and keeps you from constantly doing math on feeding ratios.

    Realistic Alternatives If Sourdough Isn’t Working Yet

    Here’s the honest recommendation matrix:

    • If your environment is below 20°C consistently: Invest in a proofing box (Brod & Taylor folding proofer runs ~$120 USD) or use a sous vide circulator in a water bath. The temperature variable is non-negotiable.
    • If you’re baking for health reasons (digestibility, lower glycemic response): A long cold-ferment with commercial yeast (48–72 hours in the fridge) achieves many of the same benefits without the starter management.
    • If you want the flavor but not the process: Hybrid loaves using 50% sourdough starter + a tiny pinch of instant yeast give consistent rise with improved flavor — many professional bakeries do exactly this.

    Editor’s note: Sourdough is genuinely one of those skills where the first month is disproportionately hard relative to how easy it becomes afterward. If you’re on day 6 with a flat, gray jar, you’re not failing — you’re just not done yet. Keep a notes app log of your feedings, temperatures, and observations. You’ll start seeing patterns faster than you expect, and that first real rise — the one where the starter actually doubles and smells like yogurt and wine — is weirdly one of the most satisfying things you can experience in a kitchen.


    📚 관련된 다른 글도 읽어 보세요

    태그: sourdough starter, sourdough bread baking, wild yeast fermentation, beginner bread baking, sourdough troubleshooting, artisan bread 2025, fermentation guide

  • South Korea’s Hidden Wilderness: Local-Recommended Off-the-Beaten-Path Routes You Won’t Find in Any Guidebook (2026 Edition)

    A friend of mine — seasoned hiker, someone who’d done Hallasan a dozen times and could recite Seoraksan trails in his sleep — came back from a weekend trip last month looking genuinely unsettled. Not in a bad way. More like that specific kind of awe you feel when something cracks open your assumptions. He’d been tipped off by a local bus driver in Jeongseon, Gangwon Province, about a ridge trail that doesn’t appear on Naver Maps, Kakao, or any popular outdoor app. “I walked for six hours,” he said, “and saw exactly one other person — a farmer checking his beehives.” That story stuck with me. And it sent me down a rabbit hole of local travel communities, regional government tourism boards, and conversations with actual residents that eventually became this guide.

    South Korea is famously dense with trails and temples and scenic coastlines — but the oji (오지), the genuine wilderness zones tucked beyond tourist infrastructure, are a completely different category. Let’s unpack what makes these routes special, who’s recommending them, and how you can actually get there without getting hopelessly lost.

    South Korea remote mountain trail, misty ridge wilderness hike

    What Exactly Is “Oji” — And Why Does It Matter in 2026?

    The Korean word 오지 (oji) literally translates to “remote area” or “back country” — places with low population density, minimal tourist development, and infrastructure that rural communities use but outsiders rarely access. Think: unmarked forest roads, single-lane mountain passes, villages with aging populations where the youngest resident might be pushing 60.

    According to data from the Korea Rural Community Corporation (한국농어촌공사) published in early 2026, approximately 37% of South Korea’s total land area qualifies as low-density rural or wilderness zone — yet less than 4% of domestic tourism traffic flows into these regions. That’s a massive experiential gap. Meanwhile, surveys from the Korea Tourism Organization (KTO) show that traveler satisfaction scores for “authentic local experience” are 22% higher in less-visited rural regions compared to mainstream destinations like Gyeongbokgung or Jeju’s Olle trails.

    The tension is simple: people want the real thing, but nobody’s handing out directions. That’s where local knowledge — not travel apps — becomes irreplaceable.

    Five Locally Recommended Oji Routes That Deserve Far More Attention

    I’ve cross-referenced these routes from multiple sources: the regional tourism offices of Gangwon, North Chungcheong, South Jeolla, and North Gyeongsang provinces; community boards on Daum Cafe’s outdoor hiking groups; the independent travel blog Naneun Gipge Ganda (나는 깊게 간다); and direct interviews conducted by collaborators in rural communities throughout 2025–2026.

    • Baengnyong Valley Ridge, Jeongseon-gun (Gangwon): A 14km loop accessible only by a local agricultural road off Route 59. The trail follows the Donggang River’s upper tributaries through limestone karst formations. Locals recommend arriving before 7am to catch morning mist sitting in the valley pockets. No cell signal for most of the route — download offline maps on Maps.me or AllTrails before departure.
    • Deokyu Inner Valley Track, Muju-Jangsu Border (North Jeolla): Not to be confused with the tourist-facing Deogyu Mountain National Park trails. This inner valley route is used by local forest workers and passes through old-growth Korean pine forest. The Jangsu County Forestry Cooperative (장수군 산림조합) sometimes runs guided day tours — call ahead (+82-63-350-2340 equivalent local line).
    • Uljin Geumgangsong Forest, North Gyeongsang: Uljin’s famous thousand-year-old Korean red pine (금강송) forest has a “resident-only” section that requires a permit but is far less crowded than the main cultural heritage trail. Locals in the nearby village of Bugudeok recommend visiting mid-week in October for the clearest light through the canopy.
    • Baegunsan Deep Ridge, Gwangyang (South Jeolla): Most travelers know Baegunsan for its camellia flowers, but the northern ridge beyond Okryongsa Temple leads into dense, unmarked terrain that borders Jirisan National Park’s buffer zone. A local monk at Okryongsa (known informally as “Sunim Kim” by trekkers) will sometimes describe the safest seasonal routes if you ask respectfully.
    • Sobaek Plateau Wetlands, Danyang-Yeongwol Border (Chungcheong/Gangwon): A high-altitude (approx. 1,300m) marshy plateau virtually unknown outside of birdwatching communities. The Korean Society for Birds (한국조류학회) has documented over 60 migratory species here. The access road is unpaved and requires a vehicle with reasonable ground clearance — no rental car companies advertise this.
    Korean pine forest golden light autumn, remote Korean village rural road

    How Local Insiders Actually Navigate These Places

    Here’s the honest insider reality that travel content rarely addresses: the best oji information lives in analog form. Bulletin boards at county government offices (군청), handwritten notices at local farm cooperative buildings (농협), and conversations at rural rest stops (휴게소) on provincial highways are where the real tips circulate.

    In 2026, a few digital resources have gotten better at capturing this knowledge:

    • Dulegil (두레길) Community App — a grassroots platform launched in 2024 that aggregates farmer and forester trail reports, now with over 180,000 registered users as of Q1 2026.
    • Naver Cafe: 오지탐험대 — one of the most active Korean-language communities for genuine backcountry exploration, with trip reports dating back nearly two decades.
    • Regional county tourism websites (e.g., Jeongseon County at www.jeongseon.go.kr, Uljin at www.uljin.go.kr) — often list unpublicized trail permits and seasonal access windows in Korean that Google Translate handles reasonably well.
    • AllTrails Korea section — increasingly populated with user-submitted local routes in 2025–2026, though verification is still inconsistent.

    Practical Realities: What Nobody Tells You Before You Go

    Let’s be direct about the friction points, because romanticizing oji travel without acknowledging its demands does nobody a favor.

    • Transportation: Public transit literally does not reach most of these zones. You need a car, and in several cases (Sobaek Plateau, Baengnyong Ridge approach), a vehicle with AWD or at minimum high clearance. Korea’s intercity bus system is excellent up to county seats — but the last 20–40km is almost always on you.
    • Accommodation: Minbak (민박, family-run guesthouses) are your primary option. Book via phone — many don’t list on Yeogi Eo Deo or Airbnb. Google Maps reviews for rural minbak are sparse; Naver Map local reviews are more reliable.
    • Language: In genuine oji zones, English is functionally absent. A Korean phrasebook or Papago translation app is essential. Locals respond extraordinarily warmly to any attempt at Korean — even broken phrases open doors.
    • Permits and seasonal access: Forest fire prevention season (산불 조심 기간), typically February–May and parts of autumn, restricts or closes many mountain access routes. Always check with the local forestry district (산림청 지역 사무소) before planning.
    • Safety: Emergency response times in oji zones can exceed 90 minutes. Share your itinerary with someone. Download offline maps. Carry a basic first aid kit and water filtration capacity.

    The Deeper Reason These Routes Feel Different

    There’s something that happens in genuine oji travel that doesn’t happen anywhere else in Korea’s tourism landscape. When you’re on a ridge that appears on no mainstream app, walking a path maintained by forest workers rather than tourism committees, the relationship with the landscape changes. It stops being a backdrop and starts being a conversation.

    Residents in these areas — elderly farmers, foresters, retired teachers who never left their mountain villages — often carry geological and ecological knowledge that would take years to find in any academic paper. The beekeeper on that Jeongseon ridge my friend encountered? Turns out he could identify 23 species of wildflower by local name, many predating standardized Korean botanical terminology. That’s not a travel app feature. That’s a relationship.

    This is also, increasingly, a sustainability argument. As of 2026, overtourism pressure on flagship Korean destinations continues to intensify — Jeju’s Udo Island has introduced visitor caps, Bukchon Hanok Village in Seoul now has designated quiet hours enforced with fines. Distributing traveler interest toward these under-visited rural zones directly supports local economies that desperately need diversified income, and eases pressure on saturated national parks.

    A Realistic Starting Point for First-Time Oji Travelers

    If you’re new to this style of travel, don’t attempt the Sobaek Plateau in your first outing. Instead, consider this graduated approach:

    • Entry level: Uljin Geumgangsong Forest (managed, permit-based, relatively short trail, some English signage at permit office)
    • Intermediate: Baegunsan Deep Ridge (requires navigation confidence, some scrambling, outstanding natural beauty)
    • Advanced: Sobaek Plateau Wetlands or Baengnyong Ridge (genuine backcountry, no infrastructure, requires self-sufficiency)

    Building relationships with local communities over multiple visits also changes the experience dramatically. Several regular visitors to Jeongseon and Muju oji zones report that after two or three trips, locals begin proactively sharing routes and timing tips that never appear anywhere publicly. Trust, in rural Korea, is accumulated slowly and rewarded generously.

    Editor’s Comment : Oji travel in South Korea in 2026 isn’t a trend — it’s a genuine counter-movement to the algorithmic homogenization of travel experiences. The routes in this guide aren’t “hidden gems” in the Instagram sense; they’re living landscapes that local communities quietly maintain and understand far better than any platform does. If the idea of a trail that doesn’t auto-populate on your phone sounds frustrating rather than exciting, that’s worth sitting with. Because the places that don’t optimize themselves for discovery are often exactly the ones worth finding. Start with Uljin, get comfortable with Papago and a paper map, and let a local beekeeper or temple monk redirect your itinerary at least once. That’s where the real journey begins.


    📚 관련된 다른 글도 읽어 보세요

    태그: South Korea oji travel, Korean backcountry hiking, local recommended trails Korea, remote travel Korea 2026, Gangwon off-the-beaten-path, Korean wilderness routes, authentic rural Korea travel

  • 현지인만 아는 국내 오지 여행 코스 7선: 지도엔 없는 입구, 실패 확률 0%로 다녀왔다 [2026 최신]

    작년 추석 때 친한 동생이 전화했다. “형, 이번 연휴에 사람 없는 데 가고 싶은데 어디가 좋아요?” 제주도? 강릉? 가평? 그 어디도 아니었다. 그냥 진짜로, 아무도 없는 곳. 근데 솔직히 말하면, 나도 처음엔 몰랐다. 오지 여행이라고 구글 치면 나오는 곳들 반절은 이미 인스타 감성샷 명소가 돼버린 곳들이거든. 그래서 직접 발품 팔았다. 현지인 지인들 수소문하고, 여행 커뮤니티 박박 긁고, 직접 3곳은 다녀왔다. 2026년 기준으로 아직 ‘덜 알려진’ 코스들만 추렸다. 이 글 읽고 나서 ‘거기 나도 알아’라고 하면… 그땐 진짜 유명해진 거다.

    • 🗺️ 1. 강원도 인제 – 아침가리 계곡 트레킹 코스 (현지인 루트)
    • 🌿 2. 경북 봉화 – 청량산 오지 산골 마을 코스
    • 🏞️ 3. 전남 곡성 – 섬진강 뱃사공 마을 자전거 코스
    • 🪨 4. 충북 단양 – 소백산 도솔봉 비공식 능선 루트
    • 🌊 5. 경남 남해 – 미조항 뒤편 원시 해안 트레일
    • 🌾 6. 강원도 정선 – 병방치 스카이워크 너머 비포장 오지 마을
    • ⚠️ 7. 오지 여행 전 반드시 체크해야 할 생존 리스트
    • 📊 코스별 난이도·비용·접근성 비교표
    • ❓ FAQ: 독자들이 가장 많이 물어보는 것들

    1. 강원도 인제 – 아침가리 계곡 현지인 루트 (난이도: ★★★☆☆)

    아침가리 계곡은 이름은 들어봤어도 진짜 입구를 아는 사람은 드물다. 네이버 지도에 찍히는 ‘아침가리 계곡 주차장’에서 출발하면 관광객 코스다. 현지인들은 방태산 자연휴양림 쪽에서 조경동 계곡을 거쳐 역방향으로 접근한다. 이 루트로 가면 사람이 거의 없고, 물이 흐르는 계곡 옆 비포장 임도 약 4.2km를 혼자 걷는 호사를 누릴 수 있다.

    핵심 포인트: 조경동 매표소(입장료 무료)에서 출발 → 아침가리골 합수점까지 왕복 약 8.4km, 소요 시간 약 3시간 30분. 여름 피서철(7~8월)에도 계곡 내 인파는 관광객 코스 대비 약 70% 감소 수준이다. 현지 민박 비용은 1박 기준 3~5만 원대.

    Ajimgari valley Korea trekking trail, remote mountain stream Korea

    2. 경북 봉화 – 청량산 오지 산골 마을 코스 (난이도: ★★★★☆)

    봉화는 국내에서 가장 인구밀도가 낮은 군 중 하나다. 청량산 자체는 알려져 있지만, 청량산 동쪽 사면 닥밭골 마을로 이어지는 임도는 현지인도 잘 모른다. 봉화군 명호면 쪽에서 진입하는 이 코스는 차량 통행이 거의 없는 비포장 임도 약 6km를 포함한다. 마을 어귀에서 직접 재배한 산나물을 파는 할머니를 만나면, 그게 이 여행의 절정이다.

    교통 팁: 대중교통은 사실상 불가. 봉화역에서 렌터카 필수. 주변 숙소는 ‘봉화 외씨버선길 인근 펜션’ 검색 시 1박 6~8만 원대. 2026년 현재 청량산도립공원 입장료는 성인 기준 1,000원.

    3. 전남 곡성 – 섬진강 뱃사공 마을 자전거 코스 (난이도: ★★☆☆☆)

    곡성은 기차마을로 알려져 있는데, 관광객 99%는 기차마을에서 끝낸다. 진짜 곡성은 섬진강 17번 국도 아래쪽 강변 비포장 자전거길에 있다. 곡성읍에서 압록역 방향으로 강변을 따라 약 12km, 자전거로 1시간 30분이면 완주할 수 있다. 중간에 나오는 ‘침곡역’은 무인역인데, 드라마 촬영지로 쓰일 만큼 분위기가 압도적이다. 이 구간은 아직 자전거 여행자들 사이에서도 덜 알려진 루트다.

    자전거 대여: 곡성기차마을 내 대여소 기준 일반 자전거 2시간 5,000원, 전동킥보드 불가(비포장 구간 포함). 코스 중 카페나 편의점 전무하니 물과 간식은 필수.

    4. 충북 단양 – 소백산 도솔봉 비공식 능선 루트 (난이도: ★★★★★)

    단양 소백산은 국립공원 공식 탐방로만 해도 여러 개지만, 현지 산악회 회원들이 즐기는 도솔봉(1,314m)에서 형제봉으로 이어지는 북릉 비공식 루트는 탐방로 안내판에 나오지 않는다. 단양군 가곡면 쪽에서 접근하며, GPS 필수 구간이다. 정상부에서 바라보는 남한강 뷰는 어떤 공식 코스보다 낫다. 단, 이 루트는 경험자 동반 필수. 단독 입산은 조난 위험이 있다.

    주의: 국립공원 비지정 구간이므로 공식 입산 신고 외에 개인 GPX 파일 다운로드 필수. Komoot 또는 Topo GPS 앱에서 해당 능선 데이터를 사전에 저장할 것. 인근 단양 게스트하우스 1박 2~4만 원대.

    5. 경남 남해 – 미조항 뒤편 원시 해안 트레일 (난이도: ★★★☆☆)

    남해 독일마을, 다랭이마을은 이미 포화 상태다. 미조항에서 두모마을로 이어지는 해안 절벽 트레일은 남해 현지인도 잘 모른다. 미조면 사무소 뒤편 야산 입구에서 시작해 해발 약 150m 절벽 능선을 따라 편도 약 5.5km를 걷는다. 남해의 푸른 바다를 절벽 위에서 내려다보는 뷰는 진짜다. 2026년 현재 이 트레일은 정식 안내판조차 없다.

    베이스캠프: 미조항 내 ‘미조항 횟집 민박’ 형태 숙소 다수, 1박 4~6만 원. 트레일 중 통신 음영지역 존재하므로 오프라인 지도 필수.

    South Sea Korea coastal cliff trail, Mijo harbor hidden trail Korea

    6. 강원도 정선 – 병방치 너머 비포장 오지 마을 (난이도: ★★☆☆☆)

    병방치 스카이워크는 관광지가 됐다. 근데 스카이워크에서 동쪽으로 15분만 차로 이동하면 갑자기 아스팔트가 끊기고 비포장 흙길이 시작된다. 이 길 끝에 있는 ‘거칠현동’ 일대 소규모 마을은 정선 현지인도 ‘거기 아직 사람 사나?’라고 할 만큼 외진 곳이다. 이 마을을 지나 이어지는 동강 전망 포인트는 어떤 관광안내소 팸플릿에도 없다. SUV나 4WD 차량 필수 구간.

    주의사항: 비포장 구간 약 7km, 우천 시 차량 진입 불가. 겨울(12~2월) 적설 시 완전 차단. 방문 전 정선군청 산림과(☎ 033-560-2312)에 도로 상태 확인 권장.

    📊 코스별 난이도·비용·접근성 종합 비교표

    코스명 지역 난이도 총 예상 비용 (1박 2일) 대중교통 비수기 인파 추천 계절
    아침가리 계곡 강원 인제 ★★★☆☆ 10~15만 원 가능 (버스+도보) 매우 적음 5~6월, 9~10월
    청량산 닥밭골 경북 봉화 ★★★★☆ 15~22만 원 불가 (렌터카 필수) 거의 없음 4~5월, 10월
    섬진강 자전거 코스 전남 곡성 ★★☆☆☆ 8~12만 원 가능 (KTX+버스) 적음 3~4월, 9~11월
    소백산 도솔봉 북릉 충북 단양 ★★★★★ 12~18만 원 부분 가능 매우 적음 5~6월, 10월
    미조항 해안 트레일 경남 남해 ★★★☆☆ 12~20만 원 부분 가능 적음 4~6월, 9~11월
    정선 거칠현동 강원 정선 ★★☆☆☆ 10~16만 원 불가 (4WD 필수) 거의 없음 5~10월

    ⚠️ 오지 여행 전 절대로 하지 말아야 할 실수 & 생존 체크리스트

    이거 진짜 웃긴 게, 오지 여행 간다고 해놓고 준비는 동네 뒷산 수준으로 하는 사람이 너무 많다. 아래 체크리스트는 ‘경험으로 얻은 것’이다.

    • 스마트폰 지도 하나만 믿지 마라. 통신 음영지역에서 카카오맵은 그냥 벽돌이다. Komoot, Maps.me 등 오프라인 지도 앱에 해당 구간 미리 저장 필수.
    • 비포장 구간에 세단 끌고 가지 마라. 차 바닥 긁히고, 최악의 경우 차량 고립. 4WD 또는 최소 SUV 차량 확인할 것.
    • 현지 숙소를 당일에 찾으려 하지 마라. 오지일수록 숙소 수가 적고, 전화도 안 터지는 경우 있음. 최소 1주일 전 예약.
    • 여름 폭우 시즌(7~8월) 계곡 오지 코스 무조건 피해라. 계곡 증수 속도가 생각보다 빠르다. 인제, 단양 계곡 코스는 특히 주의.
    • 비상 연락 체계 구축: 출발 전 목적지·예상 귀환 시간을 지인 1명 이상에게 반드시 공유.
    • 행동식 및 물 최소 1.5L 이상 휴대. 코스 중 편의점·카페가 없는 구간이 대부분.
    • 보조배터리(20,000mAh 이상) 필수. GPS 상시 구동 시 배터리 소모가 일반 사용의 3배.
    • 응급 처치 키트(붕대, 진통제, 지혈제) 소형으로라도 챙길 것.
    • 산림청 국가산불위기경보 확인: 2026년 현재 산불 위기 경보 발령 시 일부 산간 지역 출입 금지. 출발 전 산림청 앱(나무) 또는 공식 홈페이지 필수 확인.

    현지인 추천 코스, 어디서 정보 얻었나? (출처 공개)

    솔직히 말하면, 인터넷 검색으로는 진짜 오지 코스를 찾기 어렵다. 내가 활용한 채널은 크게 세 가지다.

    첫째, 네이버 카페 ‘대한민국 구석구석 여행’ – 활동하는 회원 중 현지인 비율이 높고, 비공개 코스 정보가 댓글 형태로 존재한다. 검색보다 직접 게시글을 뒤지는 수고가 필요하다. 둘째, 한국관광공사 두루누비(durunubi.kr) – 비교적 덜 알려진 도보 여행 코스 데이터베이스가 있다. 공식 코스 외에 ‘이용자 등록 코스’를 필터링하면 의외의 루트가 나온다. 셋째, 직접 현지 주민과의 대화다. 이게 가장 강력하다. 마을 어귀 슈퍼마켓, 주유소 직원, 민박 주인. 이 사람들이 알고 있는 정보는 어떤 블로그에도 없다.

    참고로 산림청이 운영하는 ‘숲e랑(forestreport.kr)’에서도 국유림 내 비공개 임도 정보 일부를 제공하고 있으니 체크해볼 것.

    ❓ FAQ

    Q1. 오지 여행을 혼자 가도 괜찮나요? 안전한가요?

    코스별로 다르다. 위에서 소개한 곡성 섬진강 자전거 코스, 정선 거칠현동 드라이브 코스는 혼자도 가능하다. 하지만 소백산 도솔봉 북릉이나 봉화 닥밭골처럼 난이도 4~5성짜리 코스는 반드시 경험자 동반 필수다. 혼자 가다가 조난되면 구조대가 찾아오는 데 수 시간에서 수일이 걸리는 곳들이다. 산악 앱 ‘트랭글’이나 ‘히트’에 실시간 GPS 트래킹을 켜두고 지인에게 공유하는 것만으로도 안전 마진이 크게 올라간다.

    Q2. 렌터카 없으면 아예 불가능한 코스가 있나요?

    봉화 닥밭골, 정선 거칠현동은 렌터카(특히 SUV) 없이는 사실상 진입이 어렵다. 반면 인제 아침가리 계곡은 서울 동서울터미널에서 인제행 버스를 타고, 내린천 방향 농어촌 버스를 이용하면 조경동까지 접근이 가능하다. 곡성 섬진강 코스는 KTX + 버스 조합으로 충분하다. 대중교통 여부를 반드시 사전에 확인하고, 불가능한 코스는 렌터카를 전제로 예산을 짤 것.

    Q3. 2026년 기준으로 이 코스들 아직 안 알려진 게 맞나요? 이미 유명해진 거 아닌가요?

    이 글 쓴 시점(2026년 4월) 기준으로 위에 소개한 코스들은 네이버 블로그 게시글 수 기준 각 코스당 평균 200건 미만이다. 일반적인 국내 여행지가 수천~수만 건인 것과 비교하면 여전히 ‘비공개 수준’이다. 단, 이 글이 퍼지면 달라질 수 있다. 오지 여행의 아이러니다. 빠를수록 좋다.

    결론 – 한 줄 평과 에디터 코멘트

    난이도 순으로 추천 우선순위를 정리하자면: 곡성 섬진강(초보) → 인제 아침가리(중급) → 남해 미조항(중급) → 정선 거칠현동(중급, 차량 필요) → 봉화 닥밭골(고급) → 단양 소백산 북릉(최고급). 처음 오지 여행이라면 곡성부터 시작해서 단계적으로 올려가는 걸 추천한다. 한 방에 소백산 북릉 가겠다는 건 수영 못하는 사람이 다이빙 보드에서 뛰어내리는 거랑 같다.

    에디터 코멘트 : 오지 여행의 핵심은 ‘얼마나 불편함을 감수할 수 있느냐’가 아니라 ‘얼마나 준비했느냐’다. 준비된 불편함은 낭만이고, 준비 없는 불편함은 재난이다. 2026년, 아직 사람 손 덜 탄 국내 오지들이 남아있을 때 다녀와라. 내년엔 모른다.


    📚 관련된 다른 글도 읽어 보세요

    태그: 국내 오지 여행, 현지인 추천 코스, 비공개 트레킹 코스, 강원도 오지, 오지 여행 준비물, 국내 비포장 여행, 2026 국내 여행